How to Build our PreCast Oven Kit | 3. Stand, Insulation & Floor Tiles
In this video we show you how to set up the optional Steel Frame stand, cut and lay your under-floor Insulation, and lay the Oven Floor Tiles. Learn more about the kit at https://bit.ly/2xXZbT5
'The first step'(as I like to say) in building our PreCast Oven is to set up a stand to build the oven on.
If you're in Australia we have the optional Steel Frame stands with 18mm thick compressed cement sheet benchtops available for order with your P85 PreCast Oven Kit. If you're outside Australia, fear not! We have put up detailed drawings on our website showing how the steel frame is assembled, so if you're outside Australia you could take our plans to a local steel fabricator and have them make it for you.
Once you have a stand to build the oven on, you'll need to cut out and lay the Calcium Silicate Board insulation, that isolates the oven from the stand. We see far too many DIY pizza ovens being built without any meaningful insulation underneath them, which is a shame because without good refractory insulation, a significant amount of heat will be conducted through the floor of the oven into the benchtop, and then from there into the atmosphere to be lost forever! Using the Calcium Silicate (CalSil) board underneath the oven prevents heat escaping through the base, keeping the oven floor hot, so that your pizza bases crisp up nicely.
With the insulation down, you'll need to lay the fire brick floor tiles. These come cut to size for you, ready to lay. You'll cover the CalSil board with aluminium foil to seal it, then bed the tiles down into our Hybrid Refractory Bedding Mortar mixture.
Our Wood Fired Oven Kits are available in Australia, the USA and the UK! Check out the links below:
Australia: https://melbournefirebricks.com.au/
USA: https://www.flamesmiths.com/
UK: https://www.kennedyfire.co.uk/
CREDITS
Videography and Editing by SUB AERO MEDIA: https://www.subaero.media/
Видео How to Build our PreCast Oven Kit | 3. Stand, Insulation & Floor Tiles канала The Fire Brick Co.
Показать
Комментарии отсутствуют
Информация о видео
Другие видео канала
 How to Host a Pizza Party - Part 1!
 The Chesterman Round Board by The Big Chop
 Introducing our 'ApostroPeel'
 Timber Nurturing Cream by The Big Chop
 The Grand Ridge Forge Spinning Peel
 Tools and Accessories for your Wood Fired Pizza Oven!
 The New "FIRE & FORGET" Firing Method for your Wood Fired Pizza Oven!
 Precast Pizza Oven or Brick Pizza Oven - Choosing the Right Oven for You
 How To Use Your Pizza Oven As A Smoker!
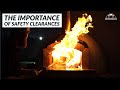 Pizza Oven Flue Safety
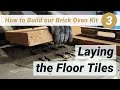 How to Build our Brick Oven Kit | 3. Laying the Floor Tiles
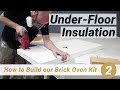 How to Build our Brick Oven Kit | 2. Under-Floor Insulation
 How to Build our Brick Oven Kit | 7. Building the Brick Dome Pt4
 How to Build our Brick Oven Kit | 6. Building the Brick Dome Pt3
 How to Build our Brick Oven Kit | 5. Building the Brick Dome Pt2
 How to Build our Brick Oven Kit | 4. Building the Brick Dome Pt1
 How to Build our PreCast Oven Kit | 4. Installing the Dome
 How to Build our PreCast Oven Kit | 5. Laying the Vent Arch
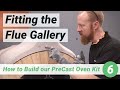 How to Build our PreCast Oven Kit | 6. Fitting the Flue Gallery
 How to Build our PreCast Oven Kit | 1. Unboxing & Overview