How To Make A Fence Post-Last 100 Years. Shou Shugi Ban 1.0. Links to Equipment in Description
How To Make A Fence Post Last 100 Years. Shou Shugi Ban 1 0 Links to Equipment in Description
In this video, we show you the Japanese charring technique that will make your wood last 100 years or more. It is especially beneficial when you have to have your wood contacting the ground.
✔️✔️ Need Coaching on your project, homestead, or business? Schedule a free 15-minute zoom or phone consultation here. 👉👉 https://calendly.com/netregenerativelife
#fence_post #sustainable_post #fence_post_treatment
Use a propane torch and not the map gas! Way faster!
https://amzn.to/2UFnefH
Equipment list.
I use the Makita cordless system. Don't let the batteries get hot and then charge them or they die. And charge them daily! Here is the motherload set. You can find all the smaller kits on Amazon as well.
https://goo.gl/d5Rr82 (amazon affiliate link)
https://goo.gl/d5Rr82
Wooden fence posts often rot quickly because of the prolonged exposure to moisture in the soil. Without stable fence posts, your fence could fall and you would have to replace the posts every few years. Many fence posts are pressure-treated to make them last longer, but you can take extra steps to prevent them from rotting or slow down the rotting process so the posts last longer. A naturally rot-resistant wood, such as western red cedar (Thuja plicata), a species of arborvitae, can last for decades if treated with wood preservative and installed to improve drainage.
Set the wooden fence posts in a cool, dry area with plenty of air circulation so the wood can dry. Skip this step if the posts are already dry, but drying is especially important when using fence posts from greenwood because the moisture inside the wood encourages rot and because moist wood won't absorb as much of the liquid wood preservative. Drying could take several months if you make your posts from fresh wood.
Brush the bottom third or bottom half of the fence post with waterborne copper naphthenate, a wood preservative that is free of arsenic and chromium. Brush the preservative on the entire post, if desired, but the bottom must be treated because the buried portion and section of a post just above ground rot much faster than the top of the post. Alternatively, you could stand the post upright in a bucket of the wood preservative, but this method isn't practical if you need to treat several fence posts.
Continue brushing additional coats of copper naphthenate preservative onto the fence post until the wood stops absorbing the preservative, indicating that the preservative has wicked its way through the sapwood and into the heartwood. Allow the pots to dry overnight before installing the fence.
Dig a hole two to three times the diameter of the fence post and 24 to 48 inches deep. The posts stand upright best when you bury one-third of the total post length, but you might not be able to dig as deep, so a minimum of 24 inches is acceptable. A portion of the copper naphthenate treated wood should be exposed above ground.
Fill the hole with about 6 inches of 1/4-minus gravel, which contains small gravel pieces as well as gravel dust for better compaction. Pack the gravel tight to form a level base with a hand tamper or the blunt end of a digging bar.
Set the post in the hole while holding a level on the side to check for plumb. Fill in the hole around the fence post with more 1/4-minus gravel packed tight against the sides of the post. Tamp down the gravel. You can use concrete if desired, but the moisture in the concrete can sometimes cause wooden posts to rot more quickly, while the gravel allows water to drain quickly away from the fence post and into the soil.
Push soil around the fence post to conceal the gravel; moist soil around the fence post can cause the post to rot, which is why you must treat a portion of the wood that is exposed above ground. Build the soil up at a slight slope around the post.
Brush copper naphthenate wood preservative into any cracks that develop anywhere on the fence post. Use a smaller brush to ensure the preservative penetrates deep into the cracks. Wood cracks naturally over time, but leaving the cracks untreated exposes the inside of the post to air and moisture that could quickly rot the wood.
For more info please visit our website:
http://www.lushplanet.net
----------------------------------------------------------
Related videos:
https://youtu.be/RpEXfrqkd8g
https://youtu.be/6brdNn4tHaA
https://youtu.be/ul6pT10DRKs
-------------------------------------------------------------------
KW: fence posts that last,fence the lasts,fence post treatment,How to treat fence posts,rot proof fence post,treating fence posts,treating fence posts below ground,how to stop fence posts from rotting,stop fence post rot, treating fence posts with silence posts, sustainable fence posts,environmental post,fence post installation, treating fence posts with tar,fence post repair,how to make a fence post last 100 earshot sugi ban 1.0,
Видео How To Make A Fence Post-Last 100 Years. Shou Shugi Ban 1.0. Links to Equipment in Description канала The Regenerative Homestead
Показать
Комментарии отсутствуют
Информация о видео
Другие видео канала
 Treating Wood Fence Posts - The old Timers Way
 The 3 secrets to ROT PROOF POSTS and how to make them
 Traditional Japanese Way to Preserve Wood with Fire using Shou Sugi Ban, Yakisugi on my log cabin
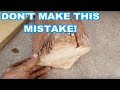 Wood 6x6 in concrete VS steel anchor (8 years later!) ROTTING! Deck support posts
 Episode 3: Shou Sugi Ban Raised Garden Beds
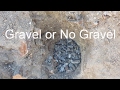 Should You Put Gravel At The Bottom Of A Wood Fence Post?
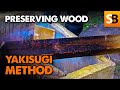 Charring Wood For Preservation — Yakisugi Method
 DIY Pressure Treated Fence Posts
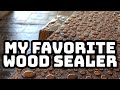 My FAVORITE Wood Sealer 🎖🎖🎖
 Preserving Wood & Wooden Fence Posts
 How to Build a Fence from Start to Finish with Wire to keep Critters In or Out // DIY Fence Project
 Treat Wood Yourself - How to Treat Wood Against Rot
 The Secrets Fence Installers Don't Want You To Know
 2nd Attempt, IF YOU DISLIKE PRESSURE TREATED WOOD THEN WATCH THIS VIDEO, DRYING SHED BUILD
 Recycled Motor Oil Fence Stain / DIY / How to Make your own wood stain
 How Do Postsaver Sleeves Stop Your Fence Posts Rotting?
 3 Tricks To Installing Stronger 4X4 Wood Fence Posts That Last Longer
 Concrete Post Rot Myth BUSTED - Does Concrete Rot Fence Posts?
 Here's What Happens When You Seal Bottom Of Wood Fence Post - Wood Rot Damage
 Yakisugi - Not Shou Sugi Ban - The Art Of A Burned Wood Finish