How to connect DCC++ EX to WiFi and use Engine Driver to run your trains
This is a short tutorial on how to wirelessly connect DCC++ EX via WiFi to Engine Driver. We demonstrate using a Makerfabs (or similar) ESP8266 WiFi Shield.
DCC-EX Website: https://dcc-ex.com
Arduino IDE: https://www.arduino.cc/en/main/software
WiFi Shield: https://www.makerfabs.com/esp8266-wifi-shield.html
(do a search for this shield, it is available from many sources)
We also show the Duinopeak board that takes an ESP-01 board. You can search for "esp-01 shield". Ali-Express and Banggood has them. You may be able to email the manufacturer at duinopeak.com
Other shields may work, the criterion is that it has an AT Command set built-in to the firmware, has a 5V to 3.3V regulator on board, and level shifters for the Tx and Rx pins to convert the 5V Arduino pin logic voltage to the 3.3V of the ESP8266 and back. If you use just an ESP-01, 01S, ESP-12 board, you can easily use just 4 jumpers to wire it directly. We will cover that in a future video
Видео How to connect DCC++ EX to WiFi and use Engine Driver to run your trains канала DCC-EX
Показать
Комментарии отсутствуют
Информация о видео
Другие видео канала
 DCC++EX Wifi & Web Throttle
 New DCC++ EX with no jumpers connected directly via WiFi to Engine Driver
 How to build your own DCC system (DCC++)
 An Arduino Mega 2560 DCC++ Base Station
 5$ Arduino WiFi Module!? ESP8266 mini Tutorial/Review
 Sprog DCC - Raspberry Pi Controlled Model Trains!
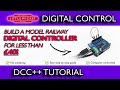 Model Railway Digital Controller (DCC++) for £40 or less! 😮
 Easily Add Sensors & Outputs To DCC++
 Thinking About Getting an Arduino? Watch This
 Easiest Way Yet To Install DCC++ Without A Sketch Or Arduino IDE
 Model Railroading 101 JMRI For Beginners MR101 Ep 19
 {HD} DCC++ System Review! The Cheapest DCC System Available??: Overview
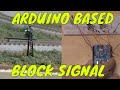 Arduino Block Signal for Model Trains
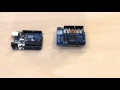 An Arduino DCC++ Base Station: The Hardware - Part 4 of 4
 exWebThrottle - A browser based USB Throttle for DCC++ EX (Alpha Testing)
 Setting Up The Pololu Motor Shield For DCC++
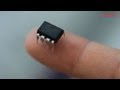 How-To: Shrinkify Your Arduino Projects
 8x8x8 LED CUBE WITH ARDUINO UNO
 DCC++WirelessThrottle with a Rotary Encoder
 How To Stop Derailments on Your Model Railway