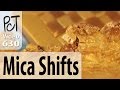
Free Polymer Clay Mica Shift Mini-Tutorial (With A Twist)
Video #642: Most everyone says to bend the blade while shaving your shifts... not me! Instead... try bending the clay... More Info: http://www.beadsandbeading.com/blog/?p=19553 Polymer Clay Tutor.
Topics Covered In This Video:
* A little while ago, I did a video on How Mica Shifts Work With Metallic Pearlescent Polymer Clay. The link to that video is posted just below the video in today's post.
* What we talked about in that video was how the little shiny particles in the metallic clays and the pearl clays, will have a certain behavior according to how they are aligned.
* If you haven't seen that video, be sure to go check it out because it is really helpful to understand how the this whole mica shift process actually works.
* One of the really cool things you can do with metallic clays is manipulate those mica particles so that they look dimensional, even if the surface of your clay is glassy smooth.
* I show some examples of mica shift jewelry I have made in the past.
* In order to do this technique, you will need to use a metallic or pearl clay.
* I use Premo Accents metallics and pearl clays because of their high mica content.
* I demo how to align the particles in the clay and get it ready for texturing.
* The demo continues using a Sculpey Texture Sheet for adding the pattern into the clay.
* The raised areas of the textured sheet are then sliced off very thinly.
* One trick for easily shaving off the top layer of clay off is to stick your sheet to a rounded surface such as a bottle or jar.
* So instead of bending your blade to shave your mica shift sheets... you bend your clay.
* Make sure not to cut deeper than the deepest area of the stamp.
* Once all the top layer has been removed, you can smooth the sheet out by running it through your pasta machine, starting at the setting you rolled the original sheet with... and then dialing down one setting at a time until the surface is smooth.
* This mica shift sheet can then be layered onto other clay or projects to make pendants, beads, decor items, or whatever you want.
* This technique benefits greatly by a good sanding and buffing after baking to bring out the rich sparkle, depth and shine.
Related Video: How Mica Shifts Work With Metallic Pearlescent Polymer Clay... http://www.beadsandbeading.com/blog/?p=19475#video
Related Video: Polymer Clay Tutorial Mica Shift Technique... http://www.beadsandbeading.com/blog/?p=6738#video
Related Video: Mica Shift Mermaid Scales Polymer Clay Tutorial... http://www.beadsandbeading.com/blog/?p=15717#video
Related Video: Reptile Hollow Lentil Bead Polymer Clay Tutorial... http://www.beadsandbeading.com/blog/?p=18728#video
And... more info about today's video is at my blog... http://www.beadsandbeading.com/blog/?p=19553
Cindy Lietz & Doug Lietz Social Links:
https://www.youtube.com/PolymerClayTutor
https://www.facebook.com/polymerclay
http://www.pinterest.com/pctutor/
https://twitter.com/PolymerClayTips
Polymer Clay Tutor... "Make what you love... Love what you make."
Видео Free Polymer Clay Mica Shift Mini-Tutorial (With A Twist) канала PolymerClayTutor
Показать
Комментарии отсутствуют
Информация о видео
Другие видео канала
 How Mica Shifts Work With Metallic Pearlescent Polymer Clay
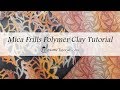 Polymer Clay Metallic Clay Technique: Mica Frills Tutorial
 5 different ways to add color to polymer clay
 Polymer Clay Tutorial - Inlaid Mica Powder
 Testing Sakura Souffle Gel Pens on Premo Polymer Clay
 Simple Polymer Clay Pendant with Mica
 Using Mica Powders with Polymer Clay
 How to make these clay mushrooms. Fairy garden mushrooms. Mushroom forest. Cosclay Polymer clay.
 DIY Jewelry Packaging Using 123 Punch Board
 Getting Started with Polymer Clay: Mica Shift Tutorial
 Polymer Clay SLAB EARRINGS Tutorial for Beginners Polymer Clay Jewelry Making Tutorial DIY Earrings
![My Epic Polymer Clay Tutor Treehouse Studio [APRIL FOOLS]](https://i.ytimg.com/vi/_GhxAEjo8Ec/default.jpg) My Epic Polymer Clay Tutor Treehouse Studio [APRIL FOOLS]
My Epic Polymer Clay Tutor Treehouse Studio [APRIL FOOLS] Mica Shift Pendant
 Polymer Clay Metallic Clay Technique: Skinner Blend Mica Shift Tutorial
 나비 만들기 폴리머클레이 강좌 /How to make butterfly cane! Real butterfly !
 Polymer Clay Mica Shift Section Pendant
 How to: Add Shimmer and Shine to Polymer Clay with Mica Powder
 Part 1of 3 Polymer Clay Hexagon and Triangle Pattern
 Mica shift necklace on polymer clay