New Construction Can Light Installation
Electric Pro Academy - Real Skills to make real money.
• IC22 = rated for direct contact with insulation.
• Can light install:
• Determine the correct installation location.
• Measure and mark both rafters with the center line location.
• Use the center line mark on the can to correctly locate the can on the first rafter.
• Stretch out the can hangers to the second rafter and align the can with the mark, install the hangers.
• Measure and adjust the can's center mark to match the required distance off the second wall. Use the set screws on the hanger slides to secure the can in this location.
• Strip and prepare Romex wire and insert the external sheath at least 1/4" into the junction box.
• Use a wire nut to secure the color matched pairs together. Twist the nut until the twist wraps the insulated part of the two together a few time - pull on the stranded wire to ensure that it is locked into the wire nut.
• Fold and tuck the wires into the junction box and reinstall the cover.
• Finally secure the wire within 12 inches of line length to the framing.
• Got a question or ideas for a video leave and comment below and submit your idea here: https://forms.clickup.com/f/23xa9-70/MU8E4HBGPNY3NXVQA3
Product Links:
• https://www.lowes.com/pd/Juno-New-Construction-Airtight-IC-Recessed-Light-Housing-Common-6-in-Actual-6-87-in/1000227181
• https://www.lowes.com/pd/IDEAL-Twister-500-Pack-Tan-Wire-Connectors/50335987
Видео New Construction Can Light Installation канала Electric Pro Academy
Показать
Комментарии отсутствуют
Информация о видео
Другие видео канала
 Electrical Power From Grid To Home
 Your Office Space Needs LED Panels
 What does a “knob & tube” knob look like?
 3 Pro Tips Straight from the Electrical Field
 Water Heater and Sump Pump Outlets - Code Minimum
 Relationship Over Leverage
 Does a Basement Bedroom Get Special Electrical Treatment?
 Balcony, Porch, & Patio Electrical - Code Minimum
 The Value of Honest Tradesmen
 Outlet Remodel In Old Wooden Walls
 AC Unit Electrical - Code Minimum
 A Master Electrician's Keys to Success - Part 2
 Electrician Life Cycle: Journeyman-To-Master
 3 Things Killing the Trades
 GFCI Crash Course - Part 2
 Coordinating With An Electrical Utility
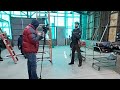 Film Day - Live Test 1
 Hallway and Stairway Electrical - Code Minimum
 Installing a GFCI
 Pre-Crew Electrical Walkthrough