iPhone 15 Pro Max Rear Camera Replacement: Step-by-Step Guide
Learn how to replace the iPhone 15 Pro Max back rear main camera module with this detailed, step-by-step guide from HowFixit.
Buy tools and parts on AMAZON:
Screwdriver Set: https://hfixt.com/spro
Opening Tool Set: https://hfixt.com/pryt
Magnetic Mat: https://hfixt.com/mat
Tweezers: https://hfixt.com/tzrs
Camera module: https://amzn.to/3UKNoOJ
Global AliExpress:
Screwdriver set: https://hfixt.com/alis
Opening tool set: https://hfixt.com/alit
Magnetic Mat: https://hfixt.com/amat
Tweezers set: https://hfixt.com/altz
Adhesive Tape: https://s.click.aliexpress.com/e/_DdSWmtt
Camera module: https://s.click.aliexpress.com/e/_DkuV0OJ
📌 *Useful links*
iPhone 15 Pro Max Tutorials: https://www.youtube.com/playlist?list=PLBeD2mwBMw0aa-xm1bnwE7JKuZ8KoxcTL
Visit our website for more DIY guides and tech insights: https://how-fixit.com
Follow us for more tech tutorials:
Instagram: https://www.instagram.com/howfixit/
Facebook: https://www.facebook.com/HowFixit/
Twitter: https://twitter.com/HowFixit
*DESCRIPTION*
Welcome to HowFixit! In this repair video guide, I'll show you how to replace the back main camera module on the iPhone 15 Pro Max. Whether you're dealing with a faulty camera or just looking for a replacement, our easy-to-follow instructions will help you complete the repair quickly and efficiently. Remember, every tech challenge is an opportunity to learn and grow. Happy repairing!
Tools You Will Need:
- Pentalobe 0.8 mm Screwdriver
- Tri-Wing 0.8 mm Screwdriver
- Phillips 1 mm Screwdriver
- Plastic Pry Tools
- Suction Cup
- Screen Disassembly Tool
- Tweezers
- Adhesive Sealant Tape
Pro Tips:
- Use a magnetic mat to keep screws organized and prevent loss.
- Be gentle and patient during the screen separation to avoid damage.
- Ensure the new camera module is dust-free before installation.
Steps Covered:
1. Turn off your iPhone and remove the Pentalobe screws near the charging port.
2. Heat the bottom edge of the iPhone to loosen the adhesive.
3. Use the suction cup and screen disassembly tool to separate the screen.
4. Disconnect the battery and display cables.
5. Remove the old camera module and replace it with the new one.
6. Reassemble your iPhone and restore its water protection.
Time Code:
00:00 - Intro to camera replacement guide
00:10 - Tools Required
00:50 - Preparing for Disassembly
01:07 - Heating the screen
01:17 - Separating the Screen
04:07 - Disconnecting Battery and Display Cables
04:15 - Removing the Old Camera Module
04:50 - iPhone 15 Pro Max Rear Camera Module
05:07 - Installing the New Camera Module
05:28 - Reassembling the iPhone
06:01 - Restoring Water Protection
08:42 - Final touching
🌟 FAQ:
Question: What tools do I need to replace the iPhone 15 Pro Max camera module?
Answer: You need Pentalobe, Tri-Wing, and Phillips screwdrivers, plastic pry tools, a suction cup, a screen disassembly tool, tweezers, and adhesive sealant tape.
Question: Is it necessary to use a magnetic mat?
Answer: Yes, a magnetic mat helps keep screws organized and prevents loss.
Question: How do I safely separate the iPhone screen?
Answer: Heat the bottom edge to loosen the adhesive, then use a suction cup and screen disassembly tool to carefully pry the screen apart.
Question: What precautions should I take while opening the iPhone 15 Pro Max?
Answer: Avoid inserting tools too deeply to prevent damage, especially near the Face ID module and other internal components.
Question: How do I ensure the new camera module is dust-free?
Answer: Check and clean the inside of the camera lenses before installation.
AFFILIATE PROGRAM
We are a participant in the Amazon Services LLC Associates Program, an affiliate advertising program designed to provide a means for us to earn fees by linking to Amazon and affiliated sites.
#iphone15promax #howfixit #iphonerepair #diy #diytech
Видео iPhone 15 Pro Max Rear Camera Replacement: Step-by-Step Guide канала How-FixIT
Показать
Комментарии отсутствуют
Информация о видео
Другие видео канала
 HP Spectre 13-4103dx Battery Replacement
 How to replace keyboard on Dell Vostro 3460 laptop
 Dell XPS 13 9380, 9370 Cooling Fan Replacement Guide
 Asus ROG G70 Upgrade and installing RAM | DIY step-by-step guide
 Dell G7 7590 Battery Replacement
 Alienware 15 R4 Motherboard Replacement | Step-by-step DIY Tutorial
 Acer Aspire S3 Keyboard Replacement: DIY Tutorial
 MSI GP72 Leopard Pro Замена жесткого диска
 Lenovo ThinkPad L530 Screen Replacement | Step-by-step DIY Tutorial
 iPhone 15 Logic Board Replacement | How to Remove iCloud Lock
 How to fix laptop overheating
 Замена камеры iPhone 11
 Asus Zenbook 14 UX431 Disassembly, fan cleaning and thermal paste replacement
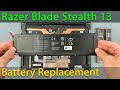 Razer Blade Stealth 13 Battery Replacement
 Замена камеры на iPhone 11 Pro Max
 Dell XPS 15 9570 Fan Replacement | Step-by-step DIY Tutorial
 Dell Precision 5510, 5520 RAM Upgrade and Install - Your Step-by-Step DIY Guide!
 Dell XPS 13 9310 Disassembly, fan cleaning and thermal paste replacement
 Dell XPS 15 9570 Disassembly, fan cleaning and thermal paste replacement
 Dell G5 5590 Keyboard Replacement
 Dell G7 7790 Disassembly, Fan Cleaning and Thermal Paste Replacement