Shattered Old Chair Repair using 3 Glues - Furniture Restoration
It took 3 different types of glue to restore this shattered old chair. I explain why as I go through the repair as well as show how to use vector clamping to clamp pieces that don't have parallel sides. This is an example of a Level 4 Woodworking Repair project.
The restoration of this shattered chair starts with taking it apart. I use spreader clamps to gently ease the pieces apart to avoid damaging them. Then I can assess the damage. There are 12 parts on this chair and 5 of them are broken, some in multiple places. It's in bad shape. Some of these parts were previously broken, which is easy to see from the stain in the joints that were broken.
The first few glue ups were bare wood connections, so I used PVA glue (aka Carpenter's glue) to make a strong, permanent bond. PVA needs tight fitting joints, glue spread on both sides of the joint, and clamping pressure to work properly. In places where wood is split, I used a blunt tip syringe to insert the glue and spread it with the stiff bristles of an artist paint brush.
I move on to the broken parts where there isn't a clean wood-to-wood connection and there are some voids between the parts. Then only glue that will hold when there's a gap between parts is epoxy. This 2-part glue is a necessity for restoring parts that don't fit 100% together. The two cross rails were previously broken with stain in the old breaks, so it told me there wasn't a good wood-to-wood connection.
The third glue in the furniture restoration project is hide glue. This glue is reversible, meaning it can be heated up and loosened in the future. This is an important glue to use on antiques so that if there's a need to repair the chair in the future (e.g., to replace a broken part), the piece can be taken apart, repaired, and put back together again. The joints in antiques should never be glued together with PVA glue.
I glued the front section together and the back section together before reassembling the whole chair. The back of the chair has a nice curved design, but it prevented me from being able to put a clamp on it. I made up some cauls (wooden blocks) for vector clamping so I could apply the clamping pressure exactly where it was needed to make a strong connection in the chair joints between the front of the chair and the back of the chair.
The final aspect of this restoration was to touch up the finish and fill some voids in the chair. I used a Mohawk graining marker to touch up some imperfections. I also use Mohawk burn-in sticks to fill in the voids in several areas to conceal the damage.
I hope you enjoy this video and learn a few new things about furniture restoration techniques so you can tackle projects like this.
RELATED VIDEOS:
Wood Filler - https://youtu.be/d9KC36yZdZs
Types of Glue - https://youtu.be/qK0IR8WT_jE
Vector Clamping - https://youtu.be/izMaQp5myf8
TOOLS:
Spreader Clamps - https://amzn.to/30F5nui
🇨🇦 Canadian link - https://amzn.to/38yfMfO
OUR NEWSLETTER - Sign up at https://WoodenItBeNice.ca
See the tools we use in our workshop and the tools we recommend: https://www.amazon.com/shop/homeimprovementwoodworking
🇨🇦 Canadian link - https://www.amazon.ca/shop/homeimprovementwoodworking
This video is hosted by Scott Bennett, Owner of Wooden It Be Nice - Furniture Repair in Brooklin, Ontario, Canada. https://WoodenItBeNice.ca
#furniturerestoration #repair #glue
Видео Shattered Old Chair Repair using 3 Glues - Furniture Restoration канала Fixing Furniture
Показать
Комментарии отсутствуют
Информация о видео
Другие видео канала
 Antique Rocking Chair Restoration with Broken Rocker - Made by John C. Mundell & Co in Elora, Ont CA
 Do you know this press? - Restoration
 Do you know what it is? - Restoration
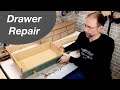 Ikea Style Drawer Repair
 Broken Upholstered Seat Repair with Pro Upholstery Tips - Furniture Restoration
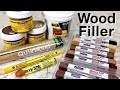 Wood Filler & Putty for Furniture Repair | Woodworking How to
 Carving and Coloring an Antique Victorian Chair - Thomas Johnson Antique Furniture Restoration
 The antique seller destroyed my chair! 😰
 Bad Furniture Repair and How to Fix It - Woodworking
 Watch how pro restorer does his job / 50-s chair restoration
 1930’s Antique Sentry Safe Restoration - Perfect Restoration
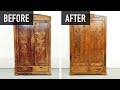 How to restore an old wardrobe
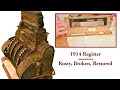 Restoration of Rusty 1914 National Cash Register - With Original Lit Top Sign, St. Paul Saloonkeeper
 Vintage Cocktail Cabinet - Furniture Restoration
 Split Wood Repair from Wood Movement | Furniture Restoration
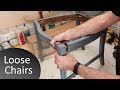 Repair Loose Chairs | How-to Fix Furniture
 Extreme restoration of an old (and seemingly fine) chair
 Restoring a Tall Clock Case - Thomas Johnson Antique Furniture Restoration
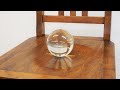 Bottomless chair restoration
 Vintage Stool Restoration