How to Make a Warm Winter Bed Quilt Sewing Tutorial
Sewing for beginners, showing you a simple project making a warm winter bed quilt! Things to gather:
1. Sewing Machine - http://amzn.to/1KKAMOD
2. Cotton - http://amzn.to/1LWpeJT
3. Sewing Scissors - http://amzn.to/1ObmipT
4. Tape Measure - http://amzn.to/1Obmndq
5. Sewing Pins - http://amzn.to/1Obmrtq
6. Vintage Inspired Fabric
7. Backing Fabric
8. Lining Fabric
9. 8 ½” Square Card
10. 7 ½” Square Card
11. Pencil
12. Dacron - http://amzn.to/1KKBb3B
13. Lots of patience! (About 30 hours)
INSTRUCTIONS:
1. Measure bed and decide on your quilt’s dimensions.
2. Lay out a vintage inspired fabric of your choice on a flat surface, this is your top fabric.
3. Using the larger card template and pencil to trace, mark squares on your top fabric. In this tutorial I make 64 squares from an 8 ½ inch template.
4. Cut out squares, nice and straight, with sewing scissors.
5. Do this again with your smaller square template and backing fabric. I use a 7 ½” square for my lining fabric, which is an inch smaller than the top fabric for a medium weight quilt.
6. Put these into two neat piles in front of you.
7. Take one square of your top fabric and one of your base fabric and laying one on top of the other, carefully lining up the edges, pin the corners together.
8. Now take make a small fold or pleat in the top fabric along 3 of the 4 edges and pin to the base fabric. Make sure you have your fabric’s edges lining up neatly and smoothly and that you have left on side open for filling later.
9. Now you can sew along the three pinned edges, make sure you backstitch at the start and finish points so that the stitching won't unravel.
10. Once you have done this step, and have made your two piles of fabric into cells, you can begin to sew the cells together. Start with two cells and carefully line up the edges before you pin and then sew. You must be accurate or it will become very difficult later on. Make sure that the top fabric of each cell is facing the same side, and that the open edges all face one in one direction.
11. When you have sewed two cells together you can add a third and then a fourth and so on. In this tutorial my quilt is a big square: 8 cells by 8 cells, so I sewed together 8 cells like this in a long band, and then started my next band until I had 8 individual bands made up of 8 cells each.
12. Now you can stuff your cells with the padding, pinning the cells closed as you go with the neat little fold in the middle of each cell to keep the edges smooth.
13. Sew the stuffed bands closed.
14. Sew together the bands, it will be easier if you do this in smaller sections.
15.Now you can sew on the backing fabric by placing the two right sides together and then stitching all the way around leaving a generous opening to pull the quilt through. For help with ‘enveloping’ and ‘bagging out’ you might like to watch my tutorial ‘How to Sew For Beginners Part 8: Bagging-Out and Finishing’.
16. Give your quilt a good shake out and hand stitch the last bit closed.
17. Enjoy your lovely and warm heirloom quilt!
OTHER USEFUL TUTORIALS:
1. How to Sew For Beginners Part 8: Bagging-Out and Finishing
https://www.youtube.com/watch?v=l6IYMgniHik
2. How to Sew For Beginners Part 7: Attaching the Lining to the Top
https://www.youtube.com/watch?v=L9IfLQ4UZZU
3. How to Sew For Beginners Part 5: Pinning
https://www.youtube.com/watch?v=7vD1Nr6USI0
Follow me on Facebook: http://www.facebook.com/astarsplace
Instagram: http://instagram.com/astarsplace
Go to http://www.astarsplace.co.nz for more!
Видео How to Make a Warm Winter Bed Quilt Sewing Tutorial канала Astar's Place
Показать
Комментарии отсутствуют
Информация о видео
Другие видео канала
 ULTIMATE QUILT VIDEO - Make a Quilt from beginning to end. ALL the details.
 Easy Puff Quilt Tutorial
 How to make quilt at home
 How to make a Bubble Puff Quilt 【泡芙拼布垫】Mother's Day Gift Ideas ❤ 母亲节礼物#HandyMum
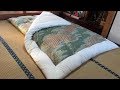 Making an Authentic Hand-Made Japanese Futon in 247 Seconds
 How to Quilt As You Go (QAYG) with Sashing and Self Binding - Sewing Tutorial
 How to Make a Duvet Cover
 Traditional Indian quilt making - only hand sewing and old clothes
 Sewing a comforter / blanket.
 alfombra bebe puff quilt
 How to make a Weighted Blanket Tutorial Video
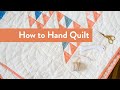 How To Hand Quilt
 how to sew a fitted sheet | bedding set ep. 3
 HOW TO MAKE A PUFF QUILT | Ombre | Step-by-Step Tutorial
 making a comforter using an antique frame... (2016-04)
 Working With Crumbs And Scraps
 How to make a Bubble Quilt-Filling the Bubbles LAST
 Fast and Easy Beginner Quilt - Quilt-in-a-day Stash Buster - Free Pattern
 Make a Soft Pillow Quilt! Quilting with Cuddle Cloth (Minky Fabric)