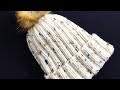
One color brioche hat reboot a Knittycats Knits tutorial
This video tutorial demonstrates in detail how to knit a one-color brioche hat. I had previously uploaded a one-color brioche hat video (link: https://youtu.be/ww2Bf75h_8A), but have since enhanced the pattern a bit and decided to upload a new video to show the hat steps in greater detail (including the hat decreases), which I am hoping is more helpful than the previous on.
Needles: US size 7 (4.5 mm, for snugger fit) or US size 9 (5.5 mm) 16” circular needles & set of 4 double-pointed needles in the same size
Gauge: With Red Heart “With Love” yarn (100% premium acrylic), one 5-oz skein (170 g, 288 m), knitting 11 sts in 1-color brioche knit in flat with US size 9 (5.5 mm) needles = 2.5” width (for 1-color brioche stitch pattern and video, click: https://youtu.be/4E0rLm3_jXU)
Finished hat size: Unstretched: ~16.5 inches round and ~8-9 inches height (hat stretches to ~21 inches to fit an adult)
Abbreviations: BRK=brioche knit; BRP=brioche purl; K=knit; K2tog**=knit 2 stitches together; P=purl; sl=slip the stitch purlwise; sm=slip marker; YF=yarn forward; YO=yarn over.
**In this pattern, a brioche st is considered to be 1 st, so a K2tog means knitting a brioche st and a single st together.
Using the circular needles, cast on 64 st using the long-tail cast-on method (or use cast-on method of your choice). Place a stitch marker after the last st before joining in the round when doing the set-up row. At the end of each row, slip the st marker and begin the next row.
Set-up row (only done once): Bring the yarn to the front, then *sl1, YO, P1. Repeat from * until you reach st marker.
Row 1: Take the yarn to the back, then *BRK, YF, sl1. Repeat from * until the end of the row (until you reach the st marker)
Row 2: Wrap the yarn around the last st in the previous row, then slip marker, then *sl1, YO, BRP. Repeat from * until the end of the row.
Repeats Rows 1 and 2 (note: when starting Row 1 again, after you slip the st marker, take the yarn to the back before starting the BRK st). Knit until cap measures about 7” from the cast on edge, ending in a Row 2 (it may be better to knit the length of the cap a little bit longer to avoid having a short cap).
Transfer sts onto 3 DPNs as follows: 20 sts on N1, 20 sts on N2, and 24 sts on N3.
Shaping the crown (number of sts left on N1/N2/N3 at the end of each row is shown in parenthesis)
Row 1: Take the yarn to the back, then *BRK, K2tog, YF, sl1. Repeat from * until the end of the row (15/15/18 left on needles).
Row 2: YF, *sl2, YO, BRP. Repeat from * until the end of the row (10/10/12 left on needs).
Row 3: Take the yarn to the back, then *K2tog (which means knit as 1 st the sl2 and YO done in the Row 2), YF, sl1. Repeat from * until the end of the row (10/10/12 left on needles).
Row 4: Wrap the yarn around the last st in the previous row, then slip marker, then *sl1, YO, BRP. Repeat from * until the end of the row (10/10/12 left on needles).
Row 5: Take the yarn to the back, then *BRK, YF, sl1. Repeat from * until the end of the row (10/10/12 left on needles).
Row 6: Wrap the yarn around the last st in the previous row, then slip marker, then *sl1, YO, BRP. Repeat from * until the end of the row (10/10/12 left on needles)
After Row 6, redistribute sts on the 3 needles as follows: 12 sts on N1, 12 sts on N2, and 8 sts on N3).
Rows 7-10: Repeat decrease Rows 1-4 (after Row 7, you will have 9/9/6 sts left on the needles; after Row 8 through Row 10, you will have 6/6/4 sts left on the needles).
After Row 10, redistribute sts on the 3 needles as follows: 8 sts on N1, 4 sts on N2, and 4 sts on N3).
Row 11-14: Repeat decrease Rows 1-4 (after Row 11, you will have 6/3/3 sts left on the needles; after Row 12 through Row 14, you will have 4/2/2 sts left on the needles).
Row 15: Take yarn to the back, then K2tog around (2/1/1 sts left on the needles).
Snip off a 6 inch tail and using the tapestry needle, pull yarn through the remaining 4 sts and pull. Re-insert yarn through center to bring it to the other side of the hat and weave in the yarn tails. Also, finish the cap by weaving in the yarn tails at the brim. Block the cap, if desired and can add an optional pom-pom on the top.
Note: If you need to adjust stitches based on the gauge of your yarn/needles, this pattern, as written, should work for 64 sts or for 80 sts, 96 sts, etc (adding on 16 more sts at a time). If casting on 80 or 96 sts, you should end up with 5 sts and 6 sts at the end, which you can then pull the yarn through). If you add on more than 96 sts, for example, 112 sts or 130 sts, then you may need to do another repeat(s) of the decrease Rows 1-4 to get down to a small number of sts when you do Row 15, so that you can end the cap as described above.
Other helpful video links:
Transferring stitches to circular needles: https://youtu.be/rLG4r-Sw1qk
Adding proactive lifelines: https://youtu.be/hLdNBLuC1sY
Hat crown finishing: https://youtu.be/yEXue1OjmNU
Видео One color brioche hat reboot a Knittycats Knits tutorial канала Knittycat's Knits
Показать
Комментарии отсутствуют
Информация о видео
Другие видео канала
 Brioche Stitch: Basic Decreases | Purl Soho
 How To Knit: One Color Brioche in the Round | Brooklyn Tweed
 Easy Knit Ribbed Hat For Adult Men and Women, How to knit for beginners, Knitting for Baby
 Fisherman's Rib in the round (1- or 2-color): a Knittycat's Knits Tutorial
 Easy SHORTCUT Brioche Pom Pom Hat - FREE Knitting Pattern | Yay For Yarn
 DIY KNIT BRIOCHE 2 COLOR HAT IN ROUND WITH BASIC DECREASING
 Brioche Stitch Hat
 How to knit 1 color brioche hat: A Knittycat's Knits tutorial
 Two-color brioche stitch tutorial on the round - Continental Method
 Knit a Chunky Brioche Slouchy Hat in SHORTCUT Brioche Stitch - Free Knitting Pattern
 Two-color brioche hat decreases: a Knittycat's Knits tutorial
 One Color Brioche in the Round
 How to knit 1-color brioche stitch: a Knittycat's Knits tutorial
 Two-color brioche hat: a Knittycat's knits tutorial
 Simple brioche hat in the round - for Continental and American Knitters (Part 1/2)
 1- or 2-color Fisherman's Rib Hat - a Knittycat's Knits Tutorial
 How to knit Brioche Increase and Decrease Stitches for the Camella Hat // Tiny Tutorial
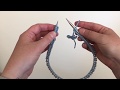 How To: 1-Color Brioche in the Round (updated)
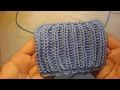 How to Knit the One Row Brioche Scarf