How to Add and Customize SmartArt Graphics in PowerPoint
Adding SmartArt graphics in PowerPoint allows you to visually represent information and ideas using pre-designed and customizable diagrams. Here's how you can add SmartArt graphics to your PowerPoint presentation:
1. Open your PowerPoint presentation and navigate to the slide where you want to add a SmartArt graphic.
2. Go to the "Insert" tab in the PowerPoint ribbon.
3. In the "Illustrations" group, click on the "SmartArt" button. A gallery of SmartArt graphics will appear.
4. Browse through the different categories and click on the desired SmartArt graphic that best suits your content. The categories include lists, process, cycles, hierarchy, relationships, matrix, and more.
5. After selecting a SmartArt graphic, a dialog box will appear, allowing you to enter your text and customize the graphic. The options in the dialog box will vary depending on the selected SmartArt category and layout.
6. Enter your text directly in the text placeholders within the SmartArt graphic. Each shape or element in the graphic represents a bullet point or text box. You can click on the shapes or use the Text Pane on the left side of the graphic to enter and edit your text.
7. Customize the SmartArt graphic as needed using the options provided in the "SmartArt Tools" contextual tab that appears in the PowerPoint ribbon when you have a SmartArt graphic selected.
- Change Layout: In the "Design" tab of the "SmartArt Tools," you can choose a different layout for your SmartArt graphic. This allows you to switch between different visual representations while retaining your entered text.
- Format: Use the "Format" tab in the "SmartArt Tools" to change the colors, styles, and effects of your SmartArt graphic. You can modify the shape fill, outline, size, and other formatting options.
- Text Pane: The Text Pane on the left side of the SmartArt graphic allows you to easily manage and organize your text. You can add, remove, and rearrange bullet points or text boxes.
- Design: The "Design" tab in the "SmartArt Tools" provides additional design options specific to the selected SmartArt graphic. You can change the color scheme, add shape effects, or modify the layout.
8. Once you've added and customized the SmartArt graphic, you can further edit and animate it like any other PowerPoint object.
By utilizing SmartArt graphics in PowerPoint, you can visually communicate complex information, illustrate processes, hierarchies, relationships, and more. These pre-designed and customizable diagrams enhance the visual appeal and clarity of your presentation, making it more engaging and impactful for your audience.
Видео How to Add and Customize SmartArt Graphics in PowerPoint канала Satyenhacks
Показать
Комментарии отсутствуют
Информация о видео
Другие видео канала
 How To Use iCloud Drive on Macbook (2022)
 How To Turn Off Background App Refresh on iPad (2022)
 How to Repeat Header Rows in Excel (2022)
 How To Record PowerPoint Presentation with Audio (2022)
 How To Block Someone on LinkedIn (2022)
 How To Enable Dark Mode in Messenger Lite (2022)
 How Do I Clear App Data from iCloud on iPad/iPhone
 How To Combine Videos on Your MacBook (2022)
 How To Compare 2 Word Documents (2022)
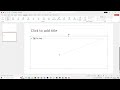 How To Do Continuous Text Scrolling Effect in Powerpoint
 How to Remove Highlight in Word (2022)
 How To Create Music Playlists on your MacBook (2022)
 How To Clear Other Storage on Android Phone (2022)
 How to Open Task Manager in Windows 11
 How To Import/Export Contacts Number to Gmail on Android (2022)
 How to Insert a New Page in Word (2022)
 How To Add a Checkbox in Word Document
 How To Compare Two Excel Sheets (2023)
 How To Clear Search History on Google Play Store (2022)
 How To Turn Off Personalised Ads on Android Phone (2022)
 How to Add Widgets on iPad (2022)