How to Adjust the Contour Waistbelt | Mystery Ranch
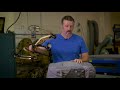
We are going to be going over the contour waistbelt. This waistbelt is found on most of our expedition packs, so that's going to be the T100, Terraplane, and the Glacier.
This belt is made up of a 5 segments, so we have 5 separate pieces of foam. To remove the belt and change size out, the first step is going to be removing the male/female buckles on the front side of the belt. To do that, we're simply going to unthread the web.
We will also need to unthread from the tri-glide adjuster. Do this on both sides of the belt. At this point our belt is free.
Next, reach in the triangle space between the body panel and the lumbar. There is going to be a male/female buckle back there, you'll need to find it and unclip it. Once that is done, our belt is attached with a little bit of velcro flap, pull that off and the belt will slide right off the webbing.
To put the belt back on, remember there is a left and a right to the sides. An easy way to tell is when you put them together the belts are making a smiley face curved up! To put these two sides back on it is basically a reverse process.
You are going to thread the belt back through the webbing. One of the key things with these sides is when you are setting them you want to make sure they are sandwiched in that velcro, so you get a nice velcro seal there. Then, we need to put the male/female buckles back together. There is a bit of length adjustment on there if needed to clip the buckles back together in the triangle space. To make sure everything is snug, you just want to be sure to tighten the male/female straps by pulling the tab. From there, it is a reverse operation with threading the webbing back through.
Видео How to Adjust the Contour Waistbelt | Mystery Ranch канала MYSTERY RANCH
Показать
Комментарии отсутствуют
Информация о видео
Другие видео канала
 Mystery Ranch | Treehouse
 Zoid Cubes
 MYSTERY RANCH | ORIGINS : Warranty Repair
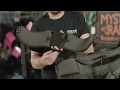 How to Adjust the STEIN Pack Waistbelt | Mystery Ranch
 MYSTERY RANCH Treehouse series
 Guidelight MT Pack Options
 Mystery Ranch | Scree
 MYSTERY RANCH GAME BAGS 60L & 80L
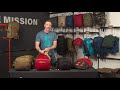 Mission Stuffels
 Thread Bed with Mark Genito - Product Developer
 MYSTERY RANCH Fire Yoke Chainsaw Pad and Talk Box Attachment
 Scepter 35 and 50 with Mark Genito - Product Developer
 Shift System | Mystery Ranch
 How to attach the GRAVELLY to the Ultralight frame | MYSTERY RANCH
 MYSTERY RANCH-Fire SHELTER ATTACHMENT
 WOMEN'S FIRE PACKS
 TIME MACHINE BUCKLE CONVERSION KIT | MYSTERY RANCH Hunting
 Jason Matzinger | Wyoming Elk Hunt | MYSTERY RANCH
 MYSTERY RANCH Gunfighter Armor Attach
 ERIN
ERIN