RGB 7 Segment Digital Clock using ESP8266 & WS2812b
Only $5 for 10 PCBs & Your First Order is Free only at PCBWay: https://www.pcbway.com/
In this video I have Showed you How to make a neopixel LED driver board, But there is more! It has a LDR to automatically change the brightness, Depending on the ambient light. A DHT 11 sensor for getting the current temperature, a push button, and an I2C port for adding any other sensor like DS3231 or MPU6050. It also has a barrel DC connector for external power supply. Connecting this to the display is as very simple. Just plug it in, using the header pins, connect the DC supply, and it's done.
____________________________________________________
Documentation : NeoPixel LED Controller
____________________________________________________
Gerber Files : https://www.pcbway.com/project/shareproject/Neopixel_LED_controller.html
____________________________________________________
CODE : https://github.com/palsayantan/Neopixel-7-Segment-Digital-Clock
____________________________________________________
Please help my future projects by purchasing this board or any of my other projects from my Tindie Store.
Link : https://www.tindie.com/products/19245/
____________________________________________________
Buy electronic components with free shipping on https://www.utsource.net/
To buy this project or if you need any help with your own project feel free to contact me on whatsapp. I'd be more than happy to help you as much as I can.
https://wa.me/917908021510
____________________________________________________
Thanks for Watching. Hope you enjoy the video. Please leave a LIKE if you do. SHARE this Video. For any farther information let me know in the COMMENTS And Don't forget to SUBSCRIBE! It really motivate me a lot to make more awesome Projects for you. Thanks for your support!😊
____________________________________________
📌 Say Hi to me on Social Media
Facebook : https://www.facebook.com/electropoint4u
Instagram : https://www.instagram.com/electropoint4u
____________________________________________
Music Credits :
BGM : MorningLightMusic
https://morninglightmusic.io/
____________________________________________
Ikson - Anywhere (Official)
Music by @ikson
____________________________________________
#esp8266
#neopixel
#clock
Видео RGB 7 Segment Digital Clock using ESP8266 & WS2812b канала Electro Point
Показать
Комментарии отсутствуют
Информация о видео
Другие видео канала
 ESP32 BLE Macro Keyboard
 DIY Novatrope - an elegant kinetic kinetic sculpture
 ESP32 5x5 Touch Matrix keyboard
 RGB PCB Christmas Tree
 RGB PCB X-Mas tree
 3D printed Stepper Bot using ESP32 with multiple VL53L0X distance sensors
 Getting Started with REYAX RYLR998 LoRa module
 Life goes on
 NeoPixel-XL | HIgh power RGB Addressable LED
 Making a PCB badge for 7th anniversary of PCBway
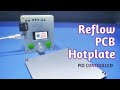 PID controlled PCB reflow hotplate using Aluminium PCB
 How to tune PID algorithm for variable setpoints
 How to make Reflow Hoteplate from a regular dry iron with touchscreen interface
 PicoClock - Multipurpose digital clock using Raspberry Pi Pico
 Portable Power Supply for your microcontroller projects
 How to make Relays Individually Addressable | One wire Output Expander
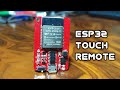 Portable wireless Touch remote using ESP32
 How to make RGBW lights using Aluminium PCB
 DIY BLE Gamepad using ESP32 | PCBway
 PCB X-Mas Tree | Merry Christmas #shorts
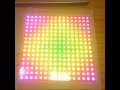 NeoPixel LED Matrix 16x16 #shorts