Getting Started Rendering in Vray (EP 4) - Interior Lighting in Vray Using Artificial Lighting
In this Vray and SketchUp tutorial, learn about the different kinds of artificial lights you can use to light your interior renders! Learn to use sphere lights, spotlights, emissive materials, and more to create realistic lighting in your interior models!
MY YOUTUBE SETUP
https://kit.com/TheSketchUpEssentials/sketchup-modeling-and-youtube-creation-kit
Check Us Out on -
Website - http://www.therenderingessentials.com
Twitter - http://www.twitter.com/easyrenders
In this video, we’re going to talk about lighting an interior model with artificial lights in Vray.
If you’re looking for more rendering Tutorials every week, make sure to click that subscribe button.
Today I wanted to talk about some of your options for lighting an interior model within SketchUp without using the environment lighting.
You’ve basically got a few different options for lighting your interior models with artificial lights – this is assuming that you don’t want to light your model with the environment lighting in Vray (sunlight and background lights).
To start off, turn the sunlight off within your lighting section of your Vray asset editor. You’ll note that you still get some exterior lighting from your background image, which you can adjust within your settings section.
Now, let’s take a look at some different lighting options.
To start off, let’s add a sphere light to your model. Basically, a sphere light is a light that emits light in all different directions equally. You can adjust the power of the light both by scaling it up and down, and by adjusting the intensity within the lighting section of your asset editor.
One thing to note – if your image is not bright enough, that doesn’t necessarily mean you need to go in and run the intensity of your lights up to a super high level. Instead, go in to your camera settings and adjust your camera exposure to bring your lighting level up.
In this case, I’m going to take this point light and adjust its size so that it fits within this lamp in my model. I’m also going to adjust the radiant power units to Watts and set it to something like 80. Though the visible wattage of the light doesn’t really correspond with the power usage of bulbs, this still allows me to set my lighting in a way that it makes sense to me.
Now let’s add a couple spot lights to our image. While a sphere light is a light that shines in all different directions, a spotlight is basically a light with a direction associated with it. Note that when setting your spotlight, you can either just single click in order to place it, or you can hold the shift key to set things like cone angle, penumbra falloff, and more.
Note that when we initially set this light, the light itself casts a very defined edge, which isn’t very realistic, and doesn’t allow the light to really move into the rest of the room. However, if we adjust the Penumbra angle setting, you’ll note that your light edges become more blurry, and more light also makes its way into the room.
We’re not going to talk about IES lights too much in this video, but these are basically lighting information files that you can download from lighting manufacturers to simulate properties of actual lights, like bulbs, etc.
An omni light is very similar to a sphere light. Honestly, I’m having a bit of trouble telling when to use which one, so any of you Vray experts out there leave a comment down below and let me know!
Finally, you can also create light within an interior render using an emissive material. An emissive material is basically a material within Vray that emits light. You can use this for things like TV screens, lighting faces, and more. In this case, I’m going to add an emissive TV screen, as well as an emissive faced material at my spotlights, otherwise they look funny.
Once you have your lighting the way that you want it, you can do a non-interactive render to create a more detailed rendering from your image.
Disclaimers: all opinions are my own, sponsors are acknowledged. Product Links in the description are typically affiliate links that let you help support the channel at no extra cost.
Видео Getting Started Rendering in Vray (EP 4) - Interior Lighting in Vray Using Artificial Lighting канала The Rendering Essentials
Показать
Комментарии отсутствуют
Информация о видео
Другие видео канала
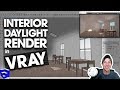 VRAY INTERIOR LIGHTING TUTORIAL – Rendering with Daylight in SketchUp!
 Getting Started Rendering in VRAY (EP 1) - BEGINNERS START HERE!
 Getting Started Rendering in Vray (EP 5) - BUMP MAPS vs DISPLACEMENT MAPS in Vray for SketchUp
 Sketchup Bedroom Interior Build + Vray Render
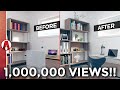 10 Tips for a REALISTIC Interior Rendering
 Getting Started with Vray 3 6 For SketchUp - START HERE IF YOU'RE A BEGINNER
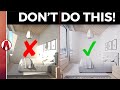 7 Beginner Mistakes Interior Rendering
 3 Tips to increase PHOTOREALISM
 Make Ceiling Lights Component in Sketchup | Make SMD/LED Lights in Sketchup
 VRAY GLASS SETTINGS TUTORIAL - Reflection Settings in Vray for SketchUp
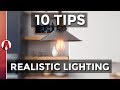 10 Tips for REALISTIC LIGHTING
 EXTERIOR LIGHTING IN VRAY for SketchUp 3.6 with HDRI, Dome Lights, and Sunlight
 STUDIO LIGHTING IN VRAY for SketchUp
 V Ray for SketchUp – Quick Start Interior Lighting
 Getting Started Rendering in Vray (EP 2) - ADDING VRAY MATERIALS TO SKETCHUP!
 How to Create REALISTIC Materials
 Interior lighting - Vray interior sketchup
 FIXING VRAY GLASS TRANSPARENCY in SketchUp - Vray 3.6 for SketchUp Tutorial
 Sketchup Stairs Interior Build + Vray Render
 ADJUSTING RENDER SIZE AND QUALITY in Vray for SketchUp