How to Self Level Bathroom Floors Part 2...Adding Leveler Over Concrete -- by Home Repair Tutor
In this second video we show how to self level a bathroom floor using Laticrete's NXT. Mixing this self leveler with the right water ratio is critical. We deep dive into the details and show how simple it is to level a bathroom floor after the prep work.
For more home improvement tips visit https://www.homerepairtutor.com/👍🏼
Helpful Links:
Supply List (everything you need) -- https://amzn.to/2OaEVoF
LATICRETE Prime-N-Bond -- https://amzn.to/2pF4iA3
NXT Level -- https://amzn.to/2RxM2Fw
Measuring Bucket -- https://amzn.to/2IK6ajV
Milwaukee Mud Mixer (Tool Only) -- https://amzn.to/2zZgmlC
Mixing Paddle -- https://amzn.to/2RDEiSG
Floor Squeegee -- https://amzn.to/2A072Ow
Paint Roller -- https://amzn.to/2PdOAXN
Hammer Drill -- https://amzn.to/2PdOAXN
Concrete Screws (1-3/4") -- https://amzn.to/2QsbvPs
Concrete Screws (2-1/4") -- https://amzn.to/2EaLAu6
4 Foot Level -- https://amzn.to/2zVmR8Z
Latex Caulk -- https://amzn.to/2BZa5b7
Sill Plate Foam -- https://amzn.to/2PgPvqD
Stapler --https://amzn.to/2C0af1Z
Silica Dust Respirator -- https://amzn.to/2BZl98g
The first step is to accurately measure how much water is needed for the NXT self leveler. This is critical because if there's too much or too little water NXT won't perform - and that goes for all self levelers.
Pour water into a large mixing barrel and add NXT. Wear a silica dust respirator to protect lungs. Mix per Laticrete's directions then immediately pour NXT over a prepped and primed concrete floor.
We needed 6 bags of NXT for this basement bathroom and used a floor squeegee to help it spread evenly. Add enough NXT to cover the floor screw indicators. Wait 24 hours or until the leveler has cured then it's okay to set a bathtub or tile the floor.
Watch our video for all the details
Видео How to Self Level Bathroom Floors Part 2...Adding Leveler Over Concrete -- by Home Repair Tutor канала Home Repair Tutor
Показать
Комментарии отсутствуют
Информация о видео
Другие видео канала
 Concrete Repair Tips for Beginners
 How to Build a Schluter Curbed Shower
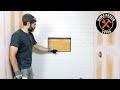 Shower Niche Tile Tips for Beginners
 Cement Board Installation for Beginners
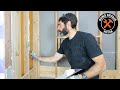 Shower Wall Wet Shimming for Beginners
 PEX Pipe Installation Tips for Beginners
 Waterproofing Shower Niche Corners Part 2 - #shorts #diy #howto #showerremodel #bathroomremodel
 Hexagon Tile Floor Tips - #shorts
 Delta Shower Valve Tips with Copper - #shorts
 Waterproofing Tub Shower Walls | Easiest Method for Beginners
 Recessed Shower Light Installation - #shorts
 Delta Handheld Shower Tip - #shorts
 How to Caulk a Bathtub - #shorts
 Tile Grout Tips - #shorts
 5 Tips for Installing DITRA-HEAT Mats - #shorts #howto #diy #bathroomremodel
 Curbless Shower Floor Tips - #shorts
 How to Paint a Room FAST | Paint Hacks for Homeowners
 Tub Shower KERDI-BOARD Tips - #shorts #diy #howto #schlutersystems #bathroomremodel
 Schluter Shower Curb Installation - #shorts
 How to Remove a Toilet - #shorts
 Tile Shower Wall Demo Tips - #shorts #demo #tileshower #bathroomremodel