Silhouette Studio Tutorial. Cutting without registration marks for making stickers.
This is a tutorial, start to finish, of how I go about printing and cutting my sticker designs WITHOUT registration marks.
00:00 Intro of the video
00:37 Page Setup
07:08 Adding "bleed" to improve the quality of your finished stickers
09:05 Taking an image from the internet or your computer, and getting it setup to be a sticker
17:45 Choosing printer settings and preparing to print
21:18 Printing the sheet of stickers
24:30 View of my workspace and overall layout
26:55 Printing completed, and setup for cutting
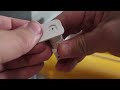
30:59 Laminating the sticker paper (9"x12" Avery laminate used)
37:38 Getting the laminated sticker paper loaded into the Cameo 4
41:30 Choosing cut settings and making the cut
46:44 Verifying the cut, weeding, and end results
In this video we go through everything. Setting up our page in Silhouette Studio, adding a "bleed" to allow for slight deviations in the cut, show how to take an image and get it ready to cut as a sticker, go through printing, laminating, and then cutting the designs.
This works for all of the Silhouette Cameo machines and at least most of this can be used with Cricut machines as well.
Keywords
Silhouette, Cameo, Silhouette Studio, Design Studio, Design Space, Cricut, Registration Marks, Make Stickers, DIY, Print & Cut, Print and Cut, Print then cut.
Видео Silhouette Studio Tutorial. Cutting without registration marks for making stickers. канала 541 Richard
00:00 Intro of the video
00:37 Page Setup
07:08 Adding "bleed" to improve the quality of your finished stickers
09:05 Taking an image from the internet or your computer, and getting it setup to be a sticker
17:45 Choosing printer settings and preparing to print
21:18 Printing the sheet of stickers
24:30 View of my workspace and overall layout
26:55 Printing completed, and setup for cutting
30:59 Laminating the sticker paper (9"x12" Avery laminate used)
37:38 Getting the laminated sticker paper loaded into the Cameo 4
41:30 Choosing cut settings and making the cut
46:44 Verifying the cut, weeding, and end results
In this video we go through everything. Setting up our page in Silhouette Studio, adding a "bleed" to allow for slight deviations in the cut, show how to take an image and get it ready to cut as a sticker, go through printing, laminating, and then cutting the designs.
This works for all of the Silhouette Cameo machines and at least most of this can be used with Cricut machines as well.
Keywords
Silhouette, Cameo, Silhouette Studio, Design Studio, Design Space, Cricut, Registration Marks, Make Stickers, DIY, Print & Cut, Print and Cut, Print then cut.
Видео Silhouette Studio Tutorial. Cutting without registration marks for making stickers. канала 541 Richard
Показать
Комментарии отсутствуют
Информация о видео
Другие видео канала