Reolink Argus 2 (WiFi Security Camera) & Solar Power – Easy setup + Install – DIY Mega Review!
Save 5% on all reolink.com purchases: ytb5offhomeca
⚡✔⚡✔⚡✔⚡REOLINK COUPON CODES & DEALS LISTED ON MY BLOG: http://newfiebort.com/reolink-deals/
💻💻💻💻💻 Blue Iris (Security Camera Video Management Software): http://newfiebort.com/buy-blue-iris/
Argus 2 on Amazon: https://amzn.to/2ULUV28
Solar Panel on Amazon: https://amzn.to/2RfNGwZ
Argus 2 with Solar Panel: https://amzn.to/2wgl9Aa
Micro SD Card on Amazon: https://amzn.to/2JG6nWx
Blog post: http://newfiebort.com/argus-2-solar-review/
How to connect to Blue Iris: https://support.reolink.com/hc/en-us/articles/360003601394-How-to-Add-Reolink-Cameras-to-Blue-Iris
Today we are checking out a totally wireless security camera from Reolink. It the Argus 2 and has an optional solar panel. I’m super excited about this setup because it allows me to install a security camera pretty much anywhere as long as I’m in WiFi range. We’ll see what’s included, add it to the Reolink app, install it in a bunch of locations inside and out so you can get a good feel as to how this camera could work for you. I’ll show tonnes of daytime and nighttime footage, do a water test, WiFi range test and whatever else I can think of. Basically, everything you need to know to understand this camera’s flexibility, so be prepared for a lot of information!
So, you can pick these up for individually or together as a package. The camera is about $100US or as a combo for $120. They go on sale, so keep an eye out for that. I have a link to coupon codes in the description below for even more savings that can be stacked on top of their sales, so do check that out.
We open the camera box and check out its contents. We have a quick install guide, mounting templates, a surveillance sticker a mounting strap in case you are unable to put screws into your mounting surface, a small lanyard, a micro usb cable to wall-charge the betters, a rest pin to rest the camera back to factory defaults, a wall/ceiling mount, a protective silicon skin to protect the camera from the elements, and the camera itself.
I show all of the camera’s details, including the magnetic mount, PIR 120 degree sensor, the micro sd card slot, the mic and speaker locations and the wide angle lens. I talk about the camera’s 2MP - 1080p Starlight CMOS sensor records at 15 frames/sec, which is common for WiFi cameras to save on disk space and decrease lag.
The solar panel, is very straight forward. It comes with another window sticker, mounting template, setup guide, metal mount, screws and 4.5m (almost 15ft) cables. The connector has a water-tight seal. As you may know, the panel doesn’t power the camera but rather keeps the battery topped up and the camera uses this power bank.
I walk through the steps of adding the camera to my Reolink account on my app and then do a quick lag test. This camera can be installing in multiple places and I discuss several options and show footage.
I test the camera’s abilities in multiple locations and show daytime and nighttime footage with the IP lights on and off. I check the range of the camera’s WiFi and spray the camera with a water hose to test its weatherproofing abilities.
So, what didn’t I like about this camera? Well, not much. The PIR sensor zone is a little short. I’d like to see that at a consistent 20ft or 6m. I also found the mic picked up the slightest breeze and ruined the audio. Maybe some internal foam or material for a windscreen could help. I also found that the outdoor camera mount conveniently only had one tightening spot, it didn’t always fully secure the camera.
What did I like? It’s a stand-alone device and all you need is the camera, solar panel and a memory card. No computer or Network Video Recorder is required. I love the image quality in the day and night, the wide view point, the fact that I had next to no false alarms with the PIR sensor including changes in lighting conditions and snow falling in front of the camera. The onboard storage is prefect and connectivity was flawless. The solar panel and long battery life makes this a game changer to security cameras. Especially because it works during a power outage. It’s a perfect, very well priced, DIY solution and removes the frustrating limiting factors of running network cables up walls, across the floor or through the yard.
Again, check out my links below for more information and check for coupon codes there too that can be stacked on top of Reolinks sale products. I know this was a long video and a tonne of information. As always, if you liked this video give it a thumbs up to let me know, and please subscribe for more Home Tech DIY Projects. Thanks for watching.
Видео Reolink Argus 2 (WiFi Security Camera) & Solar Power – Easy setup + Install – DIY Mega Review! канала Home Tech DIY
Показать
Комментарии отсутствуют
Информация о видео
Другие видео канала
 The BEST Home Security Camera for DIY Install? Reolink Argus 2 FULL Review
 A Completely WIRE-FREE PAN TILT SECURITY CAMERA! || Reolink Argus PT Unboxing/Review/Is It Worth It?
 Reolink Argus 2 vs Argus Pro - Starlight vs Traditional Night Vision - Video Footage + Cloud Beta
 REOLINK Argus 2 Wireless Outdoor Security Camera
 How to install a Security Camera Surveillance System
 Reolink Argus 2 WiFi Security Camera BATTERY POWERED! - Unboxing and Setup
 Reolink ARGUS 2 Security Camera REVIEW + Solar Panel : Fully Wireless !
 RLC-410 by Reolink - Unboxing, Setup and Review (Day and Night Footage)
 ReoLink Argus 2 (Wireless Solar Panel CCTV) Setup & Review!
 Top 10 Surveillance Mistakes To Avoid When Installing Your Security System for the First Time
 Reolink Argus 2 TOTALLY Wireless IP Security Camera
 New Reolink 5 megapixel PoE Camera - Install and Comparison | RLC-520
 Top 10 Best Wireless Outdoor Security Cameras
 OCC review of the Reolink Argus PT WiFi Camera.
 Reolink Argus Long Term Review, Argus 2 And Argus Pro Update
 Reolink Argus 2 Unboxing & Easy Setup in Minutes
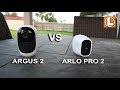 Arlo Pro 2 vs Reolink Argus 2 - Comparison Of Their Features, Video Quality Daytime and at Night
 Reolink Argus 2 review - DIY home security setup
 Reolink Argus Pro Wireless Security Camera + Solar Panel Charger
 Reolink Argus 2 Review Wire Free Camera + Solar - Unboxing, Setup, Settings, Installation, Footage