- Популярные видео
- Авто
- Видео-блоги
- ДТП, аварии
- Для маленьких
- Еда, напитки
- Животные
- Закон и право
- Знаменитости
- Игры
- Искусство
- Комедии
- Красота, мода
- Кулинария, рецепты
- Люди
- Мото
- Музыка
- Мультфильмы
- Наука, технологии
- Новости
- Образование
- Политика
- Праздники
- Приколы
- Природа
- Происшествия
- Путешествия
- Развлечения
- Ржач
- Семья
- Сериалы
- Спорт
- Стиль жизни
- ТВ передачи
- Танцы
- Технологии
- Товары
- Ужасы
- Фильмы
- Шоу-бизнес
- Юмор
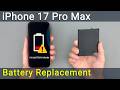
iPhone 17 Pro Max Bottom Speaker Replacement | Fix No Sound, Crackling, Muffled Audio
Learn how to replace the iPhone 17 Pro Max bottom speaker and fix no sound, muffled audio, crackling, distortion, and loudspeaker issues step by step.
Buy tools and parts on AMAZON:
Screwdriver Set: https://hfixt.com/spro
Pro Toolkit: https://hfixt.com/tool
Magnetic Mat: https://hfixt.com/mat
Tweezers: https://hfixt.com/tzrs
Adhesive tape: https://amzn.to/3N3ey3E
AliExpress:
Adhesive tape: https://s.click.aliexpress.com/e/_c3zr7kUX
Screwdriver Set: https://hfixt.com/alis
Opening Tool Kit: https://hfixt.com/alit
Magnetic Mat: https://hfixt.com/amat
Tweezers set: https://hfixt.com/altz
📌*Useful links*
Best Screwdriver Set: https://youtu.be/fdtNem4rDDM
Repair Tools & Safety Tips: https://youtu.be/Sp7PhrKV-vQ
More DIY repair guides: https://how-fixit.com
Genuine Apple parts: selfservicerepair.com
📱Follow us for more tech tips and guides!
TikTok: https://www.tiktok.com/@howfixit
Instagram: https://www.instagram.com/howfixit/
Facebook: https://www.facebook.com/HowFixit/
X: https://x.com/HowFixit
*Description*
If your iPhone 17 Pro Max bottom speaker is very quiet, sounds muffled, crackles, distorts, or has no sound at all, this step-by-step guide will show you how to replace the bottom loudspeaker and restore clear audio.
In this HowFixit tutorial, I’ll show you how to safely open the iPhone 17 Pro Max, disconnect the display, remove the cooling plate and Taptic Engine, replace the loudspeaker, test audio performance, and restore water resistance with new adhesive sealing tape.
This repair is useful if your speaker problems started after a drop, water exposure, or internal speaker failure. I also cover important tips like keeping track of screw positions, avoiding damage to display cables, making sure the speaker sits flat to prevent buzzing, and testing sound before final reassembly.
If this guide helped you, like, subscribe, and visit HowFixit for more iPhone 17 Pro Max repair tutorials.
🎬 Timecodes
00:00 Intro to Bottom Speaker Replacement Guide
00:23 Tools needed for the repair
00:44 Important screw organization warning
01:11 Remove the two bottom screws
01:20 Heat the display adhesive
01:45 Open the iPhone safely
02:18 Important pry depth warning
02:49 Release top hinges and open display
03:49 Disconnect display and sensor cables
04:15 Remove the cooling plate
05:00 Remove the Taptic Engine
05:50 Remove the bottom loudspeaker
06:29 Install the new speaker
07:05 Reinstall the Taptic Engine
08:02 Reconnect cables and quick test
08:34 Test the loudspeaker sound
08:55 Remove old adhesive
09:31 Clean frame and display
11:03 Apply new waterproof sealing tape
12:21 Final reassembly
🌟FAQ:
❓Question: How do I know if my iPhone 17 Pro Max bottom speaker is bad?
✔️Answer: Common signs include very low volume, muffled sound, crackling, distortion, rattling, or no sound from media, ringtones, and speakerphone.
❓Question: Can water damage cause the bottom speaker to stop working?
✔️Answer: Yes. Water exposure can damage the loudspeaker or cause muffled, distorted, or intermittent sound.
❓Question: Do I need to replace adhesive after opening the iPhone 17 Pro Max?
✔️Answer: Yes. Once opened, the original adhesive no longer seals properly. New adhesive is needed to help restore water resistance.
AFFILIATE PROGRAM
As an Amazon Associate, I earn from qualifying purchases.
#iphone17promax #iphonerepair #diy #howfixit
Видео iPhone 17 Pro Max Bottom Speaker Replacement | Fix No Sound, Crackling, Muffled Audio канала How-FixIT
iphone 17 pro max bottom speaker replacement iphone 17 pro max loudspeaker replacement howfixit iphone 17 pro max speaker repair iphone 17 pro max no sound fix iphone 17 pro max muffled speaker iphone 17 pro max crackling speaker iphone 17 pro max distorted audio iphone 17 pro max bottom speaker fix iphone 17 pro max loudspeaker fix how to replace iphone 17 pro max speaker iphone 17 pro max speaker not working iphone 17 pro max buzzing speaker
Комментарии отсутствуют
Информация о видео
Вчера, 21:11:00
00:13:14
Другие видео канала