Universal EZ Lip Splitter OFFICIAL Installation Instructions DIY Spoiler
Check out our full Universal EZ Lip Splitter installation guide at https://www.ezlip.com/installation
PREPARATION: Careful preparation is important for maximizing the life and durability of your EZ Lip. Clean application area using isopropyl alcohol (test a small unobtrusive area for color-fastness). Application area must be completely dry before installing your EZ Lip.
FOR MAXIMUM LIFE: For long lasting strength and durability, apply when temperature is at least 72º F (21º C). In colder climates, apply heat to the tape using a hair dryer or heat gun to help strengthen the bond.
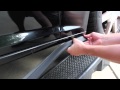
STEP 1 (PEEL): Peel protective film from tape starting at one end of the EZ Lip and attach to the surface of the vehicle.
STEP 2 (PRESS): Continue installing to the rest of your vehicle while making sure to firmly press and hold the EZ Lip for several seconds against the surface of your vehicle. Make sure to eliminate air bubbles and gaps.
STEP 3 (CUT): Cut excess off with sharp scissors.
CLEANING: Clean the EZ Lip the same way you would clean your car. Using soap and water will help eliminate dust and grime build-up. Do not wash vehicle for 24 hours after installing to give the tape time to cure.
SHINING: You can easily give your EZ Lip a nice glossy shine or help eliminate scuffs by applying tire-shine or Armor All to the surface.
Check it out installed on your car at: http://EZLip.com/gallery
Видео Universal EZ Lip Splitter OFFICIAL Installation Instructions DIY Spoiler канала EZ Lip
PREPARATION: Careful preparation is important for maximizing the life and durability of your EZ Lip. Clean application area using isopropyl alcohol (test a small unobtrusive area for color-fastness). Application area must be completely dry before installing your EZ Lip.
FOR MAXIMUM LIFE: For long lasting strength and durability, apply when temperature is at least 72º F (21º C). In colder climates, apply heat to the tape using a hair dryer or heat gun to help strengthen the bond.
STEP 1 (PEEL): Peel protective film from tape starting at one end of the EZ Lip and attach to the surface of the vehicle.
STEP 2 (PRESS): Continue installing to the rest of your vehicle while making sure to firmly press and hold the EZ Lip for several seconds against the surface of your vehicle. Make sure to eliminate air bubbles and gaps.
STEP 3 (CUT): Cut excess off with sharp scissors.
CLEANING: Clean the EZ Lip the same way you would clean your car. Using soap and water will help eliminate dust and grime build-up. Do not wash vehicle for 24 hours after installing to give the tape time to cure.
SHINING: You can easily give your EZ Lip a nice glossy shine or help eliminate scuffs by applying tire-shine or Armor All to the surface.
Check it out installed on your car at: http://EZLip.com/gallery
Видео Universal EZ Lip Splitter OFFICIAL Installation Instructions DIY Spoiler канала EZ Lip
Показать
Комментарии отсутствуют
Информация о видео
Другие видео канала
 Universal All-Fit Lip Kit Installation Instructions Do It Yourself DIY Splitter Spoiler
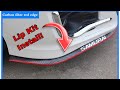 Easiest & Quickest Lip Kit Install EVER!! - (SAMURAI LIP KIT)
 Subaru WRX - EZ Lip PRO Installation
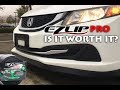 EZ LIP PRO DURABILITY TEST + REVIEW
 Cara Pemasangan Samurai Lip
 EZ Lip vs All Fit Lip: Automotive Lips Review
 All-Fit Lip Kit / EZ-Lip Comparison & Installation
 the ST gets Front, Side, and Rear Splitters from...WISH!
 Oyeeice Universal Fender Flares,How to install Oyeeice's fender flares?
 Budget DIY Lip Kit with Garden Edging
 DIY: EZ LIP PRO INSTALL & REVIEW.. SHOULD YOU BUY FOR YOUR AUDI A4 B8??
 EZLip Pro Installation and Tips (Mitsubishi Lancer) | AnthonyJ350
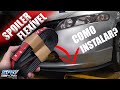 COMO INSTALAR O FRONTLIP OU SPOILER FLEXÍVEL? VEJA OS MACETES! BY SPA TURBO!
 Rocker Flare Effects Installation
 EZ LIP PRO Installation Video | Dodge Charger SXT
 Poniendo Lip Samurai En Peugeot 206cc 2.0 Gti
 Carbon Fibre Front Bumper Lip - Review
 How To Install universal front lip
 как установить универсальной губа самурай на приору
 EZ Lip & EZ Lip PRO Comparison & Durability Test