How To Make a Ring With a Wood Inlay
In this tutorial I will show my process for creating a metal ring with a wooden inlay.
Download my FREE "Guide To Making Bent Wood Rings" here:
http://eepurl.com/btZpJv
If you're interested learning more about ring making then check out my course "Next Level Wooden Rings":
https://bit.ly/2rCxSue
For this project I used a steel ring liner from http://www.bangleguy.com/ and a red buck eye burl knife scale from http://emberleaf.com/.
I measured the outside diameter and width of the ring blank so I could use my powers of deduction to work out how much wood I'd need.
The diameter required was around 21mm and the width of the inlay was 7mm.
With my measurements done I mounted my wood on the drill press and bored a hole with a 20mm paddle bit.
I drilled the hole slightly smaller than required but sanded it until the metal ring blank fit nice and snug inside.
Next I cut a rough shape out of the wooden blank on the scroll saw – just the take the edges off and make it easier to turn.
I needed a way to mount the wood on the lathe for turning so I made a quick jam chuck from a piece of pine dowel.
The jam chuck was a pretty good fit but I also held the wood in place with a wine cork from the tailstock.
This method of mounting worked nicely and I got to work with a roughing gouge to make a ring shape.
Using a caliper I marked just over 7mm so I could see where the ring needed parting.
I was going to use a parting tool but the thin wood looked pretty fragile so I used my drill press clamp and a fine toothed saw to cut the ring to size.
With the rough wooden ring made I did a bit of fine tuning with sand paper to ensure the metal ring blank was a perfect fit.
After a few test runs of assembling the ring I was ready to glue up. I carefully applied a high viscosity super glue to the metal ring blank, inserting one section at a time into the wood.
Both pieces of the steel ring slot together nicely and assembly was pretty easy if you work fast!
Time for a quick coffee and to mount this bad boy back on the lathe for shaping and finishing.
I made a an adjustment to the jam chuck and used chisels to shape the wooden ring.
After shaping I sanded through a few grits to get a nice smooth feel to the ring.
For finishing I wanted to enhance the colours of the grain and decided against a thick membrane finish like CA glue so I could actually feel the texture and smoothness of the wood against my skin.
I just used a few layers of friction polish on this piece to keep it simple and preserve the feel of the grain.
Finally I scraped away any excess super glue with a craft knife. The end result was a beautiful, tactile ring that I'll be wearing for years to come!
Thank you for watching as always, if you liked this video then help by hitting the like button or even sharing it on social media!
You can find many great turning project kits over at www.bangleguy.com and amazing materials from my fellow craftsmen over at www.emberleaf.com (they make kick ass knives too!).
Subscribe and I'll keep the videos coming – see you in the next one!
Music:
"Danger Storm" Kevin MacLeod (incompetech.com)
Licensed under Creative Commons: By Attribution 3.0 License
http://creativecommons.org/licenses/by/3.0/
Видео How To Make a Ring With a Wood Inlay канала Zebrano Wood Craft
Показать
Комментарии отсутствуют
Информация о видео
Другие видео канала
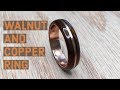 Creating a Walnut and Copper Bentwood Ring
 How to Inlay wood and antler into a ring! Easiest method
 Damascus Steel Ring With Wood Inlay How To
 How to make a silver and turquoise inlay ring without a lathe
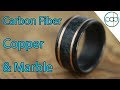 Making a Carbon Fiber, Marble, and Copper Wedding Ring!
 How to Make a Ring with a Stone Inlay | Black and White Ebony and Emerald
 Make a silver ring with wood inlay
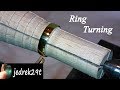 How to make a tool for turning Rings
![[ Making Volcanic Ring ] Amboyna burl wood, Silver 950](https://i.ytimg.com/vi/-tfvLA8HYn4/default.jpg) [ Making Volcanic Ring ] Amboyna burl wood, Silver 950
[ Making Volcanic Ring ] Amboyna burl wood, Silver 950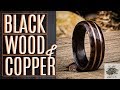 Making a Ring using Copper Wire and African Black Wood on a lathe
 Making a Ring Without a Lathe | Quick Cut 07
 Turning an Artisan Inlay Comfort Ring Core
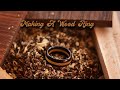 MAKING A WOOD RING!!!
 How To - Inlay Opal and other stone into wood and channel rings
 Creating a Walnut Burl and Crushed Blue Opal Wood Ring
 How to make a gorgeous mixed metal braided ring
 Turning a Pen with a Carbide Turning Tool (How-to Beginners Guide)
 Trustone Ring Tutorial - Making A Stone Inlay Ring (No Crushed Stone, No Soldering)
 Making a Tritium and Damascus Steel Glow Ring