PiPVR: Build your own Raspberry Pi (TV) Personal Video Recorder
Are you trying to cut the cord and ditch cable or satellite TV? Perhaps a Raspberry Pi can help. In this video we'll be installing the free and open source LibreELEC (Libre Embedded Linux Entertainment Center) software appliance on the world's most popular SBC (Single Board Computer).
While this guide uses the latest Pi 4, a third generation model should also suffice - you may even have one lying around in a drawer somewhere. If so, dig it out, you could be pleasantly surprised what such a small device is capable of.
By adding a few inexpensive accessories, we'll then utilise LibreELEC's pre-configured version of Kodi (media player), to set up a Tvheadend server and client - all on the same Raspberry Pi. Once configured, this will enable us to watch and record OTA (Over-The-Air) television broadcasts - even scheduling recordings through the built-in EPG (Electronic Programme Guide).
The video goes step by step through the procedure, hopefully making it easy to follow along. It also demonstrates how to watch the TV recordings on other devices on your home network. So save yourself some money and take control of your television viewing with your very own PiPVR!
Parts list:
Required
* Raspberry Pi (model 3 or 4)
* Micro SD card (16GB minimum)
* Raspberry Pi power supply
* TV/Monitor (with speakers)
* HDMI cable (Micro HDMI to HDMI, for Pi 4)
* TV tuner (Pi TV HAT or USB model)
* TV aerial (and cable)
* USB keyboard
* USB mouse
Optional
* USB 3 external SSD/hard drive (the bigger, the better)
* RF (Radio Frequency) remote control
* Raspberry Pi case
* Small fan
* Powered USB 3 hub (may be required, if the Pi needs more power)
Website links:
Raspberry Pi OS
https://www.raspberrypi.org/downloads/
USB booting on a Raspberry Pi 3
https://www.raspberrypi.org/documentation/hardware/raspberrypi/bootmodes/msd.md
Additional credits:
Earwig Factory font courtesy of typodermicfonts.com (sourced from https://www.1001fonts.com/)
(Original) images sourced from the superb https://pixabay.com/
Видео PiPVR: Build your own Raspberry Pi (TV) Personal Video Recorder канала Byte My Pi
Показать
Комментарии отсутствуют
Информация о видео
Другие видео канала
 Switch to Linux: Getting started with the easy to use Zorin OS
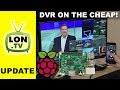 Live TV & DVR on the Raspberry Pi & HDhomerun! Cord Cutting DVR Project Part 3
 Set up your own Network Attached Storage (NAS) with openmediavault (OMV)
 Raspberry Pi 4 Getting Started
 Know How... 31: Make a Raspberry Pi Media Center with XBMC
 Unboxing & Review: Raspberry Pi TV HAT
 An introduction to Raspberry Pi hi-fi
 Awesome 5 Inch IPS Touchscreen For The Raspberry Pi 4! HDMI & Built In Speaker
 How To Connect Your Digital Video Recorder (DVR) To The Internet
 Set up a home server easily with Amahi (Linux)
 MAKING AN IMPRESSIVE SMART AMPLIFIER | Using A Raspberry Pi Zero & PiCorePlayer
 Know How 12...:Make Your Computer a DVR
 Raspberry Pi NOAA Satellite Receiver
 Stream music around the home with Airsonic server - a step by step approach
 Create OSMC Media Center and NAS storage using Raspberry Pi 2
 10 Things You Should Know about Raspberry Pi
 EVERYONE needs to learn LINUX - ft. Raspberry Pi 4
 How to setup wifi on piCorePlayer without Ethernet
 Setup a Raspberry Pi Web Server with Your Own .COM Using Google Domains
 52Pi Fan case. 2.3Ghz Overclock test. Raspberry Pi 4.