Applying a Polycrylic Finish | Acrylic Pour Glossy Finish - Acrylic Pouring for Beginners Episode 5
As a beginner pour artist, at some point you will fall in love with a pour and you will want to apply a glossy finish to your acrylic pour. We recommend using the Minwax Polycrylic to to apply a glossy finish your first pour.
This finish, or varnish, is much less expensive than some of the name brand finishes. When Polycrylic is applied correctly, it can give a beautiful top coat to help protect your paintings and add emphasis to your creations.
There are a few important steps to take when finishing your acrylic pour:
►1. Clean the surface - All dirt, dust, and oils need to be removed
►2. Do your finishing in an location where the temperature will be near 70' Fahrenheit and no more than 50% humidity (See our article on Drying Times of Acrylic pour paintings here https://leftbrainedartist.com/how-long-do-acrylic-pours-take-to-dry/)
►3. Use enough paint -If you are using a brush or pad, the brush strokes should disappear after a few seconds. The paint should not puddle on the edges when brushing or there is too much liquid.
►4. Paint 2 or three thin coats - wait at least 2 hours between coats
Don't miss the previous episodes in our Acrylic Pouring for Beginners Series:
✔Acrylic Pouring for Beginners - Episode 1 - History and Science | https://youtu.be/HeVy8BHHS1o
✔Acrylic Pouring for Beginners - Episode 2 - Supplies | https://youtu.be/0y4IUVaIZMA
✔Acrylic Pouring for Beginners - Episode 3 - Mixing Paint | https://youtu.be/QkfKSzFFKXc
✔Acrylic Pouring for Beginners - Episode 4 - Simple Pour Techniques | https://youtu.be/X6n2jwtuoOg
Arteza Paint - http://shrsl.com/2e2vm - Use code *LEFTBRAINED to get 15% off your order*. Buy the 14 pouch paint set for every more savings.
Find more answers to your questions at ➠ leftbrainedartist.com
DISCLAIMER: We are ambassadors or affiliates for many of the brands we reference on the channel. As an Amazon Associate, I earn from qualifying purchases.
Видео Applying a Polycrylic Finish | Acrylic Pour Glossy Finish - Acrylic Pouring for Beginners Episode 5 канала LeftBrainedArtist
Показать
Комментарии отсутствуют
Информация о видео
Другие видео канала
 Varnish with polycrylic semigloss tutorial! No brush marks and no streaking!✨🤘
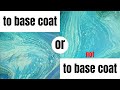 When should you use an acrylic pour base coat?
 Make your own acrylic pour container for UNDER $10 and save 15 minutes of setup time every pour.
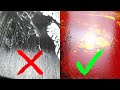
 Never use high gloss varnish to finish your art!
 Acrylic pour with HAIR DRYER Tip and Tricks
 How NOT to do a Dutch pour - Beginner mistakes and easy instructions
 Cheapest acrylic pour blooms - Easy too!
 Acrylic pour finish with NO BRUSH MARKS! - Easy acrylic pour varnish method
 #169 Learn 20 acrylic pour techniques, cool art ideas compilation satisfying video
 Painting RAIN using THE MOST AMAZING technique you will ever see!!!
 #113 Varnishing Your Acrylic Pour Painting
 #91 MUST SEE - 2 Ingredient US Floetrol Cell Activator Tests | Acrylic Pour Painting | Fluid Art
 Acrylic pour layering - Thick or thin? Which works better?
 You're doing cells all wrong! How to get cells with silicone
 Pouring Medium Throwdown - Review of 11 Pouring Mediums along with a recommendation of ones to avoid
 10 Acrylic Pour Tips from my viewers - Things they wish they knew before acrylic pouring!
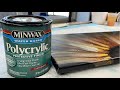 How I Finish My Acrylic Pour Paintings with Polycrylic: Step by Step Tutorial
 Properly store your acrylic pour paint so it doesn't go bad