TUTORIAL: Editing virtual recital videos using Canva + Adobe Premiere Rush
For more about this tutorial, visit: https://colorinmypiano.com/tutorial-editing-virtual-recital-videos-using-canva-adobe-premiere-rush
JUMP TO A SECTION:
0:30 An example of an edited student video with an animated and ending screen.
1:08 Browsing the templates at Canva.com and saving them to your "Likes" folder.
3:20 Selecting a template and using it as a starting point.
4:22 Getting the right dimensions for your video project (e.g., 1920x1080, 1080x1920 or 1080x1350). This step is the magic that allows you to use ANY template you find in Canva as a starting point for your project!
7:10 Opening a new custom project in Canva using your project's dimensions.
8:30 Copying the template's elements into your project.
10:57 Editing the template to suit your needs.
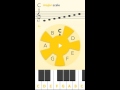
11:30 My Handdrawn Music Notes & Symbols set, used for my ending screen.
12:45 Resizing, recoloring, rotating, centering, adding text, etc.
17:00 Adding animation.
19:00 Downloading from Canva.
20:15 Keeping your files organized for your project.
22:30 Starting a new project in Adobe Premiere Rush.
23:50 Editing your video: moving things around on the timeline, trimming, layering the opening/ending screens, adding transitions, timing the applause track (I got mine from FreeSoundEffects.com), etc.
30:40 Downloading your finished video.
32:05 A peek at some of the different opening screens I designed for my student videos.
Видео TUTORIAL: Editing virtual recital videos using Canva + Adobe Premiere Rush канала Joy Morin
JUMP TO A SECTION:
0:30 An example of an edited student video with an animated and ending screen.
1:08 Browsing the templates at Canva.com and saving them to your "Likes" folder.
3:20 Selecting a template and using it as a starting point.
4:22 Getting the right dimensions for your video project (e.g., 1920x1080, 1080x1920 or 1080x1350). This step is the magic that allows you to use ANY template you find in Canva as a starting point for your project!
7:10 Opening a new custom project in Canva using your project's dimensions.
8:30 Copying the template's elements into your project.
10:57 Editing the template to suit your needs.
11:30 My Handdrawn Music Notes & Symbols set, used for my ending screen.
12:45 Resizing, recoloring, rotating, centering, adding text, etc.
17:00 Adding animation.
19:00 Downloading from Canva.
20:15 Keeping your files organized for your project.
22:30 Starting a new project in Adobe Premiere Rush.
23:50 Editing your video: moving things around on the timeline, trimming, layering the opening/ending screens, adding transitions, timing the applause track (I got mine from FreeSoundEffects.com), etc.
30:40 Downloading your finished video.
32:05 A peek at some of the different opening screens I designed for my student videos.
Видео TUTORIAL: Editing virtual recital videos using Canva + Adobe Premiere Rush канала Joy Morin
Показать
Комментарии отсутствуют
Информация о видео
Другие видео канала
 Improvising using the Musiclock app
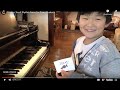 Trick-or-Treat! Rhythm Game for Piano Students
 Bach Invention in A Minor BWV 784, played by Joy Morin
 Nate plays Bigfoot by Kevin E. Cray
 Piano teaching quote: “Success is the best motivation.”
 How to produce "fiery, good beginner" piano students instead of "masters of mediocrity"
 Contemplation by Joy Morin
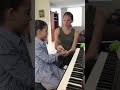 Piano Lesson Activity: Tone Production at the Piano
 Rania plays "The Wind" Piano Composition
 Emma S. plays Higgledy Piggledy Jazz by Elena Cobb
 The 12 Days of Christmas played by pianists from Joy Morin Piano Studio
 Joy plays The Office theme (piano, melodica, shaker, drum, and clave)
 Ela plays "Jesus, We Adore You"
 Incidental Music for Piano: 12 Extendable Pieces for the Young Silent-Film Pianist -- Audio Excerpts
 Slideshow: Studio Christmas Party - 17 December 2011
 Piano Studio of Joy Morin - Celebrating 2011-2014
 12 Days of Christmas...Music Teacher Edition!
 Video Walkthrough: The 12 Days of Christmas Project
 Isabella N. plays Simplicité by Joy Morin
 Noah B plays London Bridge and original composition