How to Line Isolation Test an AC System
Bryan explains how to detect line set leaks and do a line isolation test in 9 steps. If you’re struggling to find a leak in a split system’s line set, you may consider performing a line isolation test as a last resort.
As we experience more and more copper corrosion and pinhole leaks in ductless line sets, thorough leak detection and line isolation tests will become even more valuable procedures.
First, you’ll want to perform a thorough leak check on the system. You may check for leaks with a pressure test. If there is refrigerant in the system, you will want to check for leaks with a quality electronic leak detector, such as the Bacharach H-10 (https://www.trutechtools.com/Bacharach-H10-Pro-Univ) or Fieldpiece DR82 (https://www.trutechtools.com/fieldpiece-dr82-infrared-refrigerant-leak-detector.html). No matter which leak detector you choose, use it slowly and maintain it properly.
You can run a heat pump in heat mode to increase pressure in the evaporator and make leak detection easier. Run the leak detector into the chase to check for leaks there. If you still can’t find a leak, then it may be time for a line isolation test.
Before doing the line isolation test, you’ll pump down the system by closing both service valves at the condenser. Crack the suction valve open about two turns. Make sure the system runs in cooling mode, and watch for the gauge pressure to drop about 10 PSI. Remember, you want to pump down as best as you can to avoid dealing with the possible cross-contamination of recovery. Tighten the suction line and pull the disconnect once you’ve finished.
Before you can install a service port on the liquid line side of the evaporator, you must isolate the evaporator. Then, you cut the copper line and pinch it off. If you install a Schrader core, you can pressurize the line set and the evaporator coil.
When you do your pressure test on the lines and evaporator coil, you should use nitrogen in accordance with the low-side pressure test protocol. Watch over the system and note any pressure drops over at least an hour. (We recommend using Fieldpiece Job Link probes: https://www.fieldpiece.com/product-category/job-link-system/.) While the system is under pressure, go back into the condenser with a leak detector and check it once more.
Once you find and fix the leak, it’s a good idea to identify the source of corrosion and develop measures to avoid letting the issue happen again. Then, you can release your nitrogen and begin closing up the system. Reattach the copper lines to the evaporator and change out your liquid line drier.
After you’ve put everything back in order, perform one more pressure test. Use a bubble solution to check your braze joints, too. We recommend using Big Blu from Refrigeration Technologies (https://www.refrigtech.com/big-blu/). Once all of those have been taken care of, pull your vacuum below 500 microns to perform a decay test. Then, you can open the system for service by opening the suction side valve and then the liquid side valve. You would perform many of these final procedures on new installs as well.
Check out information on the 2022 HVACR Training Symposium at https://hvacrschool.com/symposium/.
Read all the tech tips, take the quizzes, and find our handy calculators at https://www.hvacrschool.com/.
Видео How to Line Isolation Test an AC System канала HVAC School
Показать
Комментарии отсутствуют
Информация о видео
Другие видео канала
 Which Leak Detection Method is Best? Craig vs. Bryan Cage Fight
 Liquid Line Temperature
 HVAC Refrigerant Recovery Machine, Hose, Tank, & Tool Setup and Procedure!
 How to Measure Total External Static Pressure (TESP)
 THE AC KEEPS TRIPPING THE BREAKER
 How to Read SUPERHEAT and SUBCOOLING
 How to Braze Air Conditioning Copper
 How to Find Refrigerant Leaks - Kalos Meeting
 HVAC 153 Nitrogen Pressure test with Analogue gauges
 Setting a Refrigerant Charge by Subcool
 How to Test an Overheated Compressor (Diagnosis & Causes)
 Refrigerant Overcharge Troubleshooting and Prevention
 Charging R-410A Refrigerant into an Air Conditioner! Pressures, Temps, Tips!
 How to Leak Test an AC With Nitrogen Pressure
 Run Capacitor Fundamentals Class
 Testing if an HVACR Compressor is Shorted to Ground, Open, or Overload Tripped!
 How To Repair WATER DAMAGED DRYWALL CEILING- Step by Step
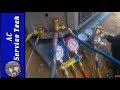 HVAC Pressure Testing a Refrigerant Line with Nitrogen!
 How to Evacuate an AC system, Full Vacuum Procedure