Anyone Who Does THIS With Flower Pots Will Never Go Broke Again
4 Ways To Save Money With Flower Pots | Did you know that you can use flower pots for so many other things than just housing flowers and plants? Sounds crazy, but it's true! In fact, you can easily build household appliances from them, which are not only practical, but also great money savers! Go ahead and fashion these 4 crafts and you'll be saving a bundle in no time.
Thanks for watching and don't forget to subscribe for more DIY crafts & projects, genius life hacks, clever tips & tricks, valuable health hacks, and fun facts: https://www.youtube.com/cleverly_diy?sub_confirmation=1
Bookmark Article: https://www.cleverly.me/4-flower-pot-crafts/
Save on Pinterest: https://bit.ly/2llz6HB
******************************************************
1. Refrigerator
You'll Need:
- large ceramic flower pot
- smaller ceramic flower pot
- duct tape
- sand
- pot lid
- dish towel
Here's How:
1.1 Cover the hole on the bottom of the larger flower pot with duct tape.
1.2 Cover the bottom of the flower pot with sand.
1.3 Cover the hole on the bottom of the smaller flower pot with duct tape and place it inside the larger pot. Fill the space between the two pots with sand.
1.4 Pour water into the space until the sand is completely soaked.
1.5 Place drinks and whatever else you want to stay cool in the smaller pot and cover with a lid and dish towel. Now there's no need to pay a fortune to keep the fridge running and it's especially handy when you're outdoors or don't have easy access to electricity.
* * * * *
2. BBQ Lid
You'll Need:
- large ceramic flower pot
- washers
- nuts
- u-hook
Here's How:
2.1 Drill two holes in the bottom of the flower pot — make sure the holes are the same distance apart as the u-hook.
2.2 Screw two nuts onto the u-hook.
2.3 Place two washers on the drilled holes and carefully slide the u-hook through the holes.
2.4 Turn the pot over and tighten the nuts to secure the u-hook.
2.5 Now you have your very own grilling lid! If you want to give something a nice smoky flavor, just throw it on the grill, cover with your new BBQ accessory, and let it cook. You'll get great flavor and save on all those oven costs!
* * * * *
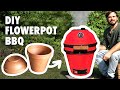
3. Grill
You'll Need:
- large ceramic flower pot
- cake pan
- charcoal briquettes
- grill grate
Here's How:
3.1 Drill four holes in the bottom of the flower pot.
3.2 Drill several holes in the bottom of a cake pan.
3.3 Place the pan in the bottom of the flower pot and fill it with charcoal briquettes.
3.4 Place the grill grate on top and get cooking! You'll save tons on a big, fancy, expensive grill.
* * * * *
4. Heater
You'll Need:
- large ceramic flower pot
- smaller ceramic flower pot
- threaded rod
- nuts
- washers
- 2 bricks
- small plate
- 2 tea lights
Here's How:
4.1 Screw a nut and a washer onto the end of the threaded rod.
4.2 Slide the larger flower pot over the threaded rod. Stand the larger pot on its head and feed the bolt through the hole in the middle. Then turn the pot over. It should now be standing on the washer and the nut. Now place another washer on the bolt and screw a bolt on. Then, again, place another washer on the bolt before sliding on the smaller pot, followed by the last washer and the last nut.
4.3 Place the bricks parallel to each other on the floor. Leave space in between for your heat source: a plate with the lit tea lights. Finally, set the upturned clay pot construction on the top of the bricks. The pots should be directly over the tea lights. Heating is expensive in winter, but that won't be a problem for you after you get this contraption up and running.
* * * * *
Now that summer is officially over, you probably have quite a few empty flower pots lying around — it's about time you put them to good use!
******************************************************
Do you want to see more content like this? Cleverly brings you clever tips, tricks & life hacks to simplify everyday life, so be sure to subscribe, like, and follow us for a first-hand look at new videos that you can share with your family & friends!
YouTube: https://www.youtube.com/Cleverly_DIY
Facebook: https://www.facebook.com/cleverly.me
Pinterest: https://www.pinterest.com/Cleverly_DIY
Website: https://www.cleverly.me
******************************************************
Видео Anyone Who Does THIS With Flower Pots Will Never Go Broke Again канала Cleverly
Thanks for watching and don't forget to subscribe for more DIY crafts & projects, genius life hacks, clever tips & tricks, valuable health hacks, and fun facts: https://www.youtube.com/cleverly_diy?sub_confirmation=1
Bookmark Article: https://www.cleverly.me/4-flower-pot-crafts/
Save on Pinterest: https://bit.ly/2llz6HB
******************************************************
1. Refrigerator
You'll Need:
- large ceramic flower pot
- smaller ceramic flower pot
- duct tape
- sand
- pot lid
- dish towel
Here's How:
1.1 Cover the hole on the bottom of the larger flower pot with duct tape.
1.2 Cover the bottom of the flower pot with sand.
1.3 Cover the hole on the bottom of the smaller flower pot with duct tape and place it inside the larger pot. Fill the space between the two pots with sand.
1.4 Pour water into the space until the sand is completely soaked.
1.5 Place drinks and whatever else you want to stay cool in the smaller pot and cover with a lid and dish towel. Now there's no need to pay a fortune to keep the fridge running and it's especially handy when you're outdoors or don't have easy access to electricity.
* * * * *
2. BBQ Lid
You'll Need:
- large ceramic flower pot
- washers
- nuts
- u-hook
Here's How:
2.1 Drill two holes in the bottom of the flower pot — make sure the holes are the same distance apart as the u-hook.
2.2 Screw two nuts onto the u-hook.
2.3 Place two washers on the drilled holes and carefully slide the u-hook through the holes.
2.4 Turn the pot over and tighten the nuts to secure the u-hook.
2.5 Now you have your very own grilling lid! If you want to give something a nice smoky flavor, just throw it on the grill, cover with your new BBQ accessory, and let it cook. You'll get great flavor and save on all those oven costs!
* * * * *
3. Grill
You'll Need:
- large ceramic flower pot
- cake pan
- charcoal briquettes
- grill grate
Here's How:
3.1 Drill four holes in the bottom of the flower pot.
3.2 Drill several holes in the bottom of a cake pan.
3.3 Place the pan in the bottom of the flower pot and fill it with charcoal briquettes.
3.4 Place the grill grate on top and get cooking! You'll save tons on a big, fancy, expensive grill.
* * * * *
4. Heater
You'll Need:
- large ceramic flower pot
- smaller ceramic flower pot
- threaded rod
- nuts
- washers
- 2 bricks
- small plate
- 2 tea lights
Here's How:
4.1 Screw a nut and a washer onto the end of the threaded rod.
4.2 Slide the larger flower pot over the threaded rod. Stand the larger pot on its head and feed the bolt through the hole in the middle. Then turn the pot over. It should now be standing on the washer and the nut. Now place another washer on the bolt and screw a bolt on. Then, again, place another washer on the bolt before sliding on the smaller pot, followed by the last washer and the last nut.
4.3 Place the bricks parallel to each other on the floor. Leave space in between for your heat source: a plate with the lit tea lights. Finally, set the upturned clay pot construction on the top of the bricks. The pots should be directly over the tea lights. Heating is expensive in winter, but that won't be a problem for you after you get this contraption up and running.
* * * * *
Now that summer is officially over, you probably have quite a few empty flower pots lying around — it's about time you put them to good use!
******************************************************
Do you want to see more content like this? Cleverly brings you clever tips, tricks & life hacks to simplify everyday life, so be sure to subscribe, like, and follow us for a first-hand look at new videos that you can share with your family & friends!
YouTube: https://www.youtube.com/Cleverly_DIY
Facebook: https://www.facebook.com/cleverly.me
Pinterest: https://www.pinterest.com/Cleverly_DIY
Website: https://www.cleverly.me
******************************************************
Видео Anyone Who Does THIS With Flower Pots Will Never Go Broke Again канала Cleverly
Показать
Комментарии отсутствуют
Информация о видео
Другие видео канала
 DIY Kamado BBQ grill - from Flowerpots
 Building the Ultimate Grill Bottle from Scrap Materials / All in one cooking station!
 DIY Flower Pot Grill & Smoker
 21 TRICKS TO BECOME A BBQ MASTER WITH THESE EASY COOKING HACKS
 Making a pizza oven is simple _ The idea of broken jars
 Churrasqueira Completa Faz Grelhados, Defumados, Bafo, Assa Pão, Pizza, Tudo no Pote de Barro.
 Simple Terracotta clay pot heater
 Flower Pot Heater redesign. This one works.
 The idea of making a unique grill for the family
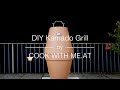 DIY Kamado Grill - Flowerpot Smoker Galileo - COOK WITH ME.AT
 CLAY POT with TEA LIGHTS Room Heating | 4HR DIY Test
 DIY Cheap Exercise Ball Pizza Oven
 How to make your own Primitive Clay Oven from Pot/ Underground Tandoor DIY in Canada
 Terra-Cotta BBQ Smoker
 How To Make Clay Tandoor/Oven At Home Pakistan/India/Midleeast Style
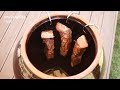 (SUB)🔥🏺항아리삼겹살훈제바베큐|Pork BBQ Cooked Charcoal Pot Oven Korean Style(Clay Pot Roasted pork belly)항아리화덕
 EMERGENCY HEAT & LIGHT FOR 72 DAYS // CRISCO CANDLES // NINTH ELEMENT
 OLD AND DAMAGED MICROWAVE OVEN ??? What a Clever Project you can Make from an Old Мicrowave Оven ?
 How to Build Your Own High-Performing Wood-Fired Pizza Oven from Bricks