Lara Bag - waist pack & crossbody bag version - sewing tutorial
The Lara bag project comes in 2x fun versions, the waist-pack and crossbody bag. Finished bag measurements : 8 1/2" x 5"
Download the PDF pattern here : https://bit.ly/3I1wxQw
Note : The making of the body of the bag is the same for either version, except for the strap, if you wish to make this into a crossbody bag version, skip the side wings panels, and make the d-ring tabs instead as shown at 18:26
In this video also demonstrated how to do the improv piecing at 4:14
Subscribe to this channel : https://bit.ly/3h5oWl5
Supplies
Main Fabric : 1/3 yard of cotton quilting fabric
alternative fabric choice : canvas, linen, home decor, denim
Lining Fabric : 1/3 yard of cotton quilting fabric
1/3 yard fusible woven interfacing - Pellon SF 101 (20“ wide) https://amzn.to/346atRJ
RFID blocking fabric (optional) 9 1/2” x 12“ (24 x 30.5 cm) https://tidd.ly/3ka0GC2
1x all purpose zipper #3 1” (2.5cm) wide at least 10” (25.4 cm) long for the zipper pocket
1x purse zipper or all purpose zipper at least 9“ (23cm) long for the zipper closure
1/4” basting tape https://amzn.to/3xKhpBH
*if opt waist pack version
1 set of side release buckle and adjustable slider 1“ (2.5 cm) https://amzn.to/3rdT1rz
1 1/2 yard of webbing strap 1” (2.5 cm) wide
*if opt crossbody bag version
2x d rings 1/2“ (12mm)
2x swivel hooks 1/2” (12mm) https://amzn.to/3CJ2GcJ
1/2” (12mm) adjustable strap slider https://amzn.to/3CJ2GcJ
The link to the hardware installation of the crossbody adjustable strap https://youtu.be/5gXCuaj5b_4?t=2366
Visit my Amazon Store for recommended supplies, tools, and notions : https://www.amazon.com/shop/yoansewingstudio
Note : Some of the links above are affiliate links; I may earn commission when you make a purchase of qualifying items
through any of those links with no additional charge.
Time Stamps
Intro 0:00
Front exterior panels 1:27
Preparing the zipper for the front zipper pocket 1:39
Attaching the zipper tab 1:48
Installing the zipper pocket 2:24
Trimming the bottom of the front exterior 3:54
Back exterior 4:06
Improv piecing 4:14
Interior panels 6:05
Card pocket 6:15
Installing the card pocket/back slip pocket 8:52
Sewing the slip pocket (front interior) 9:07
Adding the RFID blocking fabric 9:29
Sewing the side wings (for waist-pack version) 9:46
Preparing the zipper closure 11:13
Attaching the zipper tabs for zipper closure 11:30
Installing the zipper closure 12:25
Assembling the bag 13:43
Sewing the strap (for waist-pack version)
Crossbody version 18:10
Attaching the d-ring tabs (crossbody version) 18:26
Adjustable strap (crossbody version) 18:59
Closing 19:41
Find me on another platforms
Instagram : https://www.instagram.com/yoansewingstudio/
Facebook :https://www.facebook.com/yoansewingstudio/
Pinterest : https://www.pinterest.com/yoansewingstudio
Website : https://www.yoansewingstudio.com
If you wish to share what you make : #yoansewingstudio / tag me on Instagram, or post directly on my Facebook page.
Видео Lara Bag - waist pack & crossbody bag version - sewing tutorial канала YoanSewingStudio
Показать
Комментарии отсутствуют
Информация о видео
Другие видео канала
 Attaching the handle holder - Biru Backpack Project
 The Bitsy Bag Project - Sewing Tutorial
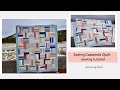 Scrappy rail fence - spring casserole quilt - sewing tutorial - how to sew
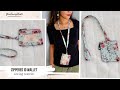 Zippered ID wallet sewing tutorial - minimalist wallet with ID window - how to sew
 sew a wrap skirt with me - NEWLOOK pattern 6456 - Vlog 1
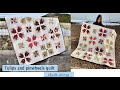 Tulips and Pinwheels Quilt - stash busting project - Quilt along
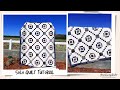 Solo Quilt Project - Sewing Tutorial
 Let's sew a backpack - Biru backpack project
 Upcycled baby onesies to a cute stuffie - Sewing tutorial Archie the stuffie
 make a quick and easy wall hanging with half square triangles
 The Octagon Quilt Patchwork - Sewing Tutorial with free pattern
 The Serene Stars Quilt along - Sewing Tutorial
 Modern Child Quilt - I spy stars and cars - sewing tutorial
 Serene Sling Bag sewing tutorial - Design 1&2 - how to sew
 Slouchy boho tote Bag- Sewing Tutorial - With pockets
 DIY quilted potholder/ oven hot pad project - vlog #2
 sew a patchwork pillow from fabric scraps
 assembling the wallet/ finishing
 Patchwork reversible half apron sew along - Using charm packs
 five-slice layer cake Quilt tutorial - scrappy & modern layer cake quilt pattern
 drawstring bucket bag sewing tutorial - with adjustable strap and pockets