Mini Mill: Replacement/upgrade of the drive and hand controls, plus adding a tachometer
The Sieg X2D Mini Mills are popular hobbiest machine tools, but the quality of the electronics is really, really poor. Brand new, the mill I got from Little Machine Shop couldn't even drill a pilot hole without overloading and shutting off, making it completely useless.
In this video I'll show you how to replace the motor drive (the electric board that runs the motor) with a quality one that leaves room to grow, upgrade all of the controls like the power switch and speed control, add in a real E-Stop button and add on a tachometer to boot!
Now, this is not a super-low-cost upgrade ($250-ish when I published this), but it's reasonable and should provide a lifetime of use. Plus it actually works.
CAD: Fusion 360
3D Printer: Lulzbot TAZ6
3D Slicer: Cura
STL Files:
https://github.com/yoshimoshi-garage/public-projects/tree/main/Mill%20Motor%20Control
Parts used:
LED Driver (power for the tach): https://amzn.to/3woOC5n
Digital Tachometer: https://amzn.to/2PAehY4
PETG Printer filament: https://amzn.to/3dzyqFx
Heat set inserts: https://amzn.to/3wvHKTy
Motor Drive:
https://www.automationdirect.com/adc/shopping/catalog/gsd5-240-10c
Speed potentiometer:
https://www.automationdirect.com/adc/shopping/catalog/ecx2300-5k
22mm Power switch:
https://www.automationdirect.com/adc/shopping/catalog/gcx1252-120l
22mm E-Stop Button:
https://www.automationdirect.com/adc/shopping/catalog/gcx1131
E-Stop Legend Plate:
https://www.automationdirect.com/adc/shopping/catalog/ecx1651
Видео Mini Mill: Replacement/upgrade of the drive and hand controls, plus adding a tachometer канала Yoshimoshi
Показать
Комментарии отсутствуют
Информация о видео
Другие видео канала
 Upgrading The Sieg X2D Mini Mill - Air Spring Install Guide
 Mini Mill: Converting the Lead Screws to NOT Insane Thread Pitch
 Mini Mill Tachometer and Spindle Lock
 So cheap they didn't even finish
 Replacing DC motor on my mini mill and making cooling modification
 Litttle Machine Shop Mill - Custom Modifications and DRO Installation (65)
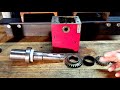 New gears for the mini-mill and a homemade shop press.
 Mini Mill Spindle speed RPM Meter Installation
 HARBOR FREIGHT MINI MILLING MACHINE- SPEEDWAY SERIES REVIEW AND TESTING
 DIY Spindle Square | Tramming a Mini Mill The Easy Way
 Mini Lathe Repair - Restoration - part 2 - Metal H/L Gears
 How To Test & Fit A Potentiometer Speed Controller On The Chinese Mini Lather
 Mini Mill: Installing the LittleMachineShop Belt Drive Conversion
 Unboxing: The LittleMachineShop 4962 SIEG X2D Mini Mill
 #MT9 - Gas Strut Conversion on Sieg SX2P Mini-Mill. By Andrew Whale.
 Minimill Belt Drive Upgrade Part Two
 Seig Mini Mill Belt Drive Upgrade Done. Now it has something in common with a Bridgeport mill
 Mini Mill Digital Tachometer
 seig x2 7 quill backlash
 How to access the gearbox on a mini mill to repair or regrease the gears