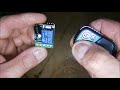
How to use: 1 Channel DC12V Remote Control Switch with 2 button remote control
433Mhz Universal Wireless Remote Control Switch DC 12V 1CH relay Receiver Module and RF Transmitter 433 Mhz Remote Controls 1527 with 2 button
From:
https://www.aliexpress.com/store/product/433Mhz-Universal-Wireless-Remote-Control-Switch-DC12V-1CH-relay-Receiver-Module-and-RF-Transmitter-433-Mhz/1456073_32716729232.html
https://rodot.tech/products/433-mhz-superheterodyne-rf-receiver-and-transmitter-module-ask-kits-with-antenna-for-arduino-uno-diy-kit-433mhz-remote-controls
About Working mode:
About Working mode:
1. Momentary/Jog: Press and hold -- on; Release -- Off
Keep pressing one button , the corresponding channel is working /on;
Loosen your finger is stop/OFF .
"4 channel switch"receiver" need 4 button remote control "transmitter "
2. Toggle/Self-Lock: Press -- on; Press again -- Off
Press one button for one time , the corresponding channel is working/on;
Press the same button again is stop/OFF .
"4 channel switch "receiver" need 4 button remote control "transmitter" ".
3. Latched/Inter-Lock: Press -- on; Press other button -- Off
Press one button for one time, the corresponding channel is working/on;
Press another button is stop/OFF"At the same time, another corresponding channel works" .
" 4 channel switch " receiver" need 4 buttons remote control "transmitter".
Clearing the code :
Push the learning button on the receivers for 8 times , the codes will be cleaned .
After clear the code, all the remote control cannot work any more.
Learning the code :(momentary)
Push the learning key on the receiver once time , it comes into momentary setting mode .
Wait for a moment , the LED will be off , it comes into learning state .
Push the remote button , LED indicator on the receiver board will flash then come off .
After 3 seconds, the LED indicator will be on again , learning successfully .
Learning the code : ( Toggle )
Push the learning key on the receiver twice time , it comes into toggle setting mode
Wait for a moment , the LED will be off , it comes into learning state .
Push the remote button,LED indicator on the receiver board will flash then come off.
After 3 seconds , the LED indicator will be on again , learning successfully .
Learning the code :( Latching )
Note: When you choose for latching mode , in order to learn more remote control , you need to learn two different button , the first time learnt is for "ON", the second time learnt for "OFF".
For example : button A = ON , button B = OFF
Push the learning key on the receiver triple time , it comes into latching mode .
Wait for a moment , the LED indicator on the receiver board will flash then come off.
Push the remote button A .
LED flash for 5 times .
Push the remote button B .
Led flash for 5 times .
After 3 seconds , the LED indicator will be on again , learning successfully.
A = ON , B = OFF .
Learning the code :( Time delay mode )
Push the learning key on the receiver forth time , the time dealy for 5 seconds .
Push the learning key on the receiver fifth time , the time delay for 10 seconds .
Push the learning key on the receiver sixth time , the time delay for 15 seconds .
The LED indicator will be off .
Push the remote button , LED flashes and off .
After 3 seconds , the LED indicator will be on again , learning successfully .
Видео How to use: 1 Channel DC12V Remote Control Switch with 2 button remote control канала qiachip.com
Показать
Комментарии отсутствуют
Информация о видео
Другие видео канала
 ⚡come programmare un radiocomando 433 Mhz a codice fisso ( tutorial )
 แนะนำรีโมทควบคุมสวิทช์ เปิดปิดไฟ ระยะไกลไร้สาย DC12V 10A delay 1 Ch Remote Control Switch
 How to Make Remote Control Door Lock at Home
 How to use : Wireless Remote Control Switch AC 250V 110V 220V 2CH Receiver and RF Remote Controls
 กดปุ่มได้ 3 แบบ วิธีใช้รีโมทอัจฉริยะ เปิดปิดไฟ
 WIRELESS RELAY SWITCH HOW TO AND REVIEW
 DIY Smart Switch - Part 1 how to use a relay
 Remote control switches for Lights and Fans | Wireless Remote Control Switch | Buy Amezon
 New RF Remote Control Switch for ( Light and Fan )
 Cara Pasang Saklar REMOTE WIRELESS RF 433 Mhz DC 12 Volt
 diy Wireless remote how to set bind 433mhz remote kill switch motorcycle
 2-CH RF Wireless RC Relay Module: DC Motor Forward/Reverse Direction Control
 AC 220V Multimode Learning Wireless Remote Control Switch 1-channel Relay Receiver Module
 Smart Home 433Mhz DC 12V 1CH Wireless Remote Switch Relay Receiver Transmitter
 remote control dc 12v universal 433mhz
 ON/OFF Home Appliance With Remote control Switch Only Rs.367 Only | Remote control switches
 AK-RK01SY
 Menyalakan Lampu LED 12 volt Dengan Remote Wireless 433MHz Receiver 1 Channel 12 volt - delay
 Reverse DC Motor By 2 Channel Simple RF Remote Control
 CÓMO CONFIGURAR E INSTALAR UN CONTROL REMOTO INALÁMBRICO ON OFF