The GENIUS way he lights up his windows for Christmas!
With the holiday season around it's time to head to Dollar Tree and grab some inexpensive foam boards.
The first thing I gotta do is put all of the foam that I have up against the window. I'm going to lay it on its side or straight up. This is going to give me an idea of what I want to do. This one is a snowman. I made a silhouette with a projector and just put it across the first foam board, outlining it right around the edges. It can be something other than perfect but we want to get a good outline so it's easier to cut out.
Place some cardboard under the foam board. You can use an X-Acto Knife or any kind of razor knife to cut through. Go slowly and be careful because these knives are sharp. Cut all the way around, the edges don't have to be exact but just go ahead and cut. Make sure you get through all the way. There's nothing more frustrating than not being able to get it out so once you cut it through take little sections out at a time. This makes it a lot easier, especially around these bigger projects.
This next one is a bunny rabbit that we have that's standing up on its hind legs. I'm using a different knife on this one just to demonstrate that you don't have to stick with just the X-Acto Knife.
We cut out the whole thing right around the edges and we'll just pop that rabbit out if any edges stick just use your knife to cut it around and then just give it a pop these foam boards come across and come apart nice and easy. The next thing we've got to do is put these silhouettes right up against the window. It doesn't take much but I'm going to use some white tape, that way it doesn't show against the white background. Take the tape, and circle it up on each other. It doesn't take much for this one, I just needed two of them and I'm gonna place it in the window.
Now, something I noticed was when I put lights behind my Silhouette, the lights show through, so take some black or royal blue and paint the back side of your Silhouettes now this might look like a mess but it actually has a rhyme and a reason for it take those lights. These are 20-foot strands and place it all up in the back of the Silhouettes not too close to the edges but as you can see this is a test and it's going to look really good.
The next thing we got to do is put another layer on. I took four pieces of the foam board and put them together with white tape. Then did a cut-out of a large Christmas tree and then put it on there. Now this one doesn't stick exactly against the window but holds up a little bit because we're going to put a little bit of a shadow in there. Once we do this, we're gonna head outside and we're gonna see what it looks like with it lit up and you can see we added a little bit of blue behind the Christmas tree, and look at this, so amazing! It just lights up for everybody out on the street to see.
I hope this inspired you to build your own holiday window silhouette.
Hometalk | Ideas you can do.
Get our daily email for endless DIY ideas: https://ht.hmtlk.com/l/4VfU
FACEBOOK → https://www.facebook.com/Hometalk
INSTAGRAM → https://www.instagram.com/hometalk
PINTEREST → https://www.pinterest.com/hometalk
TIKTOK → https://vm.tiktok.com/ne4T87
#diy #hometalk #christmas #christmasdecor #christmas2022 #christmasdiydecor
Видео The GENIUS way he lights up his windows for Christmas! канала Hometalk
Показать
Комментарии отсутствуют
Информация о видео
Другие видео канала
 19 GENIUS Christmas ideas to save for 2023!
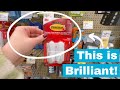 Grab a command hook for this GENIUS Christmas idea!
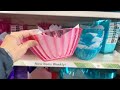 25 Quick, Easy & CUTE 💌❤️DIY Valentine's Decorations❤️💌
 13 outdoor decorating ideas using Dollar Store items you won't believe!
 29 brilliant room makeover ideas (that only LOOK expensive!)
 The BRILLIANT flooring makeover DIYers are obsessed with.
 Fake high-end home decor with these BRILLIANT DIY ideas!
 Why everyone LOVES what she did with this $2.49 bowl!
 Triple your closet storage (for $20) by doing THIS!
 Lay a tray on 6 pool noodles for this genius outdoor hack!
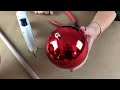
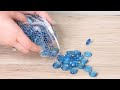 Pour Dollar Store gems into glue to make jaw dropping home decor!
 Why everyone's saving their leftover boxes to make THIS on their walls!
 🐰 Hop into Spring With These 16 DIY Easter Bunny Ideas 🐰
 Everyone's OBSESSED with these genius Christmas hacks!
 How she turned her messy closet into an amazing "mom sanctuary"
 Spectacular ways to save THOUSANDS on wedding decor!
 The brilliant reason everyone's buying Dollar Store mini crates this fall!
 Stick an old phone book into a pot... (BRILLIANT!)
 The Christmas idea that's BLOWING UP on TikTok
 The brilliant reason she grabs a Dollar Store vase