HOW TO REMOVE TRIM LIKE A PRO! Don't mess up your trim and casings...
AFFILIATE TOOL LINKS:
Channellock Nail Nipper (Nail Puller)
https://amzn.to/3rkjjFR
5-in-1 Painters Tool:
https://amzn.to/3sV9Xkj
Stanley Utility Knife:
https://amzn.to/38bwz8c
Estwing 16 oz. Hammer:
https://amzn.to/3uYdtMD
(These are affiliate links. When you shop through these links, we receive a small commission at NO EXTRA CHARGE TO YOU. We greatly appreciate the support!)
FOLLOW US ON INSTAGRAM:
https://www.instagram.com/thehonestcarpenter
FOLLOW US ON LINKEDIN:
https://www.linkedin.com/in/thehonestcarpenter
Removing trim and interior casings can be trickier than it seems. This video from THE HONEST CARPENTER will show you how to remove trim safely and carefully with just a few hand tools!
Be sure to visit us at...
www.thehonestcarpenter.com
How To Remove Trim and Casings
Tools:
Hammer
Utility Knife
5-in-1 Painter's Tool
Trim Pry Bar
Nail Puller / Nipper
Steps:
1) Score and lightly cut all caulk seams on the trim with a sharp utility knife. But be careful! Don't slash the trim itself, and don't cut your fingers. Keep your free hand out of the way.
2) Separate caulk lines with a 5-in-1by tapping the blade of the tool into the seam with the bevel facing towards the wall.
3) Work your way along the entire seam gently tapping in the 5-in-1 blade. When you reach the end, start back in the other direction. Begin forcing the blade into the gap and prying out gently.
4) Focus on nail locations. These are the actual points where the trim is being held in place.
5) When trim is separated from the wall about 1/8" to 1/4", use the trim pry bar to pry a little more forcefully. You can also use a hammer--but always be sure not to bruise or scar the surrounding areas. Prying force should only be applied INTO areas that will be covered up later. Use a flat block or pad to pry against to prevent bruising or breaking drywall or other trim.
6) When nails begin to pry out, switch over to pulling on the trim piece with your hand. Make sure it doesn't lever too hard against the wall or any surrounding trim. Work it out gently. Also, don't get poked by any nails!
7) When the piece is fully removed, use a nail puller to pry out nails from the BACK of the piece. This way, you won't damage the painted front surface of a piece that you might reuse. Also pry out nails that have remained in the wall or other trim.
Thanks for watching!
Come visit us at The Honest Carpenter
www.thehonestcarpenter.com
Видео HOW TO REMOVE TRIM LIKE A PRO! Don't mess up your trim and casings... канала The Honest Carpenter
Показать
Комментарии отсутствуют
Информация о видео
Другие видео канала
 How To Remove Baseboard
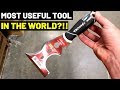 IS THIS THE MOST USEFUL TOOL IN THE WORLD? Watch And Decide!! (5-In-1, 6-In-1,Painter's Tool)
 The BEST SAW You've NEVER HEARD OF!! (Multitools--Great For Remodeling!)
 How To Repair Leaning Fences
 You Only NEED 2 POWER TOOLS!! (Here's What They Are...2 MOST IMPORTANT Power Tools)
 The Holy Grail of Caulking Tips!!!
 Fix Rotted Door Frame (Brickmold)
 DON’T USE A BALL CATCH LATCH! (Use this instead...)
 DON'T USE 3/4" PLYWOOD If You Don't Need It...TRY THIS! (1/2" Plywood Vs. 3/4" Plywood--When to Use)
 How to remove door trims without damaging the wall
 You're a "HACK" if you use 1/4 ROUND TRIM or SHOE MOLDING
 9 BRAD NAIL MISTAKES (and how to avoid them!)
 How To STRENGTHEN WOOD WITH STEEL! (Make Your Wood Projects Stronger With METAL/STEEL...#1 Trick!)
 How To Remove Wood Trim | Beginner
 Rotted Sink Cabinet Floor--How To Fix
 This HIDDEN TRIM DETAIL Affects Your Whole House! See Why...(Reveals/Trim Reveal/Trim Carpentry)
 Baseboard Removal The Best Way
 BRUSH VS. BRUSHLESS TOOLS...What's The Difference?! (Do You Need This SUPERIOR DRILL TECHNOLOGY?!)
 ⭐ This Baseboard & Door Trim Removal Tool Won't Damage Your Walls ⭐
 How To SIGHT LUMBER/BOARDS Quickly And Easily! (AVOID USELESS LUMBER!! Warped Lumber/Warped Wood)