Huawei Mate 10 LCD Screen Repair Guide
This video shows you how to repair Huawei Mate 10 LCD Screen.
Visit https://www.witrigs.com/oem-lcd-screen-with-digitizer-for-huawei-mate-10-black to get new and original Huawei Mate 10 LCD with digitizer.
Visit https://www.witrigs.com/replacement-parts-for-huawei-mate-10 to get other replacement parts of Huawei Mate 10.
The LCD Screen of your Huawei Mate 10 can get broken or ineffective because of unsuitable operation and crash. It is difficult and complicated to separate LCD screen and touch screen when you want to repair each of them. This is the best solution to replace the broken or ineffective screen of your Huawei Mate 10.
Follow this video to replace the digitizer and LCD screen of your Huawei Mate 10 in below conditions:
The screen of your Huawei Mate 10 got broken, cracked;
Colored spots and lines keep showing on the LCD screen;
There is an orange spot in the same area of the LCD screen;
Rainbow pattern or color-blocks shows on some areas of LCD screen;
The touch screen is not sensitive enough to execute your orders.
We will upload other repair guide of Huawei Mate 10 as soon as possible. Tell us which part of Huawei Mate 10 you want to repair at comments section.
Tools:
1. Plastic card – https://www.witrigs.com/plastic-opening-card
2. Suction cup - http://www.witrigs.com/super-tpu-suction-cup-transparent
3. Guitar pick - https://www.witrigs.com/case-opening-tools-04-for-iphone
4. Phillips screwdriver - https://www.witrigs.com/witrigs-phillips-screwdriver-ph000-1-5-25mm-purple
5. Soft metal card - https://www.witrigs.com/001-fish-shape-opening-pick-silver
6. Plastic spudger - https://www.witrigs.com/opening-tools-spudger-for-ipad
7. Back cover adhesive - https://www.witrigs.com/witrigs-back-frame-sticker-for-huawei-mate-10
Steps:
Step1 Remove battery cover
Step2 Remove motherboard
Step3 Remove loudspeaker, USB board and fingerprint scanner flex cable
Step4 Remove battery
Step5 Remove the LCD screen
Step6 Remove the fingerprint scanner
Step7 Test a new lcd screen
Step8 Install the fingerprint scanner onto the new screen
Step9 Install the new LCD screen
Step10 Reassemble the phone.
Witrigs offers not only mobile repair tutorial including disassembly, assembly, and components replacement guide, but also phone accessories review video on YouTube.
Publisher: Witrigs - http://www.witrigs.com/
Witrigs YouTube Channel - https://www.youtube.com/user/witrigs
If you are interested in DIY phone repair or latest phone accessories review,
Like Us on Facebook Page: https://facebook.com/witrigsphonerepair
Subscribe Us on YouTube: https://www.youtube.com/user/witrigs
Follow Us on Twitter: https://twitter.com/witrigs
Add Us on Google+: https://plus.google.com/+Witrigs-com
Subscribe Us on Blog: http://www.witrigs.com/blog/
Don’t forget to Like if this video helps you.
And don’t forget to SUBSCRIBE!
Видео Huawei Mate 10 LCD Screen Repair Guide канала Wit Rigs
Показать
Комментарии отсутствуют
Информация о видео
Другие видео канала
 Huawei Mate 10 Lite Screen Replacement - Huawei Honor 9i / Huawei Nova 2i
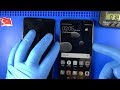 Huawei Mate 10 Ekran Değişimi 🇹🇷
 Huawei Mate 10 Screen Replacement
 Huawei Mate 10 Battery Repair Guide
 Google Pixel 5 Screen Replacement | Repair Guide
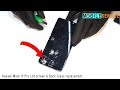 Huawei Mate 10 Pro Lcd screen & Back Glass replacement
 Google Pixel 4A Screen Replacement-Repair Guide
 huawei mate 10 pro lcd replacement _Easy Tricks
 Huawei Mate 10 Lite RNE-L21 lcd replacement - Easy Tricks
 How To Restore Huawei Mate 10 Pro Cracked, Restoring Destroyed Phone
 Huawei Mate 10 Pro Glass Replacement
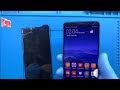 Huawei Mate 10 Pro Ekran Değişimi 🇹🇷
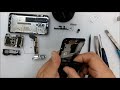 Meizu 15 Disassembly,Screen Repair,Battery Replace,Charge fix,Home Button,Teardown
 Huawei Mate 10 lite Only glass ( Touch screen ) Replacement
 Huawei Mate 10 Pro Battery Repair Guide
 Huawei P10 Lite Screen Replacement
 Huawei mate 10 battery replacement
 Huawei Mate 10 Teardown
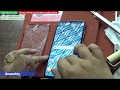 Honor 10 lite touch glass replacement done in 15 minutes