DIGITAL CLOCK USING ARDUINO | VERY EASY | PROGRAMMING EXPLAINED.
Hello everyone.
In this video we have made a Digital Clock using Nano , i have tried to explain its working and also explained the programming.
i have talked about every necessary component and i have pasted the programming in the comment section ,you can use it for your own clock.
still if something is missing or u didn't get ,you can ask in the comment section.
/
decimal point is connected to digital pin 6 of arduino
in program decimal point is represent as 'h' variable
/
Here are some link for the components used in the project.
1- Arduino Nano -
https://www.amazon.in/easy-electronics-Arduino-Nano-Cable/dp/B07C8G4N6X/ref=sr_1_1?keywords=nano&qid=1563114992&s=gateway&sr=8-1
2- 7 segment Display
https://www.amazon.in/Segment-Display-Common-Anode-Robokart/dp/B011KPYOQO/ref=sr_1_5?crid=313C0VPXKRPDC&keywords=7+segment+led+display&qid=1563115150&s=gateway&sprefix=7+segment+%2Caps%2C378&sr=8-5
(Note - If you use common Cathode type Display , you may need to change the logics )
4- PCB board
https://www.amazon.in/Think-Bots-General-Purpose-Printed-Circuit/dp/B07559VB4Y/ref=sr_1_3?keywords=pcb&qid=1563115278&s=gateway&sr=8-3
5- Push button
https://www.amazon.in/Pin-Tactile-Switch-micro-ELECTRONICS/dp/B01N27TA98/ref=sr_1_1?crid=2OIM2CPWAU6JQ&keywords=push+button&qid=1563115318&s=gateway&sprefix=push++b%2Caps%2C329&sr=8-1
6- 220 resistor
https://www.amazon.in/220-carbon-film-resistor-resistance/dp/B01N9AQ5L8/ref=sr_1_1?crid=RQQ6FXCNO3FT&keywords=220+resistor&qid=1563115421&s=gateway&sprefix=220+res%2Caps%2C337&sr=8-1
Thats it. You are Ready to go
Programme in Comment Section.
Thank you for Watching.
if you like our work please support us by just clicking the SUBSCRIBE button. :)
Note-The code is in comment section
download arduino code from below
digital clock link=https://drive.google.com/file/d/1-UJHJUg0MwV2F_4oTAkSh10LcQglXrv0/view?usp=drivesdk
you can change time format by
changing ... time_format=24; just write 12 in place of 24 in the code
you can use any 7 segment common anode or common cathode
for common anode display don't change code
...
..
.
for common cathode display just uncomment
first four line as shown below
//#define off 0
//#define on 1
// #define don 0
//#define doff 1
and put below line on comment
#define off 1
#define on 0
#define don 1
#define doff 0
now code will work for common cathode display
thankyou guys
Видео DIGITAL CLOCK USING ARDUINO | VERY EASY | PROGRAMMING EXPLAINED. канала Curious Electron
Показать
Комментарии отсутствуют
Информация о видео
Другие видео канала
 Arduino NANO Propeller LED Analog Clock
 DIY BIG CLOCK - USB POWERED NIST SERVER TIME KEEPING
 Easy digital clock | Atmega328p chip 7 segment clock | JLCPCB
 How to generate high frequency PWM signal using Arduino for buck boost converter
 Arduino and DS3231 Real Time Clock Tutorial
 Arduino and the 4 digit 7 segment led display - Anything Arduino Ep 21
 Seven Segment Digital clock using Atmega328/ Arduino by Manmohan pal
 Arduino Touchscreen Display - Using a Resistive Touchscreen
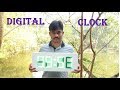 How To Make Digital Wall Clock
 DIY BIG DIGITAL CLOCK
 Arduino Real Time 6 Digit Digital Clock using 2.3" 7 segment display with rtc ds1307
 Arduino DS3231 Real Time Clock and LCD Display
 DIY 7 Segment Digital Clock
 How to build a Hidden Shelf Edge Clock - 3D Printable | Elegoo Arduino Nano | Smart Home | LED
 How to Make A Simple Digital Clock At Home
 Digital Clock Arduino Pro Mini ATmega328 5v 16Mhz
 DIY Digital Clock Homemade
 How to make a 8X8X8 RGB LED cube using Arduino
 Arduino for Beginners 27 Building a digital clock
 Homemade large 7 segment display digital clock