#Text Portrait poster | Adobe Photoshop Hindi tutorial
A designer always need some creative artwork and its pleasant to do it with few steps without load of complications.This hindi spoken tutorial will demonstrate you how to create eye-catching,powerful #text potrait # poster .These type of artwork can be used for magazine covers,cards,profile picture etc.We have created this poster with 4 steps in simple ,easy way.
step 1- Face cutting through quick selection and #Refine edge tool,Sharpen the edges,put on black background(1.00-4.04 minutes)
step 2-Put a half black panel on face(4.05-6.00 minutes)
step 3-Type text with proper settings and delete the text selection(6.01-10.11 minutes)
step 4-mixing effect,blend the layers.(10.12-13.49 minutes)
Select with the Quick Selection tool
You can use the Quick Selection tool to quickly “paint” a selection using an adjustable round brush tip. As you drag, the selection expands outward and automatically finds and follows defined edges in the image.
Select the #Quick Selection tool .
In the options bar, click one of the selection options: New, Add To, or Subtract From.
New is the default option if nothing is selected. After making the initial selection, the option changes automatically to Add To.
To change the brush tip size, click the Brush pop-up menu in the options bar, and type in a pixel size or drag the slider. Use the Size pop‑up menu options to make the brush tip size sensitive to pen pressure or a stylus wheel.
Note: When creating a selection, press the right bracket (]) to increase the Quick Selection tool brush tip size; press the left bracket ([) to decrease the brush tip size.
Choose Quick Selection options.
Sample All Layers
Creates a selection based on all layers instead of just the currently selected layer.
Auto-Enhance
Reduces roughness and blockiness in the selection boundary. Auto-Enhance automatically flows the selection further toward image edges and applies some of the edge refinement you can apply manually in the Refine Edge dialog with the Contrast and Radius options.
Paint inside the part of the image you want to select.
The selection grows as you paint. If updating is slow, continue to drag to allow time to complete work on the selection. As you paint near the edges of a shape, the selection area extends to follow the contours of the shape edge.
Settings in Refine edge-
View mode
Marching Ants: In this mode, your selection will be surrounded by marching ants. Keyboard shortcut is M.
Overlay: In this mode, your selection will be overlaid by the layer mask which default color is light red. Shortcut is V.
To read more content visit my website.
Link for the image I have used
http://pin.it/ZPNkvZl
American Captain regular font
http://goo.gl/NDwT0e
other san serif fonts
http://pin.it/VNHm6t-
Face cutting through colour range
https://www.youtube.com/watch?v=1HaeuXX8vSs
Face retouch tutorial
http://www.youtube.com/watch?v=UHYQOVVtv5o
**********************************************
Subscribe to this channe l"Ekta's Creation"
https://www.youtube.com/channel/UC1L6X3v1VUmscqKnmZXZhEA
Ekta's Creation Website
http://www.stopnlearn.com/
Ekta's Creation Facebook
https://www.facebook.com/EktasCreation/
Ekta's Creation twitter
https://twitter.com/EktasCreation
Ekta's Creation Google+
https://plus.google.com/u/0/b/117771909183925088471/+EktasCreation
Ekta's Creation Pinterest
https://in.pinterest.com/EktasCreation/
Ekta's Creation Tumblr
http://ektascreation.tumblr.com/
Видео #Text Portrait poster | Adobe Photoshop Hindi tutorial канала Ekta's Creation
Показать
Комментарии отсутствуют
Информация о видео
Другие видео канала
 How to convert photo into black and white| Photoshop hindi tutorial
 How to create vintage logo in Adobe illustrator Hindi tutorial
 Introduction to #3d object in #Photoshop Hindi #tutorial
 How to create Spiral designs | Illustrator CC Hindi tutorial
 create Neon light effect in photo|Photoshop Hindi tutorial
 Create #HDR and use #Tone mapping persona in #Affinity photo Hindi #tutorial
 Focus area selection|Photoshop Hindi tutorial |Focus masks
 Make a Comic #Cartoon from a Photo |Color halftone -Photoshop Hindi Tutorial
 Hindi typing in computer-Photoshop tutorial
 How to install free #Nik Plugin in Affinity Photo Hindi tutorial
 create #Smoke effect in #photoshop Hindi tutorial
 Colour grid|Mosaic effect in photo| Image manipulation |Photoshop hindi tutorial
 How to quickly select in photoshop CC,magnetic pen tool Hindi tutorial
 How to lighten the background using color range tool| Photoshop Hindi tutorial
 How to use spiral tool #draw swirls #curves #florals Illustrator CC Hindi tutorial
 how to use #DevelopPersona in #Affinity Photo Hindi #tutorial
 Open multiple images as layers|transform image| Photoshop Hindi tutorial-
 landscape #illustrations #Illustrator Hindi tutorial
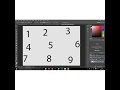 How to Save specific artboards with transparent background |Illustrator Hindi tutorial
 Create Seamless Patterns/Swatches using Pattern tool| Illustrator Hindi Tutorial
 Remove unwanted details using content aware tool,Patch tool| Photoshop Hindi tutorial-