DIY – How to Apply Clear Epoxy Resin – “Liquid Glass”
An Adventures At Home, LLC video! Do you want that ultra-glossy bar top look on your wood projects? Then look no further than this step by step video. We’ll walk you through every step to make sure your projects turn out perfect the first time. Even if you have worked with two-part clear coat epoxy before and got mediocre results, our tips and tricks may change your mind on working with this finishing product again.
Here is a link to the epoxy that we used in this video:
https://amzn.to/33l0e9M
****Reminder to everyone - Submit a photo of one of your projects you have made (hopefully using one of our videos for inspiration) and you'll have a chance to be featured on our Maker's Spotlight page! Thank everyone for watching!****
Like this video?
Make sure to give us a thumbs up and subscribe if you want to see more videos like this. Your support means a lot. Thank you!
***Video Notes and Gear Used***:
1. Main Camera: Sony A7II Full Frame Mirrorless
https://amzn.to/2QPEPCV
2. Main Camera Lens: Sony FE 70-300mm F4.5-5.6 Full Frame E-Mount
https://amzn.to/37GzFPu
3. Microphone - Fifine Wireless Microphone System
https://amzn.to/2XYhMHL
4. Lighting Kit – Neewer
https://amzn.to/2OoxwAg
5. Main Camera Tripod
https://amzn.to/37B9jOR
6. Aux. Camera: GoPro Hero 5 Black
https://amzn.to/2OlDtxT
7. GoPro Tripod
https://amzn.to/2rtDgjc
This video was edited by Adobe Premiere Elements 2019:
https://amzn.to/33igDM9
DISCLAIMER: This page contains affiliate links. As an Amazon Associate I earn from qualifying purchases. This helps support this website and allows us to continue to produce content like this. Thank you for the support!
About this video: In this video we show you how to use two-part clear coat epoxy to get an ultra-durable, ultra-glossy finish on your projects. You can get the fantastic “bar-top” look with a little bit of effort and some patience. This product is perfect if you need something that is more durable and UV-resistant the standard polyurethane. We will walk you through every step of the way including: Prepping your project, applying an initial thin coat, getting your mix perfect, applying the flood coat, getting rid of any bubbles and how to keep dust off of your project while the epoxy cures. The process may seem tedious, but the finished product is well worth the effort!
Видео DIY – How to Apply Clear Epoxy Resin – “Liquid Glass” канала Adventures At Home, LLC
Показать
Комментарии отсутствуют
Информация о видео
10 августа 2018 г. 10:57:01
00:24:34
Другие видео канала
 The SECRET to a Bubble-Free Epoxy Finish
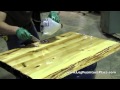 How Liquid Glass Finish is applied on Cabin Furniture at JHE's Log Furniture Place
 White Oak Epoxy Countertop
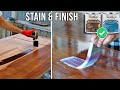 Can You Do This Dead Simple Wood Finishing Method?...
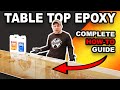 How to Use Table Top Epoxy Resin
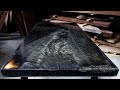 Fire + Epoxy
 Spray on Countertops | Stone Coat Epoxy
 Alumilite Explains: The difference between epoxy, polyurethane, and resin
 How to pour epoxy on a barnwood table and get a satin finish PART 1
 HOW TO APPLY POLYURETHANE TO WOOD
 5 EPOXY Tips I Wish I Knew As A Beginner!
 Famowood Glaze Coat Epoxy Application
 AVOID THESE 9 EPOXY POUR MISTAKES
 How To Polish Epoxy Resin To Glass - Like A Pro!
 DIY Farmhouse Dining Table w/ Epoxy Inlays Using Reclaimed Barnwood
 Epoxy Resin Flood Coat Tutorial | Stone Coat Epoxy
 Epoxy Countertops DIY Tutorial: How To Mix & Pour Bar Top Epoxy Resin Self Levling
 How to Apply Bar Top or Table Top Pour on Finish (Epoxy Resin)
 Use Epoxy To Coat Existing Countertops To Make Them Look Like Real Stone | Step By Step Explained
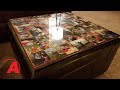 DIY Epoxy Clear Coated Game Board | Alumilite