- Популярные видео
- Авто
- Видео-блоги
- ДТП, аварии
- Для маленьких
- Еда, напитки
- Животные
- Закон и право
- Знаменитости
- Игры
- Искусство
- Комедии
- Красота, мода
- Кулинария, рецепты
- Люди
- Мото
- Музыка
- Мультфильмы
- Наука, технологии
- Новости
- Образование
- Политика
- Праздники
- Приколы
- Природа
- Происшествия
- Путешествия
- Развлечения
- Ржач
- Семья
- Сериалы
- Спорт
- Стиль жизни
- ТВ передачи
- Танцы
- Технологии
- Товары
- Ужасы
- Фильмы
- Шоу-бизнес
- Юмор
Why Bad Positioning Kills Your Anchor Tank – Domina Mastery Revealed #Anchor #Domina #Underwatch
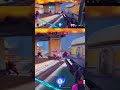
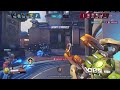
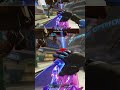
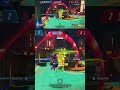
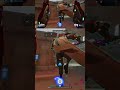
Domina’s Anchor playstyle can dominate the battlefield, but a single misstep in positioning instantly turns a potential win into a catastrophic loss. In this clip we dissect a classic example of zero team awareness: the player lines up a front‑line under a narrow choke, ignores flank pressure, and lets the enemy dive force him into a hopeless spot. The result is a shattered Barrier Array and a wasted Panopticon, proving why spatial discipline is non‑negotiable for any tank hoping to anchor.
Bad positioning shows up as hugging walls without sightlines, stacking behind teammates, or chasing low‑health foes into open zones. Each mistake creates a pocket for dive heroes—Junker Queen, Sojourn, Genji, or Echo—to exploit. Because Domina’s Barrier Array is segmented, a single breach lets enemy projectiles bypass the shield, draining the tank’s health and ultimate charge. The SRT line “That would be shit really bad positioning, just zero awareness of the team” captures the exact mindset that leads to this cascade of failures, from missed calls to wasted ult economy.
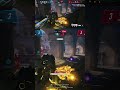
To fix this, anchor tanks must claim high ground, maintain a 90‑degree angle to the main attack corridor, and constantly scan for flank routes using the mini‑map. Domina’s Crystal Charge should be pre‑charged near objectives, ready to punish aggressive dives, while her Sonic Repulsors can create temporary safe zones when a dive hero breaches. Pairing Barrier Array with a teammate’s shield—Zarya’s Particle Barrier, Reinhardt’s Shield, or Sigma’s Experimental Barrier—creates layered protection that forces opponents to coordinate multiple ultimates before a breach succeeds. Timing the activation of Panopticon to coincide with enemy ult spikes maximizes its area denial and secures objective control.
Team awareness amplifies positional strength. Callouts like “enemy on left flank” or “keep the corridor clear” let the Anchor adjust the barrier’s orientation in real time. When a support such as Kiriko, Illari, or Lifeweaver drops a healing beacon behind the tank, the anchor can safely trade damage for space, preserving ultimate charge for a decisive Panopticon. Communicating cooldowns—especially Sigma’s Gravitic Flux, Zarya’s Graviton Surge, or Ramattra’s Void Barrier—lets the tank time his Barrier Array to negate enemy spikes and set up perfect combo windows.
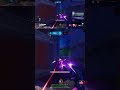
The Underwatch event introduces new map layouts like Cairo’s tight bazaar alleys and Monaco’s high‑rise rooftops, both demanding precise anchor placement. Domina’s synergy with the event’s environmental hazards—such as sandstorms that reduce visibility or sonic amplifiers that ricochet projectiles—means that a well‑positioned tank can leverage reduced sightlines to ambush opponents when they overextend. Mastering these map‑specific angles not only improves win rates but also showcases the hero’s full potential during the limited‑time mode, turning an anchor into the central pillar of any meta composition.
Watch the full replay to see the exact moments where positioning fails and where the corrected play restores dominance. Drop a comment with your own anchor tips, smash the like button if the fix helped, and subscribe for more high‑level Underwatch breakdowns. Turn on notifications so you never miss a new hero analysis, ultimate guide, or meta update. Share this video with your squad to spread smarter positioning and elevate your team’s win‑rate.
#Anchor #Domina #Underwatch
Anchor Domina Underwatch
Видео Why Bad Positioning Kills Your Anchor Tank – Domina Mastery Revealed #Anchor #Domina #Underwatch канала Feureau Gaming
Bad positioning shows up as hugging walls without sightlines, stacking behind teammates, or chasing low‑health foes into open zones. Each mistake creates a pocket for dive heroes—Junker Queen, Sojourn, Genji, or Echo—to exploit. Because Domina’s Barrier Array is segmented, a single breach lets enemy projectiles bypass the shield, draining the tank’s health and ultimate charge. The SRT line “That would be shit really bad positioning, just zero awareness of the team” captures the exact mindset that leads to this cascade of failures, from missed calls to wasted ult economy.
To fix this, anchor tanks must claim high ground, maintain a 90‑degree angle to the main attack corridor, and constantly scan for flank routes using the mini‑map. Domina’s Crystal Charge should be pre‑charged near objectives, ready to punish aggressive dives, while her Sonic Repulsors can create temporary safe zones when a dive hero breaches. Pairing Barrier Array with a teammate’s shield—Zarya’s Particle Barrier, Reinhardt’s Shield, or Sigma’s Experimental Barrier—creates layered protection that forces opponents to coordinate multiple ultimates before a breach succeeds. Timing the activation of Panopticon to coincide with enemy ult spikes maximizes its area denial and secures objective control.
Team awareness amplifies positional strength. Callouts like “enemy on left flank” or “keep the corridor clear” let the Anchor adjust the barrier’s orientation in real time. When a support such as Kiriko, Illari, or Lifeweaver drops a healing beacon behind the tank, the anchor can safely trade damage for space, preserving ultimate charge for a decisive Panopticon. Communicating cooldowns—especially Sigma’s Gravitic Flux, Zarya’s Graviton Surge, or Ramattra’s Void Barrier—lets the tank time his Barrier Array to negate enemy spikes and set up perfect combo windows.
The Underwatch event introduces new map layouts like Cairo’s tight bazaar alleys and Monaco’s high‑rise rooftops, both demanding precise anchor placement. Domina’s synergy with the event’s environmental hazards—such as sandstorms that reduce visibility or sonic amplifiers that ricochet projectiles—means that a well‑positioned tank can leverage reduced sightlines to ambush opponents when they overextend. Mastering these map‑specific angles not only improves win rates but also showcases the hero’s full potential during the limited‑time mode, turning an anchor into the central pillar of any meta composition.
Watch the full replay to see the exact moments where positioning fails and where the corrected play restores dominance. Drop a comment with your own anchor tips, smash the like button if the fix helped, and subscribe for more high‑level Underwatch breakdowns. Turn on notifications so you never miss a new hero analysis, ultimate guide, or meta update. Share this video with your squad to spread smarter positioning and elevate your team’s win‑rate.
#Anchor #Domina #Underwatch
Anchor Domina Underwatch
Видео Why Bad Positioning Kills Your Anchor Tank – Domina Mastery Revealed #Anchor #Domina #Underwatch канала Feureau Gaming
Комментарии отсутствуют
Информация о видео
Вчера, 7:36:00
00:00:19
Другие видео канала