Making flappy whiskers (14/25)
This video is a part of the - "Create TV/Broadcast Ready Animations with Adobe Animate" series. In this series, Prof. Greg Araya from the Savannah College of Art and Design (SCAD) teaches how to create TV and broadcast ready animations with Adobe Animate. You can download Adobe Animate from https://www.adobe.com/in/products/animate.html.
What you learned: Deformations for overlapping or follow through animations can be easily achieved with a Shape Tween workflow.
* Go into a Symbol that has a shape that you want to deform. In this case, it is the whisker.
* Determine the duration of frames you want for the deformation. Set Keyframes for the start and end pose.
* Add a Shape Tween between the Keyframes, and view the resulting animation.
* If the shape self-intersects of deforms unpredictably, you will need to add Shape Hints to correct the tweening.
* Go to the first Keyframe of a Shape-Tweened span and select Modify-Shape-Add Shape Hint. This will add a small red circular marker known as a Shape Hint to the stage.
* Place the Shape Hint on a corner of your shape. Snap to Objects can help with placement.
* Once the first Shape Hint (A) is set, go the to target Keyframe of the frame span and place the Shape Hint on the same corner of the shape as in the first frame. This corner may be in a different location than before.
* Continue doing this for as many corners as you need. If you know you will need multiple Shape Hints, you can add several at once and then position them accordingly on their respective Keyframes.
* Shape Hints work on a single tween span, between a pair of Keyframes. If you have multiple tween spans requiring Shape Hints, you will need to add a set of Shape Hints for every tween span.
* For added stability (at the cost of editability), it can be useful to “bake out” the animation by selecting the tween span and choosing Modify-Timeline-Convert to Frame-by-Frame Animation. This will allow editing of the shapes on every frame, useful for having parts of shapes move on an arc.
* Save your incremental progress as a new file.
Видео Making flappy whiskers (14/25) канала Adobe Animate
Показать
Комментарии отсутствуют
Информация о видео
Другие видео канала
 HTML5 Game Part 5 Add Simple Effects & Finish
 Add a Bokeh effect - Using Symbols and Advanced Layers (Part 2 of 5)
 Creating the environment (24/25)
 HTML5 Game Part 1 Set up Game and Game Objects
 HTML5 Game Part 3 Calculate & Display Score
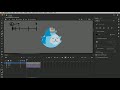 Swaying the ears (17/25)
 HTML5 Game Part 2 Add Collision Detection & Sound
 Adobe Animate | How to publish vector assets into bitmap textures
 Flapping the whiskers (16/25)
 Modern Rigging - Freeze joint and soft bone
 Adobe Animate | How to use warpping in Animate for bitmap images
 Modern Rigging - Creating rigs (bones and joints)
 Adobe Animate
 Modern Rigging in Adobe Animate
 Adobe Animate! Graphic vs Movieclip
 Adobe Animate | How to take Animate compositions to After Effects
 Adobe Animate | How to use classic tween in Adobe Animate
 Adobe Animate | How to retarget for various screen dimentions
 Adding lighting effects (25 of 25)
 Adobe Animate | How to setup a character using layer parenting in Adobe Animate
 Modern Rigging - Flexi Bone