How to Clamp Round Objects
When it comes to clamping round objects, a bicycle inner tube can be a perfect clamping tool. More on the blog: http://bit.ly/YaGOiq
Home Improvement Online With http://www.ronhazelton.com
With over 500 hundred free DIY ideas, tips, how-to's, suggestions, and video tutorials available to help you turn your home improvement plans into finished projects. With more projects being added every month this is the go-to place for Do-It-Yourselfers & professionals alike.
_
Check Out Our Site: http://www.ronhazelton.com
Follow Us On Twitter: https://twitter.com/ronhazelton
Like Us On Facebook: https://www.facebook.com/RonHazeltonHouseCalls
Follow Us On Google+: https://plus.google.com/u/1/b/106595458746638326576/+ronhazelton/posts?pageId=106595458746638326576
View Our Pinterest: https://www.pinterest.com/ronhazelton/
Don't Forget To Subscribe: https://www.youtube.com/channel/UCT7uKjjnhi3eozGVrjKfTzQ?sub_confirmation=1
Transcript:
As you can probably tell, I've got about every kind of clamp there is here in the shop, but when it comes to clamping round objects like the handle on this antique doll stroller or the shattered pedestal on this table base, well, conventional clamps aren't always the best solution. As a matter of fact, the best clamping solution might be found not in a woodworking shop, but in a bicycle shop.
That's right, a bike shop, a bicycle inner tube can be the perfect clamping tool for some kinds of jobs. Let me show you how. To turn a bicycle tube into a clamp I first cut away the valve, then cut the tube in half lengthwise. I end up with two long, narrow strips of very stretchable rubber. Now here's how I'll use these giant rubber bands to clamp the table base. I always like to put my work in the most comfortable and convenient position, in this case upside down and slipped over a wooden pin in my workbench. Next, I pour a little glue in a disposable container. This is the cut off bottom from an empty water bottle and brush it on the broken parts. Once the pieces are in place, I gently wrap a piece of painter's masking tape around them to keep things from slipping, then I begin wrapping the rubber strap. Now, what's important here is to stretch the rubber band out as I wrap so that I'm putting pressure on that joint and with each wrap I'm putting more and more pressure, just like a conventional clamp would do. A small spring clamp will hold the strap in place while the glue dries.
Now, one of the disadvantages of using the bicycle inner tube is that the tube completely covers the joints sometimes, which means you can't see the glue that is squeezing out. So what I do is put some paste wax on the finish surfaces like this so that if glue does squeeze out, I can easily remove it later on. It won't stick to the wax
On the antique baby stroller the process is virtually the same. I apply glue to the broken surfaces, position the pieces together and wrap them with a rubber strap. Again, stretching the band a bit as I make each rotation, then securing the end with a spring clamp.
The glue has dried and the table base, so I unwrap the inner to clamp and the masking tape. Well, there's a little bit of the crack still visible, it's tight. That's mostly a finish problem and I think I can take care of that with a touch up marker. I dab on the marker, let it set for a few seconds, then wipe off the excess, the repair is nearly invisible.
So when is a clamp, not a clamp, when it's a bicycle tube! And if you ask the bike shop for a flat, this is a clamp that'll be absolutely free.
Видео How to Clamp Round Objects канала Ron Hazelton
Показать
Комментарии отсутствуют
Информация о видео
Другие видео канала
 A Simple Way to Make your Shower Bigger
 Ron Hazelton's HouseCalls - Season 16 - Restore Your Gas Grill - Revive a Weather Worn Deck
 Benefits of Laminate Wood Flooring
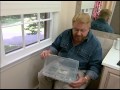 How to Use Threaded Wall Anchors
 New Types of Metal Roofing, Wallboard, and Fire Retarding Insulation
 Ron Hazelton's HouseCalls - Season 16 - DIY Irrigation System - Built-in Entertainment Center
 How to DIY Resurface a Driveway
 Ron Hazelton's HouseCalls Season 18 - Install DIY Faux Metal Ceiling - Lay Ceramic Tile over Plywood
 How to Unclog a Sink Drain
 Ron Hazelton's HouseCalls - Season 16 - DIY Vent Free Fireplace and Garage Heater
 How To Remove Dents In Wood
 How to Use a Multi-surface Waterproofer
 How to Control Weeds in Your Lawn
 Build your Own DIY Outdoor Serving Bar
 New Basement Door With Super Tough Factory Applied Powder Coat Finish
 How to Make Large Compass
 Cut Planks with a Portable Saw Mill
 How to Make a Cold Frame Greenhouse
 How to Replace a Window Pane
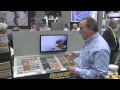 International Builders' Show 2014
 Painting Tips