Making VPX lighting textures with Blender
Video shows the process of baking the textures. One need to setup the flashers separately in VPX side afterwards. Usually the sideblade bakes needs to be cut out properly from the UV mapped texture, so that one can use them on VPX side. That process is not shows in this video. The flasher must be additive, so that all the 9 light sources can mix up correctly in the VPX engine.
VPX Lightmapper: https://github.com/vbousquet/vpx_lightmapper#installation
Timecodes:
0:00 - Install Blender 3.2 (beta)
0:21 - Install VPX Light Mapper by vbousquet
0:57 - Import VPX file with materials using the Light Mapper add-on
1:11 - Hide unwanted elements
1:21 - Make sure Cuda and Cycles is enabled. Use GPU only if you have NVidia GPU.
2:16 - Verify that materials looks correct
2:50 - Verify that F12 render looks ok, it was still lit, although all lights should be off
3:41 - I had to take Environment Emission down to make the table dark
3:50 - Set dome to use emissive material. Set strength to 500-1000 for domes. (Remember to duplicate the material, otherwise it may lit other domes with same material...)
3:52 - Start preparing baked surfaces with materials that cast shadows nice. Use grey material that has some roughness. The flasher color should be tuned eventually in VPX side.
4:00 - Unlink the used image from the material. This way that image will be the one where the bake is made.
4:35 - Realize that vpx.material is not going to work. Swap to Principled BSDF shader
5:50 - Once you are happy with the baking material, ably that to other objects you want to bake.
6:04 - Figure out the proper naming scheme, by looking how object are named on VPX side.
7:06 - Realize you had 2 domes lit instead of one. Here I duplicate the emissive material and adjust that another dome to zero emission. One at the time, unless they are linked to same solenoid.
7:12 - Finally see how a single dome casts light in the table sides and playfield.
7:20 - Save the project and start baking the flashers one object at the time..
7:35 - Here I start with the backwall. Select it and find the bake button.
7:51 - Here I notice that baking is not using GPU properly. It is doing CPU baking instead of GPU. I correct this later.
8:20 - First bake ready. Save it with desired name and move baking the next object.
10.24 - Bake for sideblades ready. Lets move to playfield object.
10.56 - Move to next dome and repeat baking for all 3 objects
14:02 - If the PF bake looks too dark, I usually boost the contrast and soften the image, so that shadows are more prominent. This probably is not too accurate, but it looks more vivid eventually in VPX.
14:58 - Repeat the process for rest of the 9 domes...
Видео Making VPX lighting textures with Blender канала iaakki
Показать
Комментарии отсутствуют
Информация о видео
Другие видео канала
 Blade Runner VPX WIP #1
 2 Times Terror - Lust (live @Tuhdimmat Tahdit 2013)
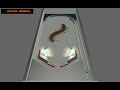 VPX centipede
 Geophagus sp. Winemilleri
 Topper video Elvira and The Party Monsters VPX
 Die Hard VPX Mirror backwall dev
 L191 and L190 fight
 The Simpsons Pinball Party VPX VPW (Skitso v2.0) VR test
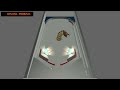 Sand Worm animation in VPX
 Blood Machines Pinball (VPW, 2022) in VR
 Pleco feeding time#2
 New arrivals 13.11.2010
 Potamotrygon Motoro and Hystrix
 Fleshkraft - Bred Undead GH3 Custom
 Puntius Denisonii
 DrDude VPX WIP testing
 Austin Powers VPX WIP19 playfield details
 VPX 10.71 vs 10.6 debug editor
 Misc. fishes
 Leos feasting pellets
 Realistic looking ramp plastics for VPX tables using Blender 3.4