- Популярные видео
- Авто
- Видео-блоги
- ДТП, аварии
- Для маленьких
- Еда, напитки
- Животные
- Закон и право
- Знаменитости
- Игры
- Искусство
- Комедии
- Красота, мода
- Кулинария, рецепты
- Люди
- Мото
- Музыка
- Мультфильмы
- Наука, технологии
- Новости
- Образование
- Политика
- Праздники
- Приколы
- Природа
- Происшествия
- Путешествия
- Развлечения
- Ржач
- Семья
- Сериалы
- Спорт
- Стиль жизни
- ТВ передачи
- Танцы
- Технологии
- Товары
- Ужасы
- Фильмы
- Шоу-бизнес
- Юмор
ESP8266 ESP32 Failed to connect No serial data received Failed to initialize RX TX Sensor
ESP32 Error fail upload on Home-Assistant, ESPhome, Arduino IDE
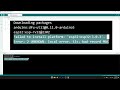
00:15 Arduino IDE: Failed to connect to ESP8266.
Error: Timed out waiting for packet header.
00:37 ESPHome: Failed to initialize.
Try resetting your device or holding the boot button.
However, this does not fix the ESPHome upload failure error.
00:53 ESPHome Builder : Error running command.
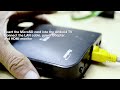
Failed to connect to ESP8266. No Serial Data Received. 01:14 Solution: Disconnect the RX or TX pins. Disconnect them during the upload, then reconnect the RX and TX pins afterward. Because the sensor and the uploader use the same pins, data transmission interference occurs. ---
Why Your ESP32/ESP8266 Fails to Upload: The RX/TX Serial Conflict
Many ESP32 or ESP8266 users connect sensors using RX and TX pins without realizing that these specific pins are often reserved for communication with the computer. This leads to frustrating errors across different platforms.
Common Error Messages
If you have a sensor connected to the main serial pins (RX/TX) during an upload, you will likely see these errors:
Arduino IDE: Failed to connect to ESP8266: Timed out waiting for packet header.
ESPHome: Failed to initialize. Try resetting your device... (Resetting usually does not fix this).
ESPHome Builder: Error running command: Failed to connect to ESP8266. No Serial Data Received.
Is my board ESP32 ESP8266 broken?
May be No, your ESP32 or ESP8266 is not broken.
The failure happens because of a UART conflict.
When a sensor is connected to the same pins used for uploading, it "shouts" data at the same time the computer is trying to send the new program.
This overlap confuses the chip and causes the upload to fail.
The Difference Between ESP32 and ESP8266
ESP32
The ESP32 is more flexible because it has three sets of RX/TX ports (UART0 RX0 TX0, UART1 RX1 TX1, and UART2 RX2 TX2).
The Problem: If you use RX0 and TX0 for your sensor, the upload will fail because these are the same pins used by the USB port.
The Solution: It is highly recommended to use RX2 and TX2 for sensors. On the ESP32, you can also "remap" or move the RX/TX functions to almost any other GPIO pins in your code to avoid conflicts entirely.
ESP8266
The ESP8266 is more limited because it only has one primary RX/TX port.
The Problem: Since there is only one port, the sensor and the USB-to-Serial converter are forced to share the same pins (GPIO1 and GPIO3).
The Solution: On ESP8266, You must physically disconnect the sensor's RX or TX wires while uploading the program. Once the upload is 100% complete, you can reconnect the pins to allow the sensor to communicate.
Most boards use GPIO1 (TX) and GPIO3 (RX) to talk to your computer via USB.
During Upload: Your computer sends the new program through the USB cable to these pins.
The Conflict: If a sensor (like the LD2410) is "hogging" these pins, the computer cannot establish a clear connection with the chip.
Tip:
Always check your pinout diagram before wiring. If you want to avoid unplugging wires every time you update your code, use an ESP32 or use "Software-Serial" on an ESP8266 to move the sensor to different pins.
Видео ESP8266 ESP32 Failed to connect No serial data received Failed to initialize RX TX Sensor канала Obengplus com
00:15 Arduino IDE: Failed to connect to ESP8266.
Error: Timed out waiting for packet header.
00:37 ESPHome: Failed to initialize.
Try resetting your device or holding the boot button.
However, this does not fix the ESPHome upload failure error.
00:53 ESPHome Builder : Error running command.
Failed to connect to ESP8266. No Serial Data Received. 01:14 Solution: Disconnect the RX or TX pins. Disconnect them during the upload, then reconnect the RX and TX pins afterward. Because the sensor and the uploader use the same pins, data transmission interference occurs. ---
Why Your ESP32/ESP8266 Fails to Upload: The RX/TX Serial Conflict
Many ESP32 or ESP8266 users connect sensors using RX and TX pins without realizing that these specific pins are often reserved for communication with the computer. This leads to frustrating errors across different platforms.
Common Error Messages
If you have a sensor connected to the main serial pins (RX/TX) during an upload, you will likely see these errors:
Arduino IDE: Failed to connect to ESP8266: Timed out waiting for packet header.
ESPHome: Failed to initialize. Try resetting your device... (Resetting usually does not fix this).
ESPHome Builder: Error running command: Failed to connect to ESP8266. No Serial Data Received.
Is my board ESP32 ESP8266 broken?
May be No, your ESP32 or ESP8266 is not broken.
The failure happens because of a UART conflict.
When a sensor is connected to the same pins used for uploading, it "shouts" data at the same time the computer is trying to send the new program.
This overlap confuses the chip and causes the upload to fail.
The Difference Between ESP32 and ESP8266
ESP32
The ESP32 is more flexible because it has three sets of RX/TX ports (UART0 RX0 TX0, UART1 RX1 TX1, and UART2 RX2 TX2).
The Problem: If you use RX0 and TX0 for your sensor, the upload will fail because these are the same pins used by the USB port.
The Solution: It is highly recommended to use RX2 and TX2 for sensors. On the ESP32, you can also "remap" or move the RX/TX functions to almost any other GPIO pins in your code to avoid conflicts entirely.
ESP8266
The ESP8266 is more limited because it only has one primary RX/TX port.
The Problem: Since there is only one port, the sensor and the USB-to-Serial converter are forced to share the same pins (GPIO1 and GPIO3).
The Solution: On ESP8266, You must physically disconnect the sensor's RX or TX wires while uploading the program. Once the upload is 100% complete, you can reconnect the pins to allow the sensor to communicate.
Most boards use GPIO1 (TX) and GPIO3 (RX) to talk to your computer via USB.
During Upload: Your computer sends the new program through the USB cable to these pins.
The Conflict: If a sensor (like the LD2410) is "hogging" these pins, the computer cannot establish a clear connection with the chip.
Tip:
Always check your pinout diagram before wiring. If you want to avoid unplugging wires every time you update your code, use an ESP32 or use "Software-Serial" on an ESP8266 to move the sensor to different pins.
Видео ESP8266 ESP32 Failed to connect No serial data received Failed to initialize RX TX Sensor канала Obengplus com
ESPHome Failed to initialize Home Assistant ESPHome Builder Error Failed to connect to ESP8266 Arduino IDE error Failed to connect to ESP8266 RX TX conflict error LD2410 sensor Timed out waiting for packet header Arduino IDE ESPHome command ESP8266 Timed out waiting for packet header.ESPHome Builder No Serial Data Received ESP8266 Failed to connect ESP8266 No serial data received ESP32 No serial data received ESP32 Failed to connect
Комментарии отсутствуют
Информация о видео
28 декабря 2025 г. 1:20:31
00:03:42
Другие видео канала