Plumbing Something With Shark Bites
How to do-it-yourself tutorial on basic pipe replacement using half inch (1/2") copper pipe and easy to use SharkBite pipe couplings.
Transcript provided for the hearing impaired:
Today on Repairs101 we're going to take care of something that I've been putting off for a long time. You might remember from an earlier video of mine this leaky elbow here. And we're going to change this leaking elbow here that I discovered way back in one of the very first videos I made. I never seem to run out of things to fix around here.
So I've already turned off the water and I've let the system drain by opening a faucet at the lowest point and letting all the water run out through that and then to speed that up, of course, I went up to the highest point and opened a valve up there to let the air chase all the water out.
The challenge here, as I see it, is that this elbow is of course attached to this pipe that is going straight up and that is inaccessible. And this end of this pipe coming this way is tied into this tee which makes it also inaccessible. You'll see that when I unscrew this end of this pipe, this end of this pipe get driven deeper into this valve. And therein lies your problem in reassembly. The real problem of course is figuring out exactly how to put this back together again. Taking it apart is easy, I'm just going to cut it with my reciprocating saw right here. If I can I'm going to rebuild this valve right here and if I can't I have a replacement for it.
I got some of these great "SharkBite" quick connectors. I got something called "SharkBites". Definitely worth the price for the time you save in making connections. I got them at "Home Depot" and they go together real quick so we're going to use those.
Be sure to wear hearing protection and eye protection as I'm doing. [Sawing]
[Pops] Oh yeah. There it goes. [Bangs] Whoo! Alright, there we go. That's tricky. OK I got it.
[Torching]
[Groans] Oh man that was hard.
Yeah I used to have this foreman who would say "It doesn't matter how strong you are, it's all in the funny noises you make".
Alright, I got it. [Sizzles] It's still very hot. You can almost hear it sizzle -- well I can hear it sizzling, I don't know if you can hear it sizzling.
There you go. Stem valve, just like the ones in my earlier video and there you go, we'll just change the bushing on that real quick and I can put those back in service. OK here's what a really bad looking valve bushing looks like, it's completely dried out and it's going to take quite a bit of digging to remove it. Take it apart, clean it out, put in a new bushing and reuse it. New valve like this is about seven or eight dollars Canadian. One of these valve bushings is only a few cents. I'm just going to drop that in there.
Then spin the pipe out.
Clean up these threads. Make sure you're wearing your eye protection when you do this kind of work.
Now this is the point in the repair where a lot of guys will reach for their Teflon tape or silicone tape. I was trained not to use this stuff. As far as sealing pipes go I use pipe sealant. Here's "Oatey" brand, and that's what I use is "pipe-dope"; "pipe joint compound". Now the reason is because mechanics have to consider that in fuel systems, the Teflon tape breaks down and it enters the fuel system and then it can get into things like the fuel injectors and plug them up and cost you a lot of money.
I'm just going to slip in the SharkBite now, got the threads on that all doped up, there we go. There we go.
Cut your pipes using a pipe cutter like this one, don't kid yourself about a hacksaw. You're not going to be able to cut them square using a hacksaw. This is the only tool for the job.
There we go. After you've cut it you want to ream the burrs out of the end, that's what that little triangle sticking out of your pipe-cutter is for. It's to ream the burrs out. So you want to do that. Make sure it's nice and smooth and clean. OK I'll just clean up the end with some sandpaper. Make sure it's nice. Nice and clean and ready to go into those Shark-Bites. That one's good, this one... I'll give it a reaming. And we're nice and clean, ready to go in.
So the last stage is make the connection between the two. Now you're going to make a one inch deep connection into these Shark Bites until you hear a click and there it is right there. Now this side. OK bam, that one's done too. And that's what it looks like. Pretty good, eh? Pretty quick, pretty easy, pretty good.
No leaks. I like that part.
Видео Plumbing Something With Shark Bites канала Repairs101
Показать
Комментарии отсутствуют
Информация о видео
Другие видео канала
 Beginners Guide To SHARKBITE Fittings (Watch till end BEFORE Buying!) | GOT2LEARN
 Water Pipe Fix -- DIY main waterline repair video
 How to Choose Water Supply Piping | This Old House
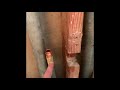 Removing and connecting galvanized pipe to copper pipe
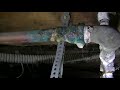 Replacing Rotten Leaking Galvanized Pipe Under House With PEX
 Repair of Failed SharkBite on Water Heater
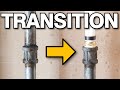 How to TRANSITION (PEX | COPPER | POLYB | CPVC | GALVANIZED) (COMPLETE GUIDE) | GOT2LEARN
 3 Easy Step By Step Ways To Repair & Connect Copper Pipe!
 The ULTIMATE Plumbing Tricks BIBLE (30+ Tricks!) | GOT2LEARN
 Laundry Room part 3 - plumbing copper to pex using sharkbite
 galvanized to copper pipe repair
 How to fix a leaking galvanized pipe using a Johnson coupler
 Replace water meter valves and shark bite with copper fittings
 How to Connect a Kitchen Sink Drain
 Plumbing New PEX Water Lines 06 08 2017
 6 SHARKBITE Mistakes NOT To Make! | GOT2LEARN
 Repair Copper Pipe Leaks with SharkBites (Super EASY)
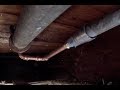 Ridgid RP 340 Galvanized to copper water line repair
 Plumbing Our Home With PEX- First Time Homebuilders