How To Install S&S Cycles 1200cc Hooligan kit 883cc Harley-Davidson Sportsters Part 1 - Disassembly
This Video is brought to you by Lowbrow Customs https://www.lowbrowcustoms.com
Part 1 - Disassembly - In this How to video, Todd walks you through the disassembly of a 2003 Harley-Davidson Sportster 883cc engine in preparation for installing a S&S Cycles Hooligan 1200cc conversion kit with oversized cams. These kits work on 2000-2018 Harley-Davidson Sportsters and can be installed on your motor with in a day spent in the garage. So, break out the tool box and follow along. See how "There's no big mystery going on in there!" This step by step and does not skip anything, and will help you understand how easy it is to break down your motor and add some real horsepower to it.
Part 2: https://youtu.be/DopRVi3qCeM
Part 3: https://youtu.be/HCCR93g9r6Q
You can purchase the S&S Cycles Hooligan Here:
Sliver: https://www.lowbrowcustoms.com/products/s-and-s-cycle-hooligan-kit-883cc-to-1200cc-for-2000-2018-harley-davidson-sportster-models-silver
Black: https://www.lowbrowcustoms.com/products/s-and-s-cycle-hooligan-kit-883cc-to-1200cc-for-2000-2018-harley-davidson-sportster-models-wrinkle-black
00:01 - Intro
01:12 - What you may need to get started.
02:44 - Make sure your Gas tank, exhaust, carb, and coil is removed from the bike so you have clear access to the engine. Drain your oil Tank.
04:01 - Start by removing the 8 bolts on the top of the rocker boxes.
06:41 - Break the rocker boxes free with a dead blow and remove them from the engine. Do not use a screw driver to pry. This can be a pain but they will separate.
07:49 - Keeping a clear work bench separate front and rear parts keeping them separate and in order will help keep the job going smoothly.
08:16 - Remove the spark plugs so that you can rotate the engine. This will allow for you to get the pushrods down to their lowest point and relieve pressure.
08:40 - Jack up the rear wheel and put it in gear to rotate the engine. Watch the rockers on the rear rocker box and stop when they are at their lowest point.
09:20 - Remove the 9 bolts from the rear rocker box.
09:45 - Gone Fishing!
14:47 - Pull the pushrods out before removing the rest of the rear rocker box, it will make it easier to remove.
15:36 - Review of what bolts you need to remove from the inside rocker box.
15:53 - Start on the front one, repeat the process you just did on the rear.
16:55 - Doh! Don't pull a todd and forget to rotate the engine.
19:50 - Remove the rocker box.
20:09 - Remove the pushrods, Note: pink colored band is exhaust, Brown colored band is intake.
20:26 - Its now time to remove the cylinder heads!
22:29 - Don't Forget to remove your intake manifold before removing the cylinders. We have a special wrench available on the website to help with this job.
24:25: See why your intake manifold only needs to remove 2 bolts.
24:48 - Remove all 8 cylinder head bolts.
26:35 - Remove rear cylinder head.
27:00 - If you have a head stay still on your front cylinder be sure to remove it.
27:53 - Remove the front cylinder head.
28:07 - Now we are down to the cylinders, remove both cylinders.
29:27 - Stuff each cylinder hole with blue shop rags so no bolts, circlips, or anything else falls down in your crank case!
29:43 - Remove the circlips from the piston pins.
30:10 - Remove the pins from the pistons. Push the pin from the opposite side of the removed circlip.
30:32 - Remove the push rod tube holders. Even if you are not replacing the liters and cams you need to do this step to replace the lower push rod tube seals.
32:28 - Time to remove the lifters, you must first remove he 4 locking pin bolts.
33:07 - How the lifter locking pin looks and works.
34:43 - Using a magnet, stick it down the lifter holes and pull up the lifters. If you are reusing the same lifters, be sure to pay attention and mark which holes each one comes out of.
35:23 - Remove the front drive pulley cover.
36:24 - Remove the ignition module. Scribe or mark your timing for was of use getting it back timed.
77:11 - Find your ignition pick up plug and unplug it from the wiring harness under the frame.
38:02 - Remove the timing cup.
39:02 - Now it's time to remove the cam cover! Woooo!
39:14 - Tips and tricks on how to keep track of the different sized bolts that belong to the cam cover.
40:55 - Demo of the best trick to keep track of your bolts and where they go on the cam cover.
41:35 - Cam cover off... yeah right that Mother F*cker is on there! DOHHHHH! Do not pry with screwdriver!
42:02 - Make sure to have some kind of oil pan under your cam area because if you haven't drained your oil it will all come out of your oil pump.
42:12 - Once cam cover is free pull off and unhook the breather oil line located on the left of the cover.
43:35 - Would ya look at that cam chest!
43:50 - Remove the old Cams.
44:28 - To be continued...
Music:
Licensed acquired by: Artlist.io
"Coming Home"
"Now is the Moment"
Composed by: Geva Alon
"Great Pretender"
Composed by: Tony Petersen
Видео How To Install S&S Cycles 1200cc Hooligan kit 883cc Harley-Davidson Sportsters Part 1 - Disassembly канала lowbrowcustoms
Показать
Комментарии отсутствуют
Информация о видео
Другие видео канала
 How To Install S&S Cycles 1200cc Hooligan kit 883cc Harley-Davidson Sportsters - Part 2 - Assembly
 Harley Iron 883 to 1200 BIG BORE Kit DYNO Tuning! (Hooligan Kit Ep 3)
 Should You Convert Your 883 to a 1200 or Big Bore 1250/1275?
 Sportster Build | Before and After
 Was The Sportster 1250 Conversion Worth It | Hammer Performance 1250 Kit
 How To Install A Motorcycle Internal Throttle On Custom Handlebars
 How Fast Is a Harley Sportster 1200? (Stock vs Stage 1)
 How To Install S&S Cycles 1200cc Hooligan kit 883cc Harley-Davidson Sportsters - Part 3 - Assembly
 How to Install A Hummer Style Ignition Switch Into A Frisco Sportster Gas Tank For Your Chopper
 Harley Sportster Makeover
 How to Install: S&S Cycle 1200 Conversion Kit for XL models
 How to: Install A Harley-Davidson Sportster Hardtail Frame 1982 - 2003
 Sportster 883 -1200 Conversion : Weekend Wrenching
 How-To Guide: What To Look For When Purchasing A Used Harley-Davidson Sportster
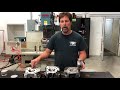 The Basics Of Converting Your 883
 Harley Davidson Iron 883 with 1200 Conversion Test Ride
 Sportster Cam Upgrades To Increase Horsepower and Torque
 In Depth look at Christian Newman's Custom Twin Turbo 8 Valve Harley-Davidson ULH at Mama Tried 2021
 How-To: Leaky Rocker Box Gasket Fix on Harley-Davidson Sportster