- Популярные видео
- Авто
- Видео-блоги
- ДТП, аварии
- Для маленьких
- Еда, напитки
- Животные
- Закон и право
- Знаменитости
- Игры
- Искусство
- Комедии
- Красота, мода
- Кулинария, рецепты
- Люди
- Мото
- Музыка
- Мультфильмы
- Наука, технологии
- Новости
- Образование
- Политика
- Праздники
- Приколы
- Природа
- Происшествия
- Путешествия
- Развлечения
- Ржач
- Семья
- Сериалы
- Спорт
- Стиль жизни
- ТВ передачи
- Танцы
- Технологии
- Товары
- Ужасы
- Фильмы
- Шоу-бизнес
- Юмор
How to Get Clear, Glare-Free Dash Cam Footage with Polarized Lens Attachments
How to Get Clear, Glare-Free Dash Cam Footage with Polarized Lens Attachments
Amazon Product Link: http://amazon.com/dp/B07LDCK7ZR/?tag=nhu68-20
If you’ve ever reviewed your dash cam footage only to find it washed out by glare or reflections, you know how frustrating it can be. That annoying shine from your windshield or bright sunlight can blur details and distort colors, making your recordings less reliable. But what if you could fix this with a simple add-on that works like sunglasses for your dash cam? By using a polarized lens attachment, you can capture crisp, glare-free video that shows true colors and clear details every time.
Step 1: Understand the Problem. Dash cams often struggle with reflections and glare caused by sunlight hitting your windshield or other reflective surfaces. This glare can obscure important details like license plates, road signs, or even pedestrians. The polarized lens attachment acts like a filter, blocking out this unwanted light and reducing reflections, so your camera records exactly what you see with your own eyes.
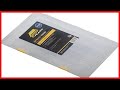
Step 2: Choose the Right Polarized Lens Attachment. Look for a lens designed specifically for your Garmin dash cam model. These attachments are compact, easy to install, and made to fit perfectly without interfering with your camera’s functions. The package dimensions are small—around 3.4 cm by 7 cm by 17.3 cm—making it a lightweight, hassle-free upgrade. Plus, products made in Taiwan are known for their quality and durability.
Step 3: Install the Lens Attachment. Attaching the polarized lens is straightforward. Simply snap or slide it onto your dash cam’s lens area. No tools or technical skills are needed. Once in place, the lens immediately starts filtering out glare and reflections, improving the clarity of your recordings. It’s like giving your dash cam a pair of sunglasses that work 24/7.
Step 4: Test Your Dash Cam Footage. After installation, take your car for a drive in bright conditions. Review the video to see the difference. You’ll notice colors are more vibrant and true to life, and the distracting reflections from your windshield are gone. This makes your footage more reliable for insurance claims, legal evidence, or simply capturing your road trips in stunning detail.
Step 5: Maintain and Enjoy. The polarized lens attachment requires minimal care—just keep it clean and free of dust or smudges. With this simple upgrade, your Garmin dash cam will consistently deliver high-quality, glare-free video, enhancing your driving safety and peace of mind.
By adding a polarized lens attachment to your Garmin dash cam, you’re investing in clearer, more accurate video recordings. It’s a small change that makes a big difference, especially when you need your dash cam footage to be trustworthy. Ready to upgrade your dash cam experience? Try a polarized lens attachment and see the road in a whole new light.
#DashCam, #Garmin, #PolarizedLens, #ClearVideo, #DrivingSafety
Видео How to Get Clear, Glare-Free Dash Cam Footage with Polarized Lens Attachments канала วัชรพงศ์ ทองเหว่า
Amazon Product Link: http://amazon.com/dp/B07LDCK7ZR/?tag=nhu68-20
If you’ve ever reviewed your dash cam footage only to find it washed out by glare or reflections, you know how frustrating it can be. That annoying shine from your windshield or bright sunlight can blur details and distort colors, making your recordings less reliable. But what if you could fix this with a simple add-on that works like sunglasses for your dash cam? By using a polarized lens attachment, you can capture crisp, glare-free video that shows true colors and clear details every time.
Step 1: Understand the Problem. Dash cams often struggle with reflections and glare caused by sunlight hitting your windshield or other reflective surfaces. This glare can obscure important details like license plates, road signs, or even pedestrians. The polarized lens attachment acts like a filter, blocking out this unwanted light and reducing reflections, so your camera records exactly what you see with your own eyes.
Step 2: Choose the Right Polarized Lens Attachment. Look for a lens designed specifically for your Garmin dash cam model. These attachments are compact, easy to install, and made to fit perfectly without interfering with your camera’s functions. The package dimensions are small—around 3.4 cm by 7 cm by 17.3 cm—making it a lightweight, hassle-free upgrade. Plus, products made in Taiwan are known for their quality and durability.
Step 3: Install the Lens Attachment. Attaching the polarized lens is straightforward. Simply snap or slide it onto your dash cam’s lens area. No tools or technical skills are needed. Once in place, the lens immediately starts filtering out glare and reflections, improving the clarity of your recordings. It’s like giving your dash cam a pair of sunglasses that work 24/7.
Step 4: Test Your Dash Cam Footage. After installation, take your car for a drive in bright conditions. Review the video to see the difference. You’ll notice colors are more vibrant and true to life, and the distracting reflections from your windshield are gone. This makes your footage more reliable for insurance claims, legal evidence, or simply capturing your road trips in stunning detail.
Step 5: Maintain and Enjoy. The polarized lens attachment requires minimal care—just keep it clean and free of dust or smudges. With this simple upgrade, your Garmin dash cam will consistently deliver high-quality, glare-free video, enhancing your driving safety and peace of mind.
By adding a polarized lens attachment to your Garmin dash cam, you’re investing in clearer, more accurate video recordings. It’s a small change that makes a big difference, especially when you need your dash cam footage to be trustworthy. Ready to upgrade your dash cam experience? Try a polarized lens attachment and see the road in a whole new light.
#DashCam, #Garmin, #PolarizedLens, #ClearVideo, #DrivingSafety
Видео How to Get Clear, Glare-Free Dash Cam Footage with Polarized Lens Attachments канала วัชรพงศ์ ทองเหว่า
Комментарии отсутствуют
Информация о видео
4 января 2026 г. 11:35:08
00:03:36
Другие видео канала