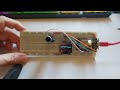
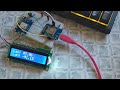
ESP32Cam motion detection will save pictures automatically on the SD card
1. PIR Sensor Integration
• The PIR sensor is connected to GPIO 14. It detects motion and sends a HIGH signal to the ESP32-CAM when movement is detected.
• This signal triggers the camera to capture an image.
2. Camera Initialization
• The ESP32-CAM is initialized with its camera settings, including pin configurations (like CAM_PIN_PWDN, CAM_PIN_RESET, etc.).
• If the camera initialization fails, an error message is printed.
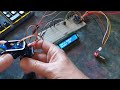
3. SD Card Initialization
• The SD card is initialized using the SD_MMC library.
• If the SD card initialization fails, the program will stop with an error message.
• Successful initialization ensures the ESP32-CAM can save captured images.
4. PIR Detection and ISR Setup
• An interrupt is attached to GPIO 14 (the PIR sensor pin) using attachInterrupt().
• When motion is detected, the ISR (motionDetected()) is triggered. This function sets a flag (motionDetectedFlag) to notify the main loop.
5. Main Loop
• The loop() function checks if the motion detection flag is set.
• If motion is detected:
1. The flag is reset.
2. The camera captures an image.
3. The image is saved to the SD card with a unique filename (photo_random_number.jpg).
4. A status message is printed.
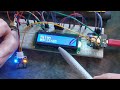
6. Status LED Control
• If the status LED is included, it can flash during image capture to indicate activity.
• GPIO control for the LED ensures it lights up while capturing the image.
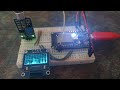
Workflow Summary
1. Power on: The ESP32-CAM initializes the camera and SD card.
2. PIR detects motion: Sends a HIGH signal to GPIO 14, triggering the ISR.
3. Capture and Save: The main loop processes the motion event and takes a photo.
4. Reset: The system is ready for the next motion event.
1. "esp_camera.h"
• Purpose: Provides functions and configurations to work with the ESP32-CAM module.
• Key Features:
o Initializes the camera hardware.
o Captures images in various formats (JPEG, RGB, etc.).
o Allows setting camera parameters (e.g., resolution, brightness, etc.).
________________________________________
2. "FS.h"
• Purpose: Offers a general interface for working with file systems on the ESP32.
• Key Features:
o Provides functions to open, read, write, and manage files and directories.
o Acts as a base library for specific file system implementations (e.g., SD_MMC, SPIFFS).
________________________________________
3. "SD_MMC.h"
• Purpose: Enables interaction with SD cards using the SDMMC (SD Memory Card Controller) interface on the ESP32.
• Key Features:
o Initializes and mounts the SD card file system.
o Allows file operations (read, write, delete) on the SD card.
o Supports high-speed SD card communication through the SDMMC protocol.
Code:
https://github.com/ukkokalevala/ESP32CamPirSavePics.git
Видео ESP32Cam motion detection will save pictures automatically on the SD card канала Electricum
• The PIR sensor is connected to GPIO 14. It detects motion and sends a HIGH signal to the ESP32-CAM when movement is detected.
• This signal triggers the camera to capture an image.
2. Camera Initialization
• The ESP32-CAM is initialized with its camera settings, including pin configurations (like CAM_PIN_PWDN, CAM_PIN_RESET, etc.).
• If the camera initialization fails, an error message is printed.
3. SD Card Initialization
• The SD card is initialized using the SD_MMC library.
• If the SD card initialization fails, the program will stop with an error message.
• Successful initialization ensures the ESP32-CAM can save captured images.
4. PIR Detection and ISR Setup
• An interrupt is attached to GPIO 14 (the PIR sensor pin) using attachInterrupt().
• When motion is detected, the ISR (motionDetected()) is triggered. This function sets a flag (motionDetectedFlag) to notify the main loop.
5. Main Loop
• The loop() function checks if the motion detection flag is set.
• If motion is detected:
1. The flag is reset.
2. The camera captures an image.
3. The image is saved to the SD card with a unique filename (photo_random_number.jpg).
4. A status message is printed.
6. Status LED Control
• If the status LED is included, it can flash during image capture to indicate activity.
• GPIO control for the LED ensures it lights up while capturing the image.
Workflow Summary
1. Power on: The ESP32-CAM initializes the camera and SD card.
2. PIR detects motion: Sends a HIGH signal to GPIO 14, triggering the ISR.
3. Capture and Save: The main loop processes the motion event and takes a photo.
4. Reset: The system is ready for the next motion event.
1. "esp_camera.h"
• Purpose: Provides functions and configurations to work with the ESP32-CAM module.
• Key Features:
o Initializes the camera hardware.
o Captures images in various formats (JPEG, RGB, etc.).
o Allows setting camera parameters (e.g., resolution, brightness, etc.).
________________________________________
2. "FS.h"
• Purpose: Offers a general interface for working with file systems on the ESP32.
• Key Features:
o Provides functions to open, read, write, and manage files and directories.
o Acts as a base library for specific file system implementations (e.g., SD_MMC, SPIFFS).
________________________________________
3. "SD_MMC.h"
• Purpose: Enables interaction with SD cards using the SDMMC (SD Memory Card Controller) interface on the ESP32.
• Key Features:
o Initializes and mounts the SD card file system.
o Allows file operations (read, write, delete) on the SD card.
o Supports high-speed SD card communication through the SDMMC protocol.
Code:
https://github.com/ukkokalevala/ESP32CamPirSavePics.git
Видео ESP32Cam motion detection will save pictures automatically on the SD card канала Electricum
Комментарии отсутствуют
Информация о видео
11 января 2025 г. 15:56:16
00:10:10
Другие видео канала