Viewrail Stand Off Pins Installation Animation
Do you have questions about the installation process of Viewrails Stand Off Pins? Are you thinking about utilizing them on your next DIY project? Look no further! THis rendering provides you with a high quality, step-by-step look at the installation of a Viewrail Stand Off Pin.
(0:00) INTRO
Before you begin, mark the locations where your lag bolts will fasten to secure your Standoff Pins. Keep the overall system in mind as each of the 4 Standoff Pins will need to be mounted before you can install your glass panel.
(0:14) STEP 1: Installing Your Standoff Pin Base
On your marked location, use a ¼” drill bit and predrill a 4.5” holes for your lags. Set the Pin Base in place and run the provided ⅜” lag bolt into the supporting structure. Once in place, take the Glass Adjuster Nut, remove the protective cover, and adhere its bushing to the outward facing surface. Slide the Glass Adjuster Nut into the Glass Pin Base.
(1:12) STEP 2: Installing Your Standoff Pin Cover
Next, using the provided allen wrench, fasten the Glass Pin Adjuster Screw into Glass Adjuster Nut until snug. Then take the Glass Pin Cover, remove the protective lining, and attach its bushing to the outside facing surface. Use the Center Bushing to sit around the extrusion. Tighten the Glass Pin Cover onto the Adjuster Nut.
(1:52) STEP 3: Installing Your Glass Panel
Once all 4 Standoff Pins are in place, you are ready for glass installation. It may be necessary at this point to grab a partner for assistance in transporting the glass and holding it in place. Use the provided suction cups to hold the glass panel in front of the Standoff Pins.
(2:14) STEP 4: Adjusting Your Pins Location
Using the provided allen wrench, you can also loosen the Adjuster Nut to slide the Pin Cover horizontally or vertically to make sure it lines up with the holes in the glass. Depending on the degree of tightening, these can be adjusted to make sure the glass is plumb. Once your glass is set, simply retighten.
(2:40)STEP 5: Locking Your Glass Panel in Place
Next, insert the Set Screw into the Pin Cover and tighten. This will lock the assembly in place. If not plumb, loosen the set screw and use the Glass Pin Tool and Spanner Wrench to adjust. Retighten the set screw afterwards to lock in place.
(3:21) STEP 6: Installing Your Glass Pin Cap
Finally, take the Glass Pin Cap, remove the protective cover, and adhere its bushing to the side facing the glass. Tighten the cap in place. You can use the Spanner Wrench to lock into the cap for a tight grip. Repeat these steps for each of your Standoff Pins.
Looking for inspiration for your next project? Check out our Completed Project Gallery here: https://www.viewrail.com/completed-projects/
Be sure to keep up with us on all our social media channels!
Facebook: https://www.facebook.com/viewrail/
Instagram: https://www.instagram.com/viewrail/
Pinterest: https://www.pinterest.com/viewrail/glass-railing/
Видео Viewrail Stand Off Pins Installation Animation канала Viewrail
Показать
Комментарии отсутствуют
Информация о видео
Другие видео канала
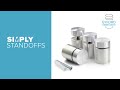 Simply Standoffs- Gyford's Economy line of US Quality Standoffs
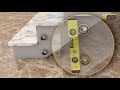 Spider Sistem TSA 50 SP
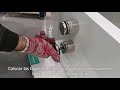 Nuevo Conector 1380017SA (CC 775) COMENZA HERRALUM
 Easy Glass® MOD 0749 - Assembly Video
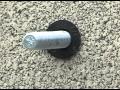 Basic Anchor Installation Training
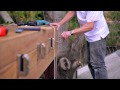 Smart Spigot Glass Clamp - DIY Timber Installation
 8+8 Şeffaf Temperli Lamine Cam Korkuluk İmalat ve Montajı Uygulaması
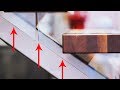 Contemporary Architecture Fans Are Gonna Love This new stuff from Viewrail! Intl Builders Show 2019
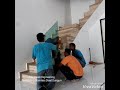 Tempered Glass Railing Installation
 Customized metal fasteners stainless steel standoff glass balustrade standoff brackets SO01
 Nuevo Conector 1380017SA (CC 775) COMENZA HERRALUM
 mlevel Stainless Steel Adjustable Square Standoffs Installation Video
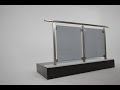 BTS - SL12 Glass Aluminum Railing Installation . BTS - SL12 Camlı Aluminyum Korkuluk Küpeşte Montajı
 Sign Mounts: Stand Off: Fisso Safe
 FastenMaster ThruLOK Hand Rail to Rim Joist or Carrying Beam to Notched Support Post Connections
 Smart Spigot Glass Clamp - DIY Concrete Installation
 Glass stand-off for concrete wall new design 5050S
 000110 Assembly guide - Adjustable standoff glass railing
 Viewrail Glass Clip Installation Animation
 BTS Aluminium N50-F Frameless Glass Railing System Installation