- Популярные видео
- Авто
- Видео-блоги
- ДТП, аварии
- Для маленьких
- Еда, напитки
- Животные
- Закон и право
- Знаменитости
- Игры
- Искусство
- Комедии
- Красота, мода
- Кулинария, рецепты
- Люди
- Мото
- Музыка
- Мультфильмы
- Наука, технологии
- Новости
- Образование
- Политика
- Праздники
- Приколы
- Природа
- Происшествия
- Путешествия
- Развлечения
- Ржач
- Семья
- Сериалы
- Спорт
- Стиль жизни
- ТВ передачи
- Танцы
- Технологии
- Товары
- Ужасы
- Фильмы
- Шоу-бизнес
- Юмор
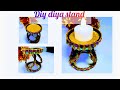
DIY diya stand #art&craft #handmade #homemade #viralvideo
#diy
#art&craft
#diwalidecor
#pistashell
#diyadecor
#homemade
#viralvideo
#trendingvideo
#ytvideo
#design
#diyastand
#painting
#handmade
#ecofriendly
#festivecraftidea
---
DIY Diya Stand handmade,homemade,– Detailed Description (Fabric + Plastic Cover)
This diya stand is made by repurposing a round plastic cover—like the lid from a food container or a transparent plastic packaging top—and decorating it with fabric, lace, and embellishments to create a festive, sturdy platform for placing diyas.
---
⭐ Materials Used
1 round plastic cover/lid (transparent or opaque, sturdy enough to hold a diya)
Small piece of decorative fabric (silk, brocade, velvet, cotton with prints, etc.)
Cotton or sponge padding (optional, for a soft raised look)
Fabric glue / hot glue gun
Lace trims (gold lace, gota patti lace, bead lace, etc.)
Beads, sequins, mirrors, pearls, or other embellishments
Small circular base (optional: cardboard circle for extra support)
---
⭐ Step-by-Step Construction Description
1. Preparing the Base
The plastic cover is cleaned thoroughly and dried.
Its smooth inner surface becomes the bottom of the diya stand, while the outer rim becomes the top platform.
If needed, a round piece of cardboard is cut to the exact size of the plastic cover to reinforce the base and make it more stable.
2. Adding Soft Padding (Optional but decorative)
A thin layer of cotton or sponge is placed on the top of the plastic cover to create a raised cushioned look.
This also helps prevent the fabric from showing wrinkles and gives the stand a plush, premium appearance.
3. Wrapping the Fabric
A circular piece of decorative fabric—cut slightly larger than the lid—is placed over the padded surface.
The fabric is stretched evenly so no folds appear, and the extra edges are pulled to the underside of the cover.
These edges are secured using fabric glue or a glue gun.
The fabric hugs the shape of the plastic cover neatly, forming a smooth, elegant upper surface.
4. Decorating the Border
The sides of the stand (the rim of the cover) are wrapped with lace or ribbon—often golden gota lace or bead lace.
The lace is glued around the circumference in a clean and continuous line.
This frames the entire stand and hides any raw fabric edges underneath, giving the piece a finished and festive look.
5. Surface Embellishment
The top surface is decorated with:
small sequins arranged in a floral pattern,
mirror work pieces in symmetrical designs,
pearls placed in a ring where the diya will sit,
or tiny artificial flowers/beads for a traditional effect.
These embellishments create a focal point and make the stand appear rich and ornamental.
6. Final Touches
Any loose threads or glue marks are removed.
The stand is allowed to dry fully so the fabric and decorations remain firmly attached.
The finished diya stand is lightweight, stable, and glossy due to the plastic base but looks luxurious because of the fabric covering.
---
⭐ How the Finished Stand Looks
A circular, cushioned platform covered with beautiful festive fabric.
Edged with shiny lace or beaded trim.
Decorated on top with symmetrical patterns made from sequins, pearls, or mirrors.
Sturdy enough to hold a diya, LED light, tealight candle, or small idols.
Lightweight and elegant—perfect for Diwali decorations, pooja setups, and gifting.
https://youtube.com/@creativegalaxy7
Видео DIY diya stand #art&craft #handmade #homemade #viralvideo канала Creative Galaxy
Art and craft DIY DIY diya stand Handmade Homemade Trending video Viral video art video crafting ideas design hacks diy crafts diy decor diy home diy home decor diy projects epic fails home decor home decorating ideas home improvements home renovation hacks homeschool art lessons how to draw interior design interior design ideas interior design tips kristen mcgowan remodel ideas room makeover step by step trendy decor
Комментарии отсутствуют
Информация о видео
19 ноября 2025 г. 18:30:10
00:03:12
Другие видео канала