5 Easy Steps DIY Adjustable DC Bench Power Supply Variable with 2x Salvaged Pots High Current Output
This is a DIY tutorial showing how I hack cheap power supplies with free common upcycled electronics. In just 5 Simple steps replace the 2 feedback resistors with potentiometers on laptop/printer power supplies and your done.
Do not attempt this if you do not know how to handle high voltage capacitors and live AC mains voltage. You must be mindful of the voltage rating of the output capacitors when setting a final maximum voltage.
MODIFICATIONS:
I replace 2 resistors from the DC output side of the power supply. These 2 resistors create a simple voltage divider. The voltage divider is connected to a zener shunt regulator, and it's output goes to an optocoupler. You don't have to know or understand the circuit. The optocoupler is always a 4 pin dip chip that crosses the isolation barrier under the transformer. Usually there are two resistors for the voltage divider and some others for biasing the opto and/or the shunt regulator input voltage pin, don't worry about these. The shunt regulator itself is always a TL431
The shunt regulator will have one connection that has the full voltage output (or close to it(biased)), a second connection will be at ground, and the last connection will be at 2.4-2.5 volts(Vref). Just look at the output caps to find positive and ground traces.
The simple equation for the feedback output is
Vout= (1+R1/R2)*Vref
I've shown an example with the values from this video. The equation came out to 12.44 volts. If you watch carefully I actually got 13.44 volts. This was because I didn't want to complicate things by showing how there was a small additional bias on the voltage input pin of the TL431. If you notice it wasn't at the full 12.12 volts of output power because of the extra resistors below the ones that I replaced with potentiometers. The only reason I mention the equation is to insure you don't blow up the output capacitor(s) accidentally. The accuracy of the equation doesn't matter, it's just an approximation.
The resistors are easy to identify, R1 will be connected between the output voltage and Vref pins, R2 will be connected between the Vref pin and ground. Pick 2 potentiometers that are close to the values of these resistors. Resistor R2 should be a trimmer pot because you only need it for setting up the maximum output voltage. After you've set the maximum output, you use the potentiometer you replaced R1 with to adjust the output voltage.
There is a limit to how high and low of an output voltage you can achieve with each SMPS design. This has to do with the transformer specs, frequency controller chip, and timing capacitor.
Most power supplies that I've modified are stable from about 7.5 to 22ish volts. The supply can be biased higher or lower but when a load is applied it will get pulled down.
FIRST TIME SETUP:
The trick to making the adjustment for the first time is to; first, do the equation so you know the max voltage with both potentiometers set at full resistance; second, check that both potentiometers are set up as rheostats (only 2 of 3 pins are wired up), and that they are turned to their full resistance value -use a meter and check this; third, power on, and slowly lower the trimmer resistor (R2/5K trimmer pot in this video) while watching a multimeter connected to the output. Set your maximum output voltage. After this is setup, you never touch this trimmer potentiometer again. Your output variation is totally controlled by the R1 potentiometer from this point forward.
CC Music (by order of appearance):
1.) They Say by WowaMusik
https://soundcloud.com/wowamusik
Creative Commons — Attribution 3.0 Unported— CC BY 3.0
http://creativecommons.org/licenses/b...
Music provided by Audio Library https://youtu.be/E6LCO7SH8kA
2.) Cold Funk - Funkorama by Kevin MacLeod is licensed under a Creative Commons Attribution license (https://creativecommons.org/licenses/by/4.0/)
Source: http://incompetech.com/music/royalty-free/index.html?isrc=USUAN1100499
Artist: http://incompetech.com/
Funkorama
3:21 Kevin MacLeod
R&B & Soul | Funky
3.) Funkorama by Kevin MacLeod is licensed under a Creative Commons Attribution license (https://creativecommons.org/licenses/by/4.0/)
Source: http://incompetech.com/music/royalty-free/index.html?isrc=USUAN1100474
Artist: http://incompetech.com/
4.) Vacation Uke by ALBIS from YouTube Audio Library · Pop | Happy · #Music for YouTube creators http://goo.gl/YmnOAx
5.) Where I am From by Topher Mohr and Alex Elena (YouTube Audio Library) Pop | Calm · Free music for YouTube creators http://bit.ly/The-Audio-Library
Видео 5 Easy Steps DIY Adjustable DC Bench Power Supply Variable with 2x Salvaged Pots High Current Output канала Upcycle Electronics
Показать
Комментарии отсутствуют
Информация о видео
Другие видео канала
 Turn any fixed voltage adapter to variable voltage output (3v - 25v)
 Modify a Laptop Power Supply 5V to 30V | How to make 12v to 220v inverter
 ATX PC - DON' T THROW THAT AWAY!!! here is a BIG idea
 12V 5A LED switching power supply - with schematic
 How to increase the current of the power supply
 Simple !!! Voltage regulator
 HACKED!: ATX Power Supply with Variable Output Voltage?
 HOW TO MAKE A BENCH TOP POWER SUPPLY | MADE FROM A COMPUTER ATX POWER SUPPLY
 power supply sederhana pakai box
 Cara membuat regulator adjustable 1.1V to 42V Ide Kreatif Elektronik DIY Simple voltage regulator
 What You Need To Know Before Buying A Boost/Buck Converter
 COMO MODIFICAR EL VOLTAJE DE SALIDA DE UN ADAPTADOR DE CORRIENTE
 How to make an adjustable power supply in 5 minutes
 Rangkaian penurun tegangan (Regulator LM317 dengan tip3055)
 DIY Mini Lab Bench Power Supply (With Switchable DC and AC Input)
 Modify 12V power supply to 24V 36V 48V
 Build a Simple Power Supply
 Como cambiar voltaje de un cargador de celular muy fácil!
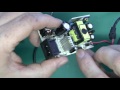 12V Power Supply Repair
 #283 How to Increase / Adjust Output of any SMPS charger or Adapter