Range Rover P38 # 091 - Trailer Hitch with Dual Plug Connectors
I'm not sponsored. I've bought all of this with my own money.
I got a brand new trailer hitch from Rameder in Germany. The hitch itself is made by GDW in Belgium. Rated for 3.500kg (7.700 lbs) it's a solid piece of kit. It comes with everything you need, and is a straight bolt-in procedure, but there can be a couple of things that could set you back.
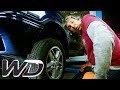
The bumper needs to come off to attach a brace bar across the frame in which the hitch connector attaches to. The workshop manual states you should remove the mud flaps (if fitted) and inner rear fender wheel liner before removing the bumper. Also you should remove the rear wheels. I found it's just as easy to detach the fender liner (single screw) and dropping the whole bumper including liner and mud flaps, leaving the wheels in place. Especially if you live in rust prone areas.
The two bolts that hold the bumper to the frame might have rusted solid. Mine had, and I ended up having to cut them and fabricate some new fasteners. Also the wheel arch cover bolt is prone to rusting very easily in place. Again, a bit of angle grinder action, drilling and tapping a new screw hole might be required. But beside that, it's pretty easy going.
I didn't order a trailer wiring kit even though they were available. The reason is I'd like to do my own dual plug set up. In Europe there's two standards of trailer plugs. A 7-pin and a 13-pin variant. The latter is just a few years old and features ignition signal and battery power supply to the trailer.
I did order the backing plate and mounting hardware for the wiring kit from a Land Rover parts shop:
2x ANR2689 - Backing plate for connectors
2x FS106125L - Bolts for backing plates (M6x12mm)
6x SE105358 - Bolts for connectors (3 needed per connector)
You'll need washers and nuts for the SE105358 bolts but I don't have their part numbers. And you'll need the trailer connectors and wires. If you're installing just one connector, you'll need half the amount of hardware listed above. Optionally you can add some quick connectors under the car for easier removal of the bumper. I just added a few feet extra of wire to allow the bumper to come off and rest on the ground.
NOTE! This wiring is for Europe, specifically Norway and Sweden (and most likely most of EU). Other regions may have different setups. I know for sure USA and Australia have other wiring, so please check with your local standards to wire everything correctly.
Since the Range Rover has provisions for two plugs in the bumper from the factory I bought my own 7- and 13-pin outlets, some 7-lead wire and I'll show you how to wire it all up. It won't feature ignition and power on the 13-pin, so that's left up to the viewer to figure out on their own if they decide to add that.
You'll find the original trailer connector behind the right access door in the trunk. Here's the wiring you'll want to perform. Note both the 7- and 13-pin have the same first 7 wires connected the same way.
P38 trunk plug - Trailer connector - Function
GR (Green / Red) - # 1 (Yellow) - Left Indicator(s)
RY (Red / Yellow) - # 2 (Blue) - Fog Lights
B (Black) - # 3 (Grey or White) - Common Grounding
GY (Green / Yellow) - # 4 (Green) - Right Indicator(s)
RW (Red / White) - # 5 (Brown) - Right Tail Light / Markers
GP (Green / Purple) - # 6 (Red) - Brake Lights
RB (Red / Black) - #7 (Black) - Left Tail Light / Markers
The following are for the 13-pin connector, and some of the signals are available from connector X172 on the Range Rovers too. However I'm not familiar with where it's located, so I've not hooked these up. NA means Not Available on the Range Rover.
GN (Green / Brown) - # 8 (Pink) - Reversing Lights
KO (Pink / Orange via fuse 14 - 20A) - # 9 (Orange) - Constant Battery Supply (+12V)
NA - # 10 (Grey) - Ignition (charging battery, fridge etc)
NA - # 11 (White / Black) - Grounding for pin # 10 (igniton signal)
NA - # 12 (White / Blue) - Trailer Attached Signal (bridged to # 3 when trailer attached)
U (Blue) - # 13 (White/ Red) - Grounding for pin # 9 (Constant Battery Supply)
Note! Nothing special is needed for the instrument cluster trailer indicator to work when a trailer is attached. The BeCM will sense current draw on the trailer wiring and activate the trailer indicator when you're using your indicators.
Here's a couple of wiring URLs that might be of interest:
https://www.towbarandtrailercentre.com/wiring-diagrams
https://www.caravanclub.co.uk/media/1022790/towbar-wiring-mo.pdf
WARNING: I wouldn't tow much heavy stuff with an automatic P38 though. The ZF 4HP22 / 4HP24 automatic transmission isn't designed to handle much more than the car itself. Use caution. I burnt out my 4HP22 in the black P38 towing a 1500 kg caravan a couple of summers ago. The transmission needs rebuilding as it's slipping and shifting jerky, especially when cold. The oil was pretty brown and had obviously been overheated.
You can reach me at gamuso@gmail.com.
Thanks for watching!
Видео Range Rover P38 # 091 - Trailer Hitch with Dual Plug Connectors канала Work On P38
I got a brand new trailer hitch from Rameder in Germany. The hitch itself is made by GDW in Belgium. Rated for 3.500kg (7.700 lbs) it's a solid piece of kit. It comes with everything you need, and is a straight bolt-in procedure, but there can be a couple of things that could set you back.
The bumper needs to come off to attach a brace bar across the frame in which the hitch connector attaches to. The workshop manual states you should remove the mud flaps (if fitted) and inner rear fender wheel liner before removing the bumper. Also you should remove the rear wheels. I found it's just as easy to detach the fender liner (single screw) and dropping the whole bumper including liner and mud flaps, leaving the wheels in place. Especially if you live in rust prone areas.
The two bolts that hold the bumper to the frame might have rusted solid. Mine had, and I ended up having to cut them and fabricate some new fasteners. Also the wheel arch cover bolt is prone to rusting very easily in place. Again, a bit of angle grinder action, drilling and tapping a new screw hole might be required. But beside that, it's pretty easy going.
I didn't order a trailer wiring kit even though they were available. The reason is I'd like to do my own dual plug set up. In Europe there's two standards of trailer plugs. A 7-pin and a 13-pin variant. The latter is just a few years old and features ignition signal and battery power supply to the trailer.
I did order the backing plate and mounting hardware for the wiring kit from a Land Rover parts shop:
2x ANR2689 - Backing plate for connectors
2x FS106125L - Bolts for backing plates (M6x12mm)
6x SE105358 - Bolts for connectors (3 needed per connector)
You'll need washers and nuts for the SE105358 bolts but I don't have their part numbers. And you'll need the trailer connectors and wires. If you're installing just one connector, you'll need half the amount of hardware listed above. Optionally you can add some quick connectors under the car for easier removal of the bumper. I just added a few feet extra of wire to allow the bumper to come off and rest on the ground.
NOTE! This wiring is for Europe, specifically Norway and Sweden (and most likely most of EU). Other regions may have different setups. I know for sure USA and Australia have other wiring, so please check with your local standards to wire everything correctly.
Since the Range Rover has provisions for two plugs in the bumper from the factory I bought my own 7- and 13-pin outlets, some 7-lead wire and I'll show you how to wire it all up. It won't feature ignition and power on the 13-pin, so that's left up to the viewer to figure out on their own if they decide to add that.
You'll find the original trailer connector behind the right access door in the trunk. Here's the wiring you'll want to perform. Note both the 7- and 13-pin have the same first 7 wires connected the same way.
P38 trunk plug - Trailer connector - Function
GR (Green / Red) - # 1 (Yellow) - Left Indicator(s)
RY (Red / Yellow) - # 2 (Blue) - Fog Lights
B (Black) - # 3 (Grey or White) - Common Grounding
GY (Green / Yellow) - # 4 (Green) - Right Indicator(s)
RW (Red / White) - # 5 (Brown) - Right Tail Light / Markers
GP (Green / Purple) - # 6 (Red) - Brake Lights
RB (Red / Black) - #7 (Black) - Left Tail Light / Markers
The following are for the 13-pin connector, and some of the signals are available from connector X172 on the Range Rovers too. However I'm not familiar with where it's located, so I've not hooked these up. NA means Not Available on the Range Rover.
GN (Green / Brown) - # 8 (Pink) - Reversing Lights
KO (Pink / Orange via fuse 14 - 20A) - # 9 (Orange) - Constant Battery Supply (+12V)
NA - # 10 (Grey) - Ignition (charging battery, fridge etc)
NA - # 11 (White / Black) - Grounding for pin # 10 (igniton signal)
NA - # 12 (White / Blue) - Trailer Attached Signal (bridged to # 3 when trailer attached)
U (Blue) - # 13 (White/ Red) - Grounding for pin # 9 (Constant Battery Supply)
Note! Nothing special is needed for the instrument cluster trailer indicator to work when a trailer is attached. The BeCM will sense current draw on the trailer wiring and activate the trailer indicator when you're using your indicators.
Here's a couple of wiring URLs that might be of interest:
https://www.towbarandtrailercentre.com/wiring-diagrams
https://www.caravanclub.co.uk/media/1022790/towbar-wiring-mo.pdf
WARNING: I wouldn't tow much heavy stuff with an automatic P38 though. The ZF 4HP22 / 4HP24 automatic transmission isn't designed to handle much more than the car itself. Use caution. I burnt out my 4HP22 in the black P38 towing a 1500 kg caravan a couple of summers ago. The transmission needs rebuilding as it's slipping and shifting jerky, especially when cold. The oil was pretty brown and had obviously been overheated.
You can reach me at gamuso@gmail.com.
Thanks for watching!
Видео Range Rover P38 # 091 - Trailer Hitch with Dual Plug Connectors канала Work On P38
Показать
Комментарии отсутствуют
Информация о видео
Другие видео канала
 Edd Shows Us How To Fix This Range Rover's Dodgy Suspension | Wheeler Dealers
 Range Rover P38 # 078 - Fuel Tank Pump and Sending Unit
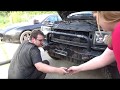 Range Rover P38 #4 - Grille and winch bumper - Road to Ruin
 Range Rover P38 Offroading in mud, rocks and water (HD)
 P38 Range Rover towing on wet clay
 TOZLU GARAJ | En kirli Range Rover'ı yıkadık
 Range Rover P38 # 062 - AC System Fix +
 Goodbye P38! A walkabout the rolling chassis before drive train removal
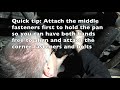 Range Rover P38 # 076 - Automatic Transmission Oil Change + Quick Service Inspection
 How To Wire Up A Towbar
 Curing the Range Rover P38 "Death wobble". Part 2: Fitting front anti roll bar links and D bushes.
 Make a quick detach mount for a winch on your trailer hitch.
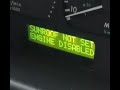 Range Rover P38 EKA Entry
 Range Rover P38 # 103 - Winter Preparations
 ***HOW TO MAKE CUSTOM OFF ROAD METAL REAR BUMPER(home made)🥇🎆🎇
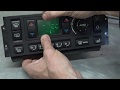 Range Rover P38 HEVAC Screen Repair: How To
 Range Rover P38 Dash Removal step by step removal
 Range Rover P38 # 070 - 70th Video - What I Like, And What I Don't
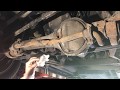 Range Rover P38 # 094 - Differential and Transfer Case Oil Change