Programming System II - Floppy Support
Adding support for the Altair floppy drive to the MITS Programming System II. Also known as “Waiting for Altair DOS...”
Recommended prerequisite viewing includes my other three "Programming System II - xxx" videos and the "Early Altair 8800 - Adding a Floppy" video series - especially videos #3 and #4.
Run the Programming System on your own Altair 8800 and Altair floppy drive using the files at the following link: https://deramp.com/downloads/altair/software/papertape_cassette/MITS%20Programming%20System%20II/floppy_drive_support/
Видео Programming System II - Floppy Support канала deramp5113
Показать
Комментарии отсутствуют
Информация о видео
Другие видео канала
 SWTPC 6800 - The SWTPC DC-1 Floppy Controller
 Early Altair 8800 - Adding a Floppy Drive #1
 Altair 8800 - Video #9.2 - Loading 8K BASIC the Fun Way
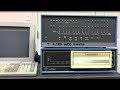 Fully Functional Altair 8800 Built from New Equipment in 2018
 Moppy + Star Wars Theme = Floppy Vader's Theme
 Altair 8800 All-In-One Computer
 Teletype Model 15 - How Does It Work?
 How Old School Floppy Drives Worked
 Altair 8800 - Video #2 - Front Panel Programming
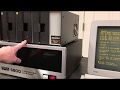 SWTPC 6800 - Comparing FLEX and CP/M
 Early Altair 8800 - Adding a Floppy Drive - BASIC
 Interfacing the Teletype Model 15
 Teletype Model 15 - Introduction
 SWTPC 6800 - FDOS (the first DOS shipped by SWTPC)
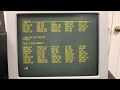 SWTPC 6800 - FLEX Part 1
 Early Altair 8800 - Adding a Floppy Drive #2
 SWTPC 6800 with Percom Floppy, Part 2
 Altair FDC+ Enhanced Floppy Disk Controller - Full Demo
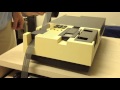 Altair 8800 - Video #28 - High Speed Paper Tape Reader/Punch
 Early Altair 8800 - Adding a Floppy Drive #3