Akiara Mini Sewing Machine Tutorial - 9 Points to follow for best results
In this video, you will understand how following the important steps will enable you to work efficiently. These are 9 basic points that need to be followed by every user for prolonged use of the machine
1. Adjust the Tension Controller
2. Keep 8 cms of extra thread before sewing
3. Pull the thread in front of the machine
4. Do not use the machine without a cloth
5. Move the Dial-in Anticlock direction
6. Place the bobbin in the number 9 direction
7. Remove and clean the bobbin if you experience the stitch is not happening from the rear side
8. Verify that the thread travels through eight required checkpoints
9. Cut the thread with help of a scissor after completion of work, do not pull to cut it.
If you are looking for Handy Sewing Kit, Click the link below :
https://www.amazon.in/sewing-Kit/dp/B08RDYC794
Check out more Akiara products :
Handy Sewing Machine
https://www.amazon.in/dp/B08T737NC1/keywords=HandSewing
Mini Sewing Machine
https://www.amazon.in/dp/B08W3GY226/Keywords=StitchingMachine
Check out our all products store -
https://www.amazon.in/akiara-makeslifeeasy
You can contact us on the following number if you are still finding it difficult to rectify the issue by yourself. Our #customersupport will help you with your queries.
Email: info@akiara.in
Call us: 771-89-54565
We attend calls on said number only during our working Hours: Mon to Friday: 10 am to 5 pm. You can still drop us an email, we will address your queries as soon as possible.
Видео Akiara Mini Sewing Machine Tutorial - 9 Points to follow for best results канала akiara
Показать
Комментарии отсутствуют
Информация о видео
Другие видео канала
 Akiara Yume Stitch Machine - Full Video (हिंदी में)
 Akiara Yume Stitch Machine - बटन सिलाई
 Akiara Yume Stitch Machine - नीचे की ताक बोबिन
 Akiara Yume Stitch Machine - धागा चढ़ाना
 Akiara Yume Stitch Machine - सिलाई
 Akiara Yume Stitch Machine - रिवर्स सिलाई
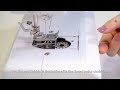 Akiara Yume Stitch Machine - नीचे की बॉबिन को बदलना।
 Akiara Yume Stitch Machine - सुईयों को बदलना
 Akiara Yume Stitch Machine - प्रेसर फुटर को बदलना
 Akiara Yume Stitch Machine - मशीन के बारे में जानें
 Akiara Yume Stitch Machine - जानकारी
 Akiara Yume Stitch Machine - बटनहोल सिलाई
 Akiara Yume Stitch Machine - सिलाई समायोजन
 Akiara Yume Stitch Machine Full Demo
 Akiara Yume Stitch Machine Windding the bottom Bobbin
 Akiara Yume Stitch Machine Promotional with Features
 Akiara Yume Stitch Machine Information
 Akiara Yume Stitch Machine How to Threading
 Akiara Yume Stitch Machine How to Replace Needle
 Akiara Yume Stitch Machine How to Sewing
 Akiara Yume Stitch How to Replace Bottom Bobbin