Canon Pixma MX492 printer installation
Guide to install Canon Pixma MX492 printer driver on your computer. To download driver and setup printer, write on your search engine MX492 download and click on the link:
https://www.usa.canon.com/internet/portal/us/home/support/details/printers/inkjet-multifunction/mx-series-inkjet/mx492
You can select whether you this printer via USB or LAN connection.
Connect the printer and the computer using the USB cable and turn ON the printer, wait for a while until the printer is detected to finish installation.
If you have router, you can install printer with wireless LAN connection. Make sure the printer is turned on, confirm that your wireless router is available and computer connected to the network, the printer must be connected to router.
The printer name will be shown in the table, click on it and click next to finish the installation.
To check that the printer is installed, click on the Windows button in the bottom right corner of the desktop, and enter to “printers and faxes” page to check that the printer is available and ready to print.
If you find the video useful, click on Like and Subscribe.
Видео Canon Pixma MX492 printer installation канала New_tips
Показать
Комментарии отсутствуют
Информация о видео
Другие видео канала
 Canon mx492 WiFi Setup Home / Office, review.
 Unboxing + Review + Instalacion + Configuracion Canon E481 en español
 Canon PIXMA MX492 - Cableless Setup with a Windows® Computer
 Canon Pixma MP230 Printer installation
 How to WakeSurfing 360 - The Ultimate Beginner Guide
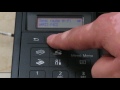 Configuración Lan inalámbrica y Conexión Directa,Canon Pixma G4100.
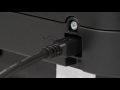 Canon PIXMA MX492 - Wireless Setup with a USB cable on a Windows® Computer
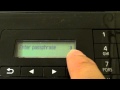 Connect Canon Printer to Wi-Fi Network or Router
 Canon Pixma TS8151 printer driver download
 Sistema continuo de tinta ¡HAZLO TÚ MISMO! / DenisTec
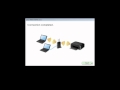 Canon PIXMA MX492 - WiFi Protected Setup with a Windows® Computer
 Canon Pixma MX490 Printer Disassembly - Taking Apart for Parts or Repair MX492 TR4520 TR4522
 Canon printer E480 Error code 6000 ? How to fix.??
 Setting Up Your Wireless Canon PIXMA MX922 - Standard Setup with a Mac
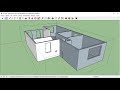 Dibujar en Sketchup PARTE 1 (Importar de autocad a sketchup)
 Canon PIXMA MX492 - Cableless Setup with a Mac
 RESETEO DE ALMUADILLAS CANON G4100
 Canon Printer Wireless Setup How to connect to a Wi-Fi Network Router w/ 3 Methods (easy or painful)
 Canon IR 2200-3300 Printer Setting
 How to Hard Reset Canon Printer Error