Milwaukee M18 FUEL 18-Gauge Brad Nailer 2746-20 Review - Gen 2 - What's New?
What’s NEW on the Gen 2 Nailer?
Purchase link: http://shrsl.com/1q7r4
Milwaukee made ten significant improvements to their Milwaukee M18 FUEL 18 Gauge Brad Nailer:
1. More Power with Lower Tank PSI
The earlier Gen 1 nailer was powerful which resulted in too much recoil.
The Gen I nailer had more pressure than necessary to properly drive nails, which resulted in too much recoil.
The excessive recoil sometimes made the nailer jump, or slip off the nail head, resulting in either an oversize hole or what looked like a “double striker mark”.
To address this, Milwaukee reduced the energy output [PSI in the tank] Which results in less wear and tear on the tool, less jumping off the material [smaller fastener hole] and less recoil.
The Gen 2 brad nailer has an inner cylinder with a nitrogen air spring mechanism [piston] and an outer cylinder. The area between the two cylinders is filled with Nitrogen to a specified PSI. Milwaukee chose to use Nitrogen over air because it is least likely to result in condensation and corrosion of the tanks.
The reason the brad nailer can fire so quickly is because the “striker” is always pulled back to the tank. once the trigger is pulled the pressure in the tank fires the striker and piston forward to sink the nail. Once the firing sequence is completed, a motor spins a rack and pinion system that ratchets back, and resets, the firing pin.
1. Moved Depth Adjustment:
The Gen I depth adjustment interfered with the user line of sight. Milwaukee moved the depth adjustment from the left side of the tool to the right side, ” and recessed it a bit. This immediately improved the nailers line of sight for 85% of right handed users. Recessing the depth adjustment knob further improved the line of side on the right side.
2. More Compact
The Gen 1 nailer had a bulky nose, which made it difficult to get into corners. Milwaukee significantly reduced the weight by 1-pound, and size of the Gen 2 nailer, making it more compact, lighter, better accessible and improved line of sight. The also improved the nailers toe-nailing ability.
3. Workpiece Contact Bracket:
The Gen 1 installs fasteners, 3/16th inch off-center, in the model we tested, this was the result in too much play in the contact bracket. Milwaukee improved the contact bracket by reducing this play, or wobble, improving fastener placement accuracy.
I was able to place fasteners spot on – they solved that issue.
4. Improved Contact Tips:
The Gen 2 nailer comes with three interchangeable contact tips, that stor on the magazine of the tool.:
1. General Purpose:
2. Small Tip – useful with small profiles.
3. Wing Tip – more surface area to actuate the tool, less likely to mar soft woods, allows close profile nailing in certain angles not normally able to fire tool]
5. Angled Battery:
The battery orientation has been angled allowing the tool to sit on its battery pack and magazine.
6. Belt Hook Relocated:
The reversible belt hook was relocated the front / bottom / battery area of the tool and enlarged to allow better balance, and hooking onto tool belts.
7. Increased Runtime:
Milwaukee found that by reducing the PSI in the cylinder tank the tool drew less energy from the 2.0 Ah battery which resulted in an increase in runtime. Gen 1 experienced 1200 fasteners on a 2.0 h battery charge and was improved to 1500 fasteners in the Gen 2.
The nailer magazine holds 110 nails and is able to accommodate fastener sizes from 5/8” – 2-1/8”.
8. Thermal Overload Protection
Milwaukee made some big improvements from Gen 1 to Gen 2 regarding thermal protection controls.
Gen 1 would hit the thermal protection at approximately 100-150 nails when fired at a fast rate continuously. The Gen 2 tool won’t hit a thermal protection until between 700-2000 continuous nails, depending on how fast your firing. [i.e. 3-4 nails/second continuously vs 1 nail/second continuously.]
Job site users should never find themselves hitting a thermal protection limit with the Gen 2 tool, whereas that was possible with Gen 1.
While speed may be fun to talk about and interest some production trim
carpenters, the real test on the job site is the fastener holes, depth of fastener, line of sight, accuracy and doing quality work.
Power Switch
The power switch is located on the lower rear area of the tools handle. This power button needs to be pressed for approximately 2-seconds to power on the tool.
The Gen 1 tool requires you hold the power switch button down for 5-7 seconds to turn off the tool. On the Gen 2 turning the unit off requires depressing the switch for 2-seconds. Which is WAY better!
Note: The tool will power itself off after 60 minutes (1 hour) of inactivity. This is to ensure the tool is safe if left unattended on a jobsite, or if it is accidently stored in your vehicle/storage box.
An LED power indicator lights up and stays on the entire time the tool is connected to the battery, and in the “powered on mode.”
Видео Milwaukee M18 FUEL 18-Gauge Brad Nailer 2746-20 Review - Gen 2 - What's New? канала A Concord Carpenter / ToolBoxBuzz
Показать
Комментарии отсутствуют
Информация о видео
28 июля 2019 г. 16:03:59
00:12:38
Другие видео канала
 BEST 18 Gauge Cordless Brad Nailer - Head-To-Head
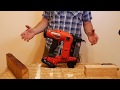 Milwaukee M18 Fuel 18 Ga Brad Nailer 2746-21CT Gen 2 Honest Review
![[NEW] Milwaukee M18 FUEL Brushless Framing Nailers 2745 & 2744](https://i.ytimg.com/vi/gS7nGoVWwWw/default.jpg) [NEW] Milwaukee M18 FUEL Brushless Framing Nailers 2745 & 2744
[NEW] Milwaukee M18 FUEL Brushless Framing Nailers 2745 & 2744 Milwaukee 12" M18 Cordless Miter Saw vs Milwaukee 10" M18 Cordless Miter Saw. TOOL DUEL!
 Milwaukee M18 FUEL Gen 2 18 Gauge Brad Nailer Review and Comparison to Gen 1
 MILWAUKEE FUEL M18 18GA BRAD NAILER KIT REVIEW // GEN 2 // 2746-21CT
 Milwaukee M18 18ga Brad Nailer 2746-20
 NEW Milwaukee Tools M18 NAILERS and STAPLERS (Cordless Options YOU Should Have Waited For!)
 Bailey Built: Unboxing the Craftsman V20 18-gauge Cordless Brad Nailer
 Is this Brad Nailer any Good?
 Review AFTER Heavy-use | Milwaukee 18 Gauge Brad Nailer (Gen 2)
 The Best Cordless Nail Gun: Toolsday
 Finally - - The Milwaukee M18 Battery Powered Framing Nail gun is HERE
 Milwaukee 2742 16 gauge 18 volt cordless trim nail gun , (ttr) tested tool review
 Milwaukee M18 FUEL Gen 2 Brad Nailer (NOT WHAT I EXPECTED)
 Milwaukee M18 FUEL Cordless Compact Router REVIEW! Is the new Milwaukee M18 Router really that good?
![Framing Gun Comparison! Milwaukee v Paslode v Hikoki v Dewalt [2020]](https://i.ytimg.com/vi/qNFGMsiV5Mc/default.jpg) Framing Gun Comparison! Milwaukee v Paslode v Hikoki v Dewalt [2020]
Framing Gun Comparison! Milwaukee v Paslode v Hikoki v Dewalt [2020] WYN2K: Milwaukee M18 Fuel Framing Nailer Review | 2744-20 | 21 degrees | Cordless performance
 Milwaukee M18 Fuel 18ga Brad & 16ga Angled Finish Nailer Review 2740-21 2742-21 In 4K
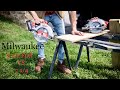 Milwaukee circular saws, M18 6 1/2 Fuel vs 7 1/4...Find out which one is better than your Skilsaw??